another bed linen apron made on the treadle…
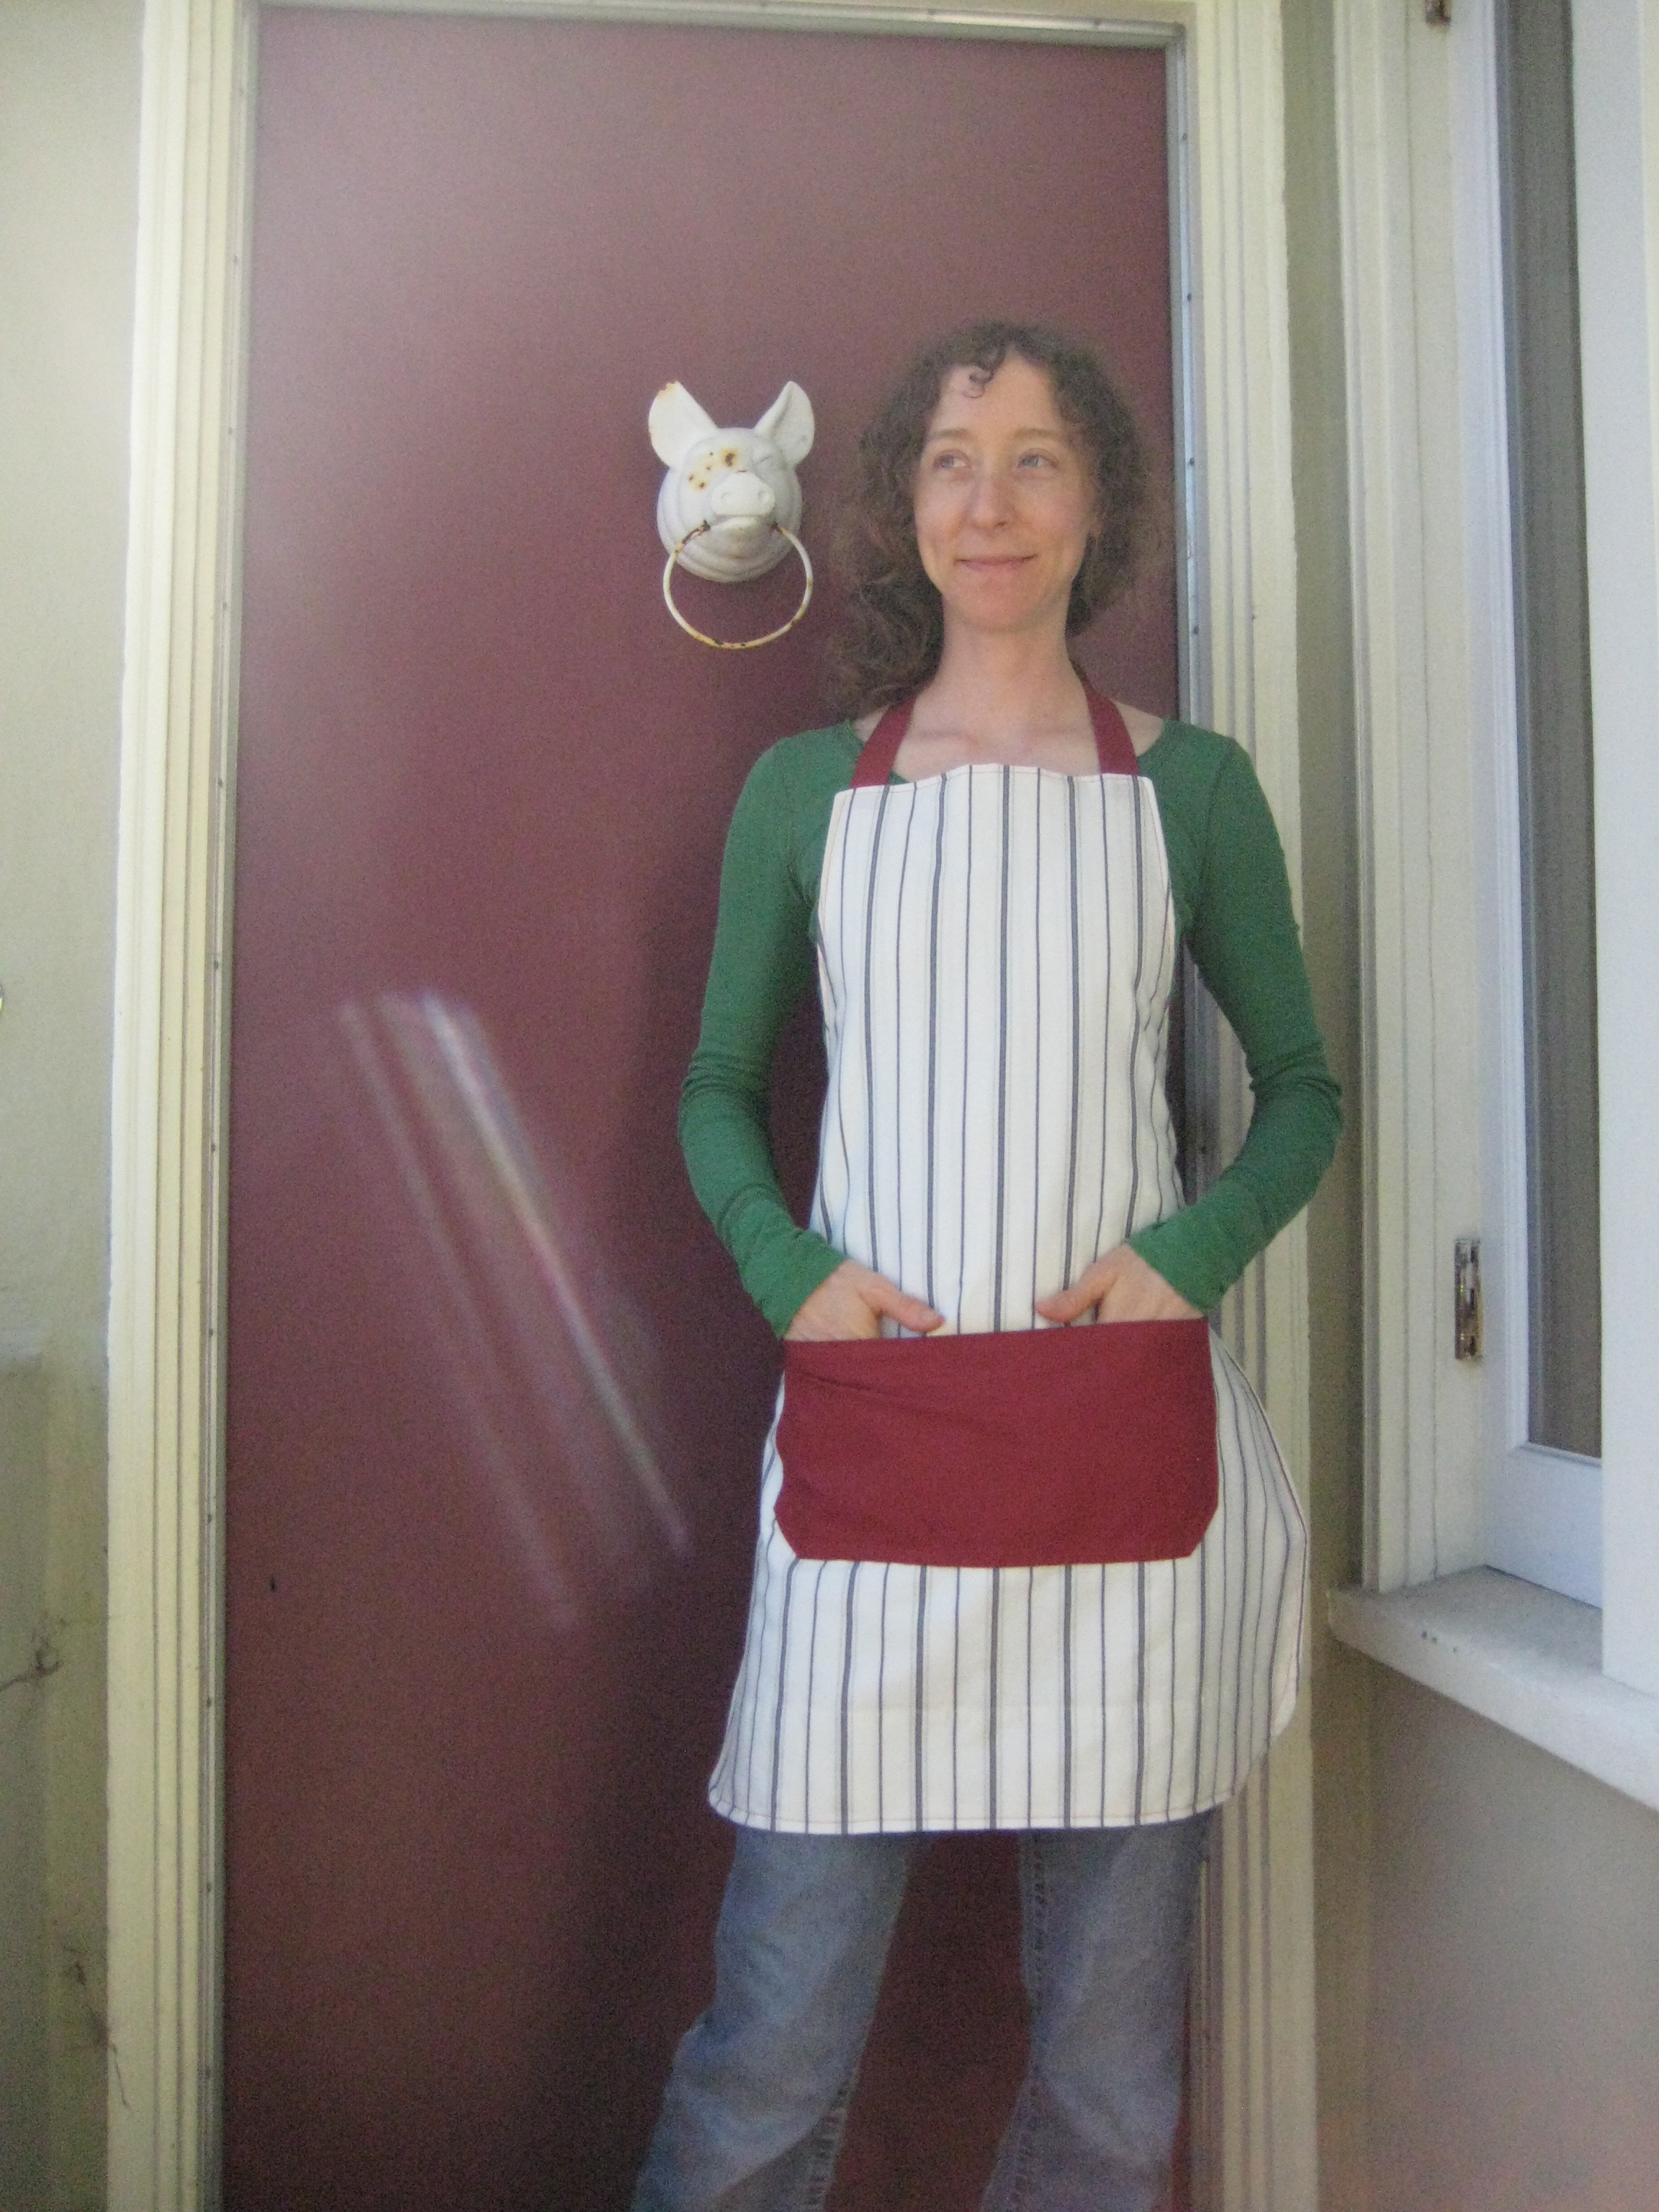
It’s a double-layered nice and thick work apron.
I used this pattern from Ink and Spindle (except I didn’t use the D-rings. I just made a tie at the neck.)
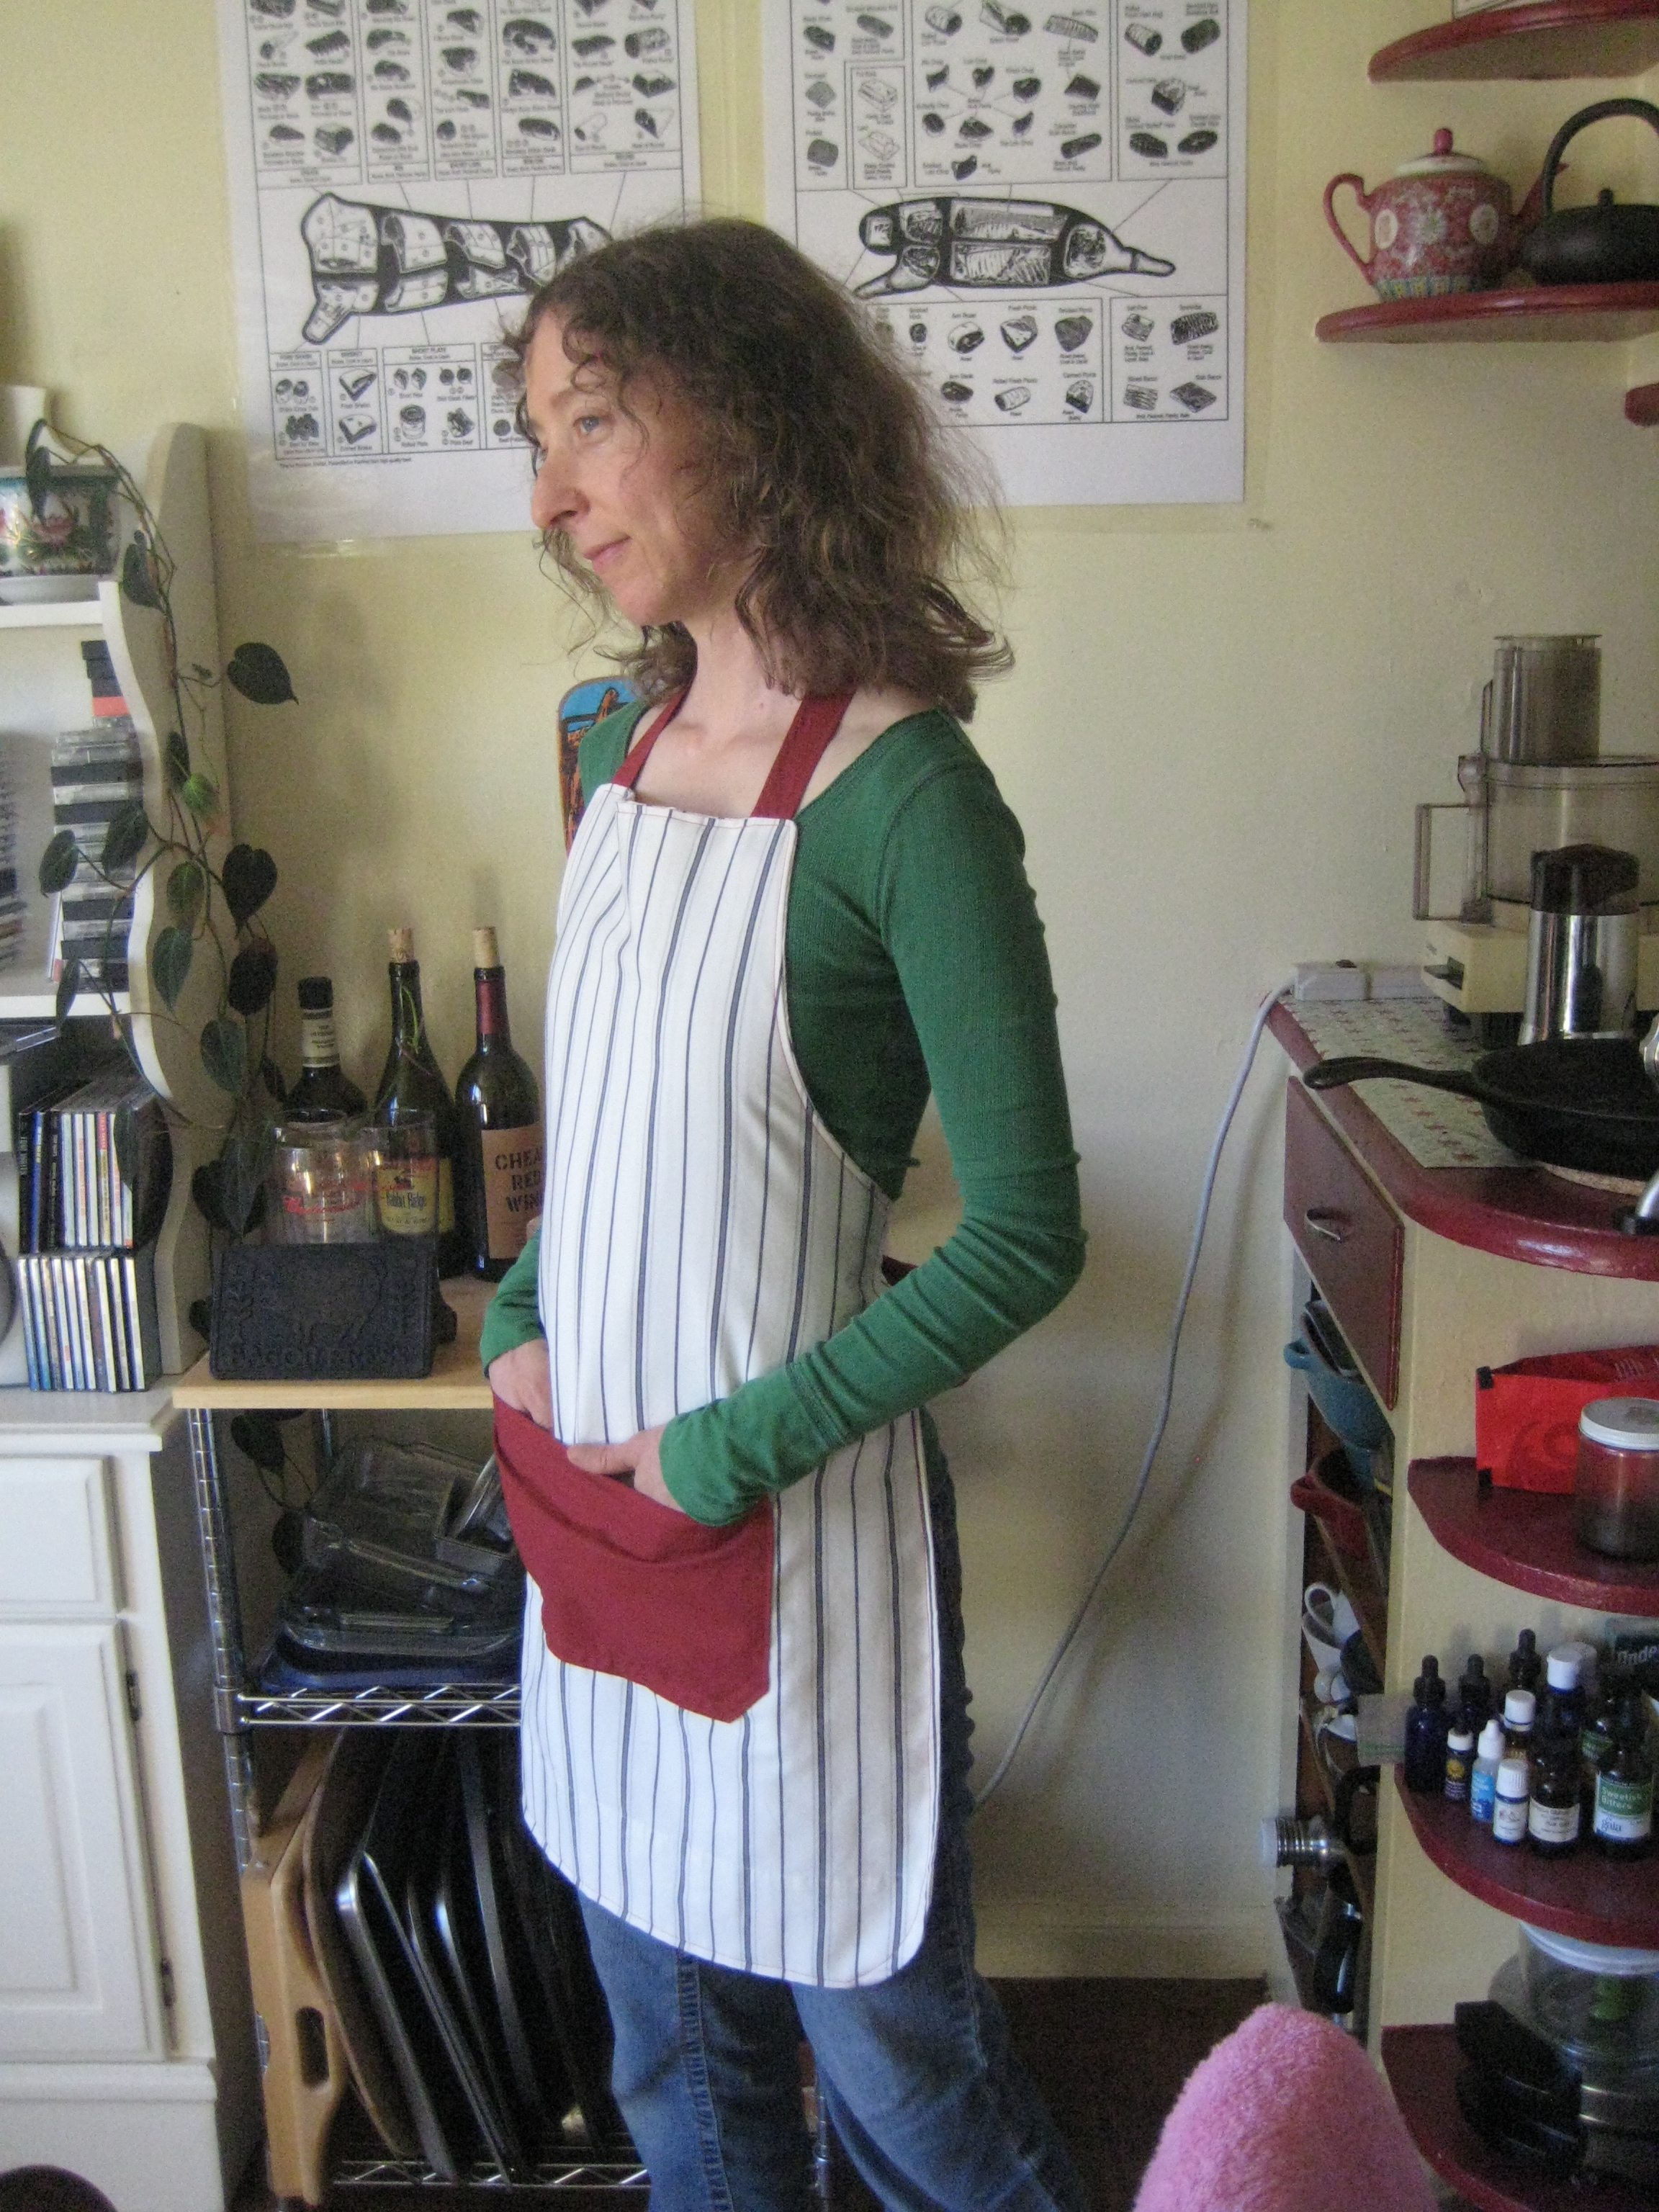
another bed linen apron made on the treadle…
It’s a double-layered nice and thick work apron.
I used this pattern from Ink and Spindle (except I didn’t use the D-rings. I just made a tie at the neck.)
Posted in Uncategorized | Leave a Comment »
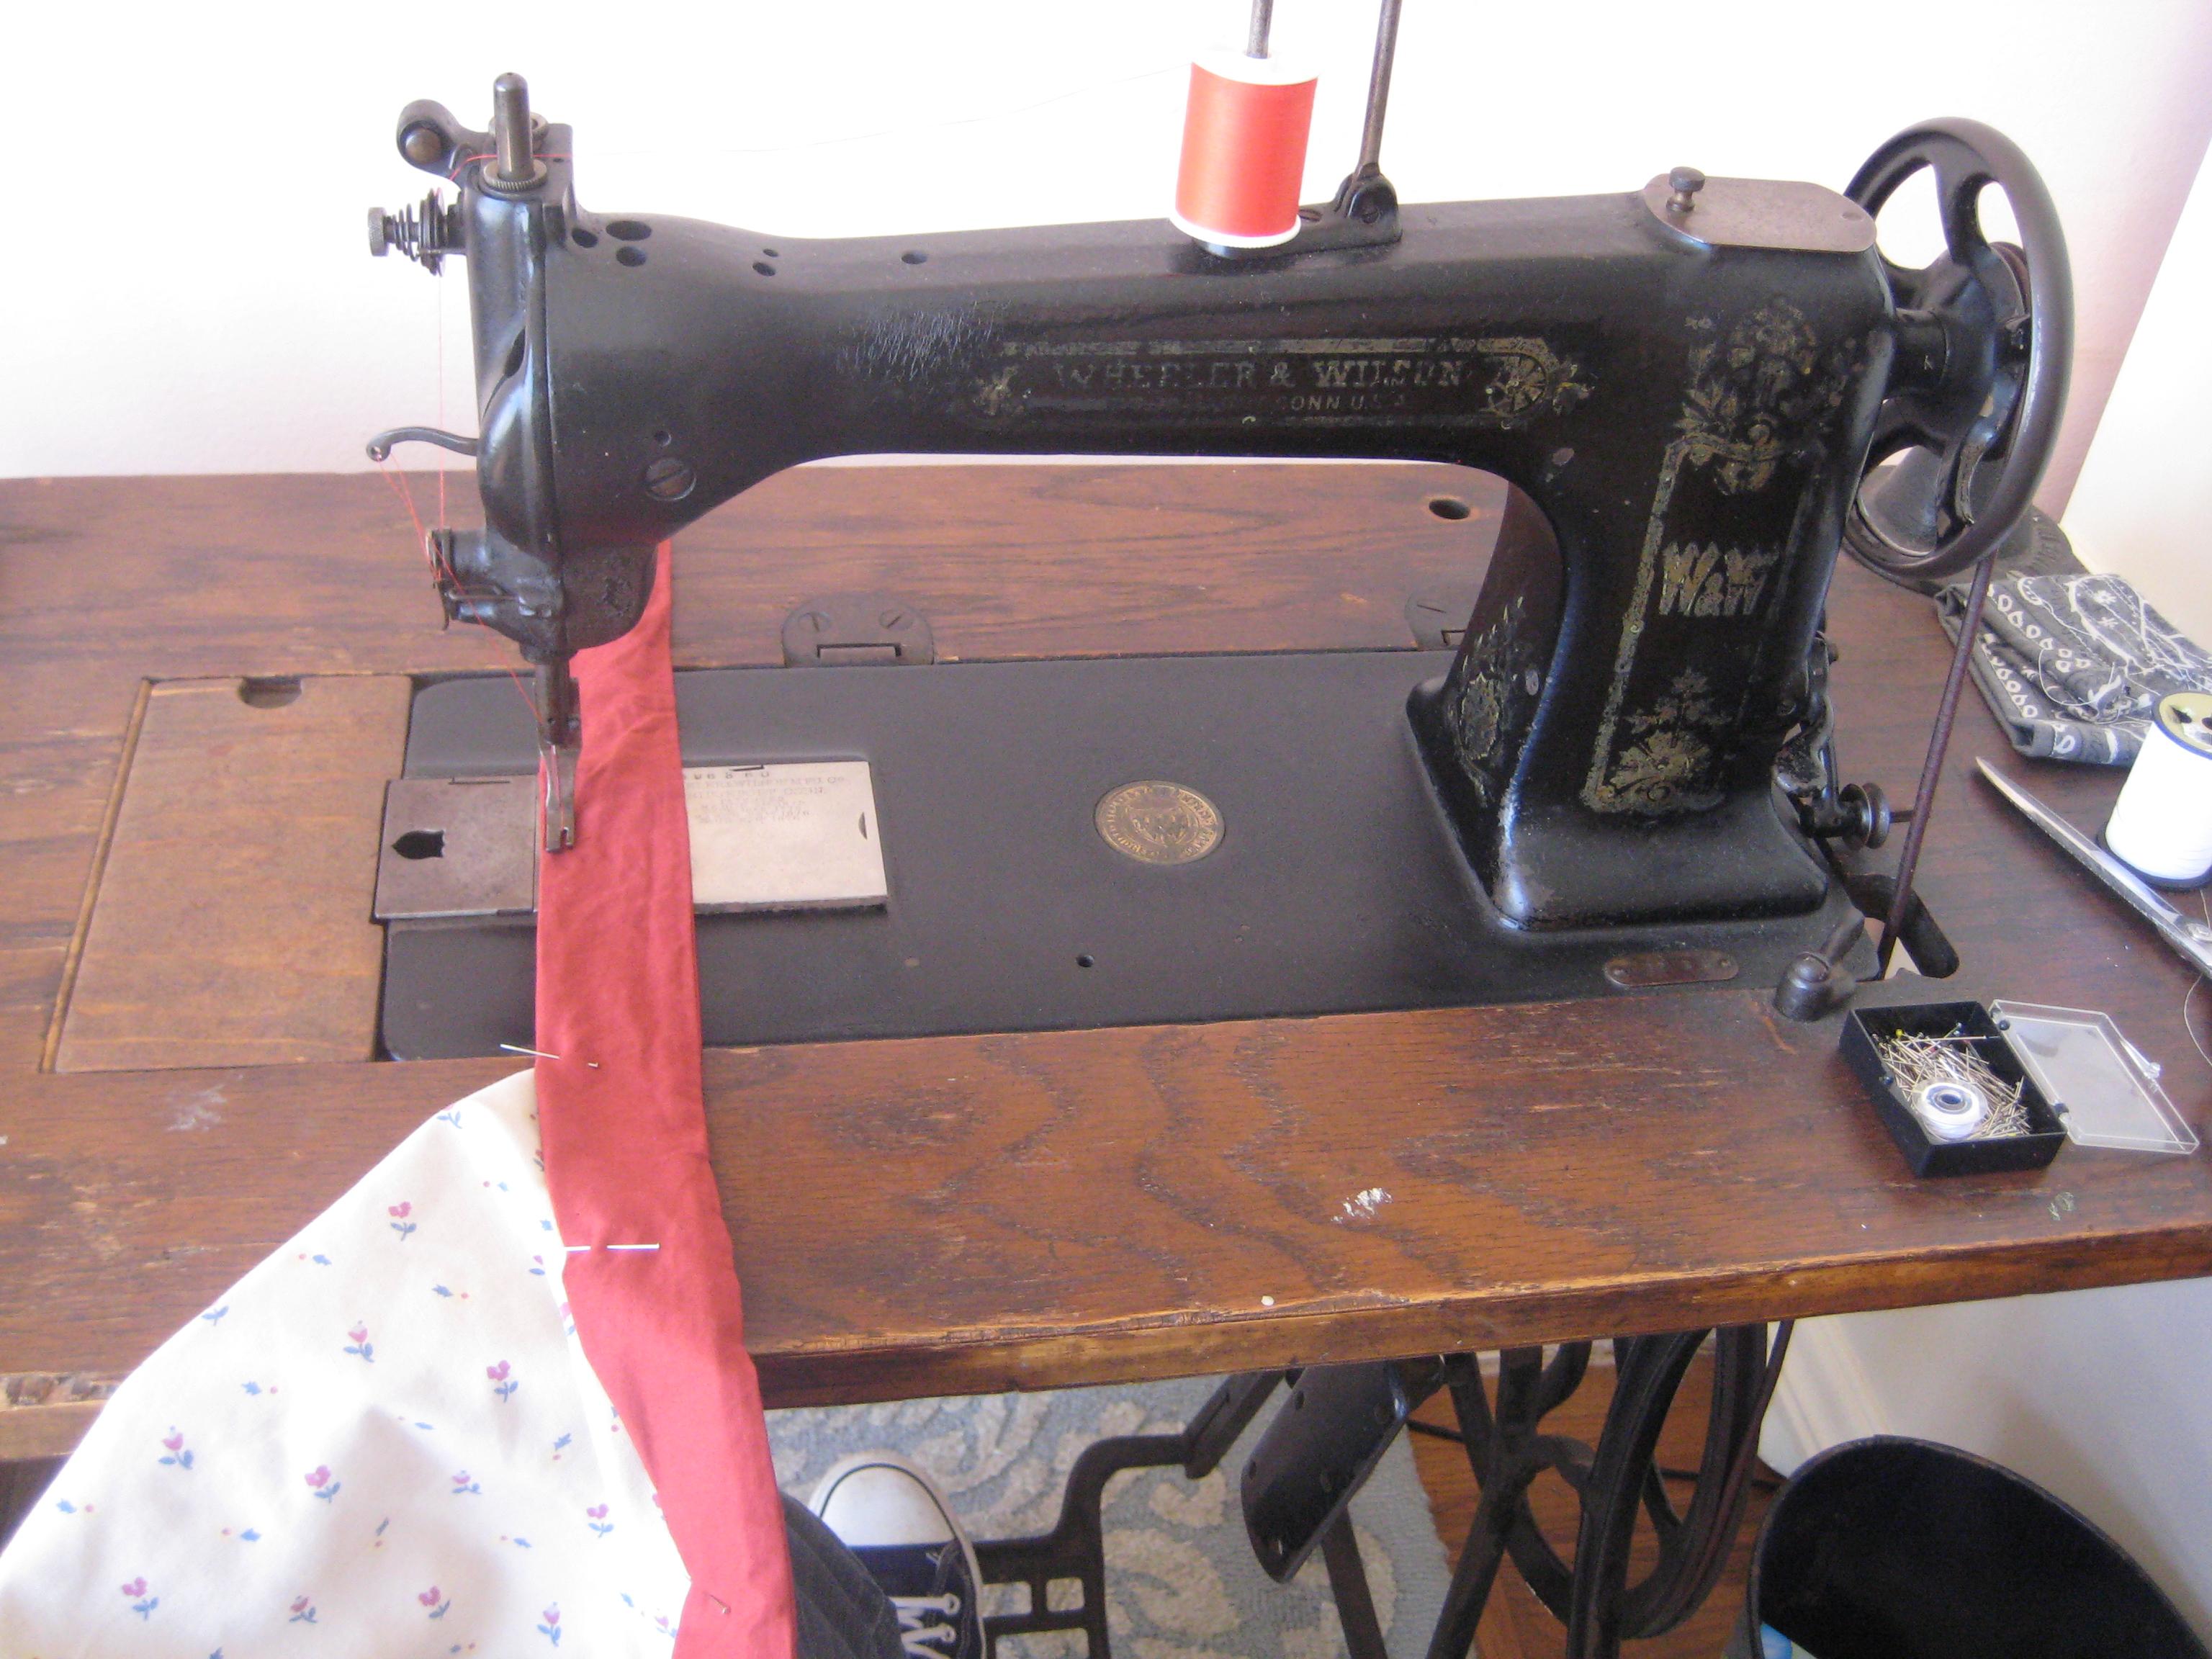
I am starting a project of sewing aprons on the treadle made from re-purposed kitchen and bed linens.
This first one was super easy – almost felt like cheating – because the pillow case already had a nice ruffle on it.
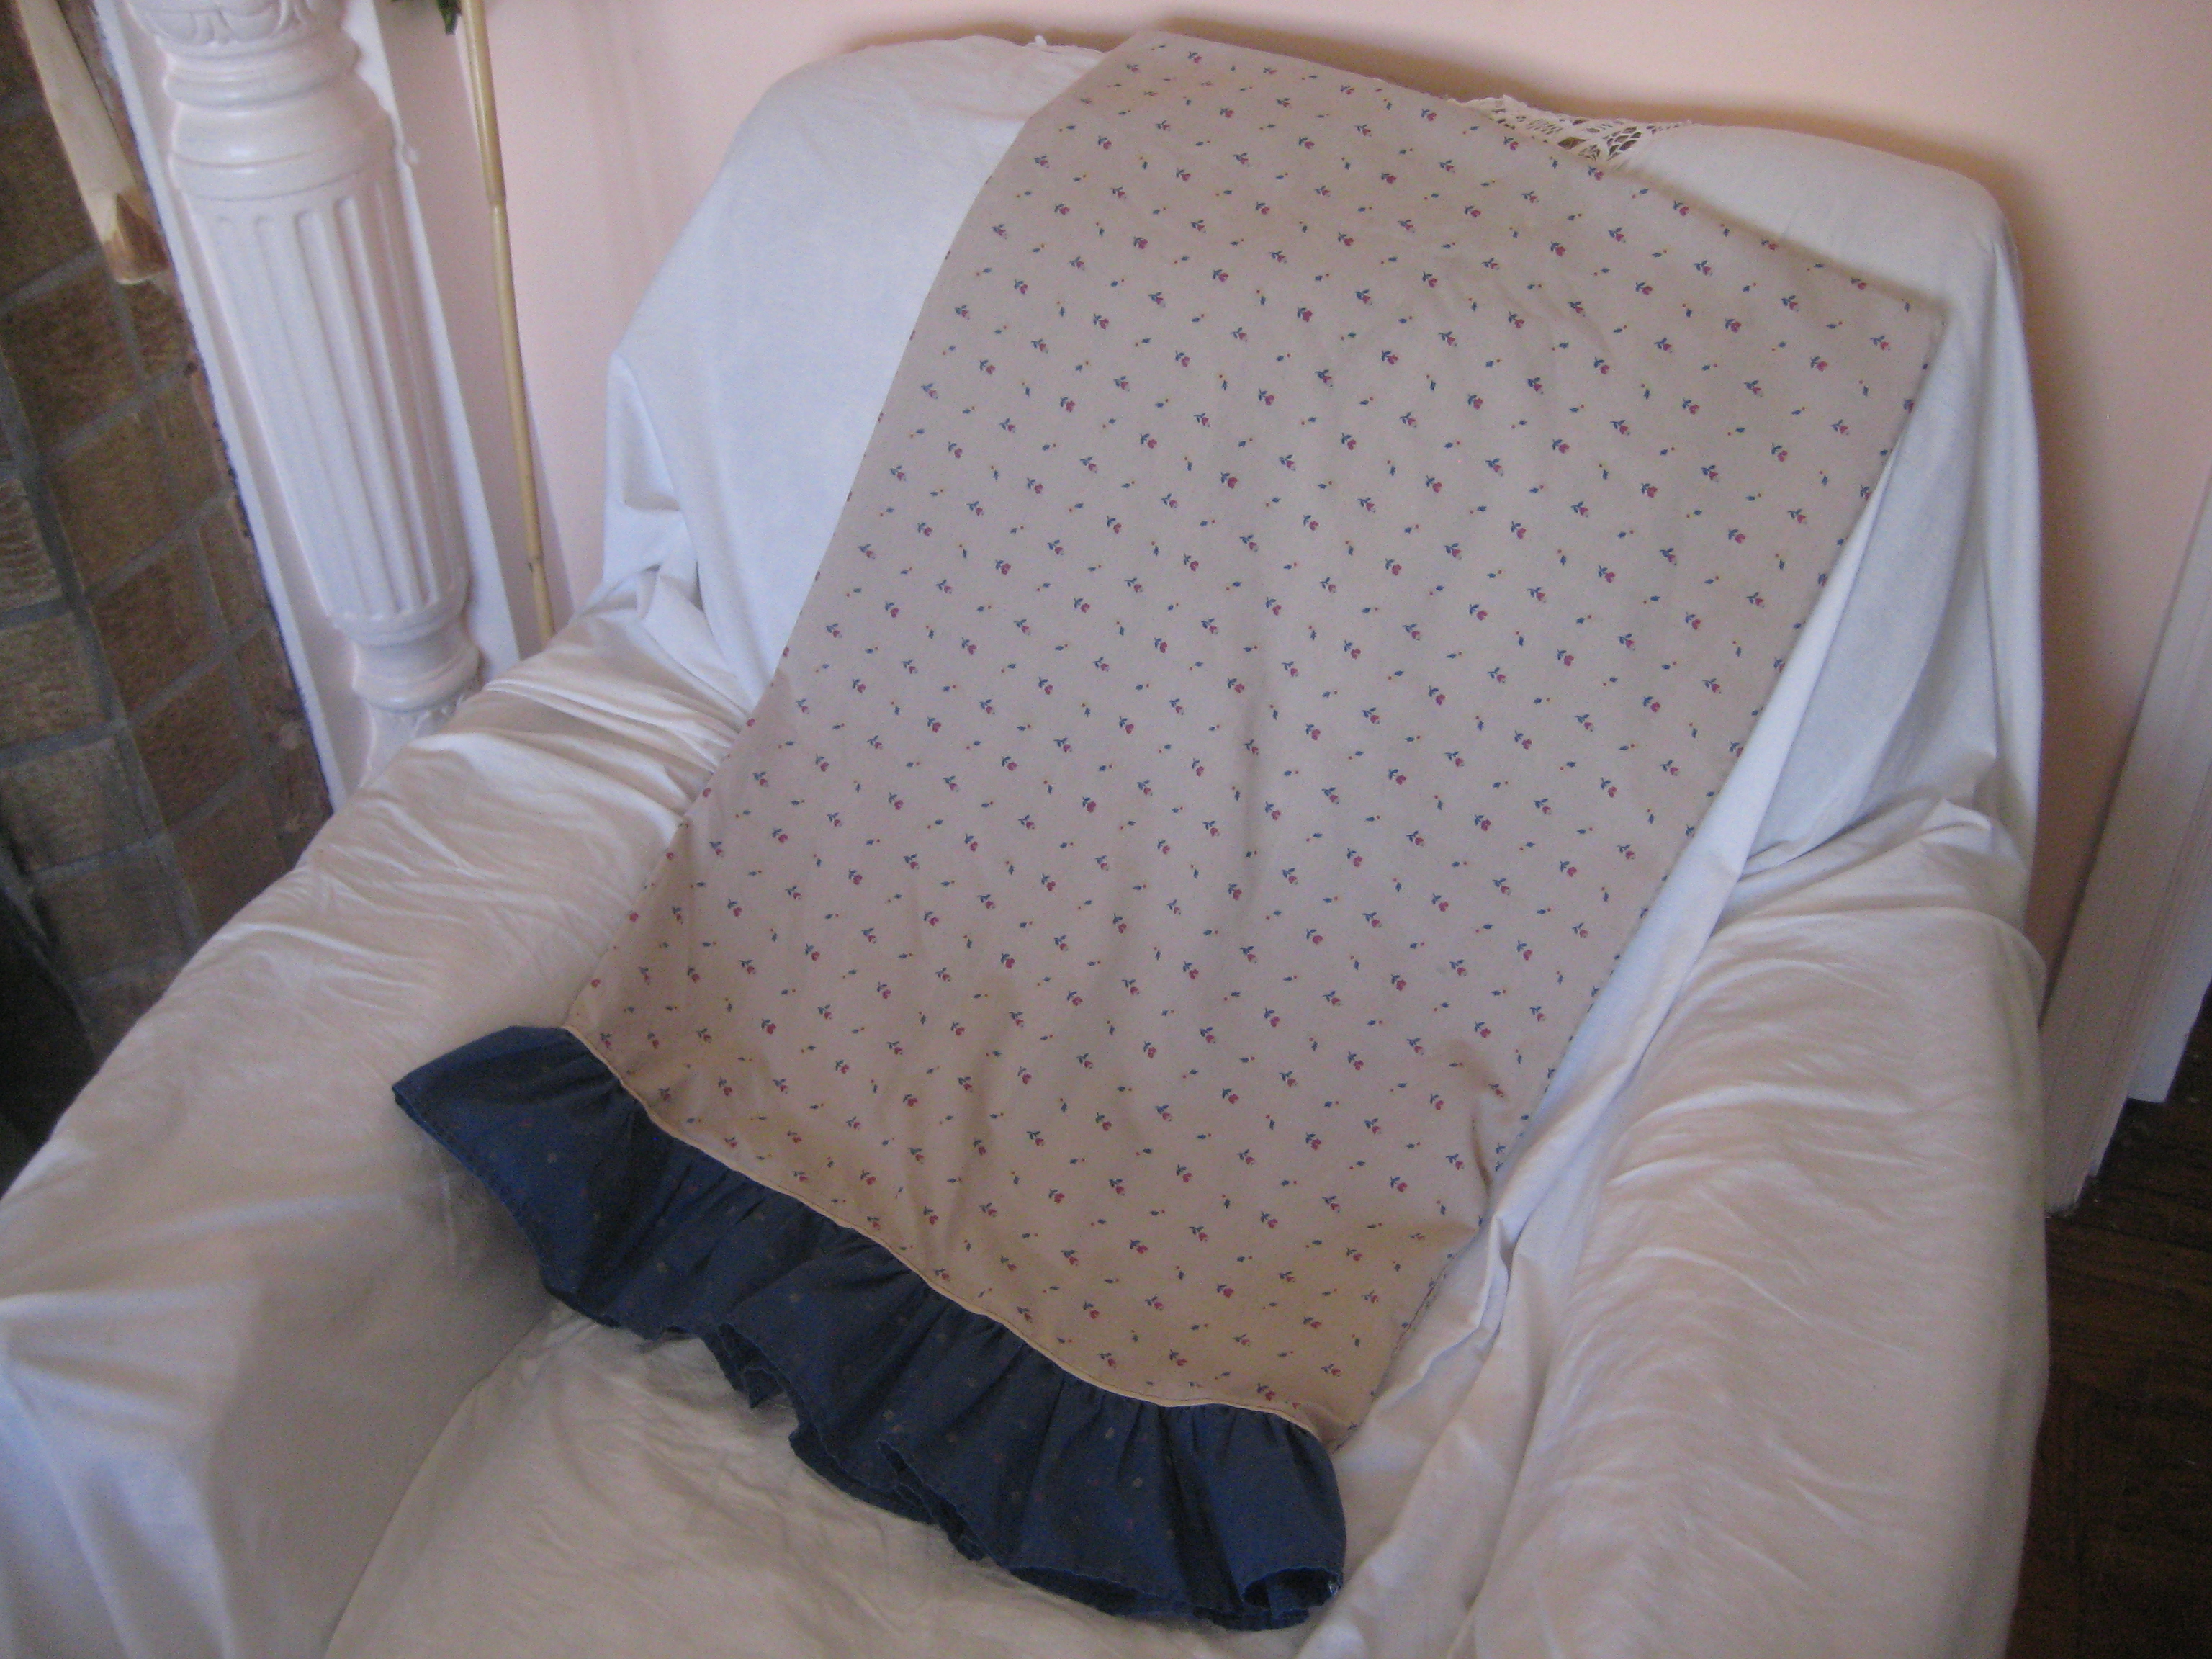
I simply cut off the part I didn’t want.
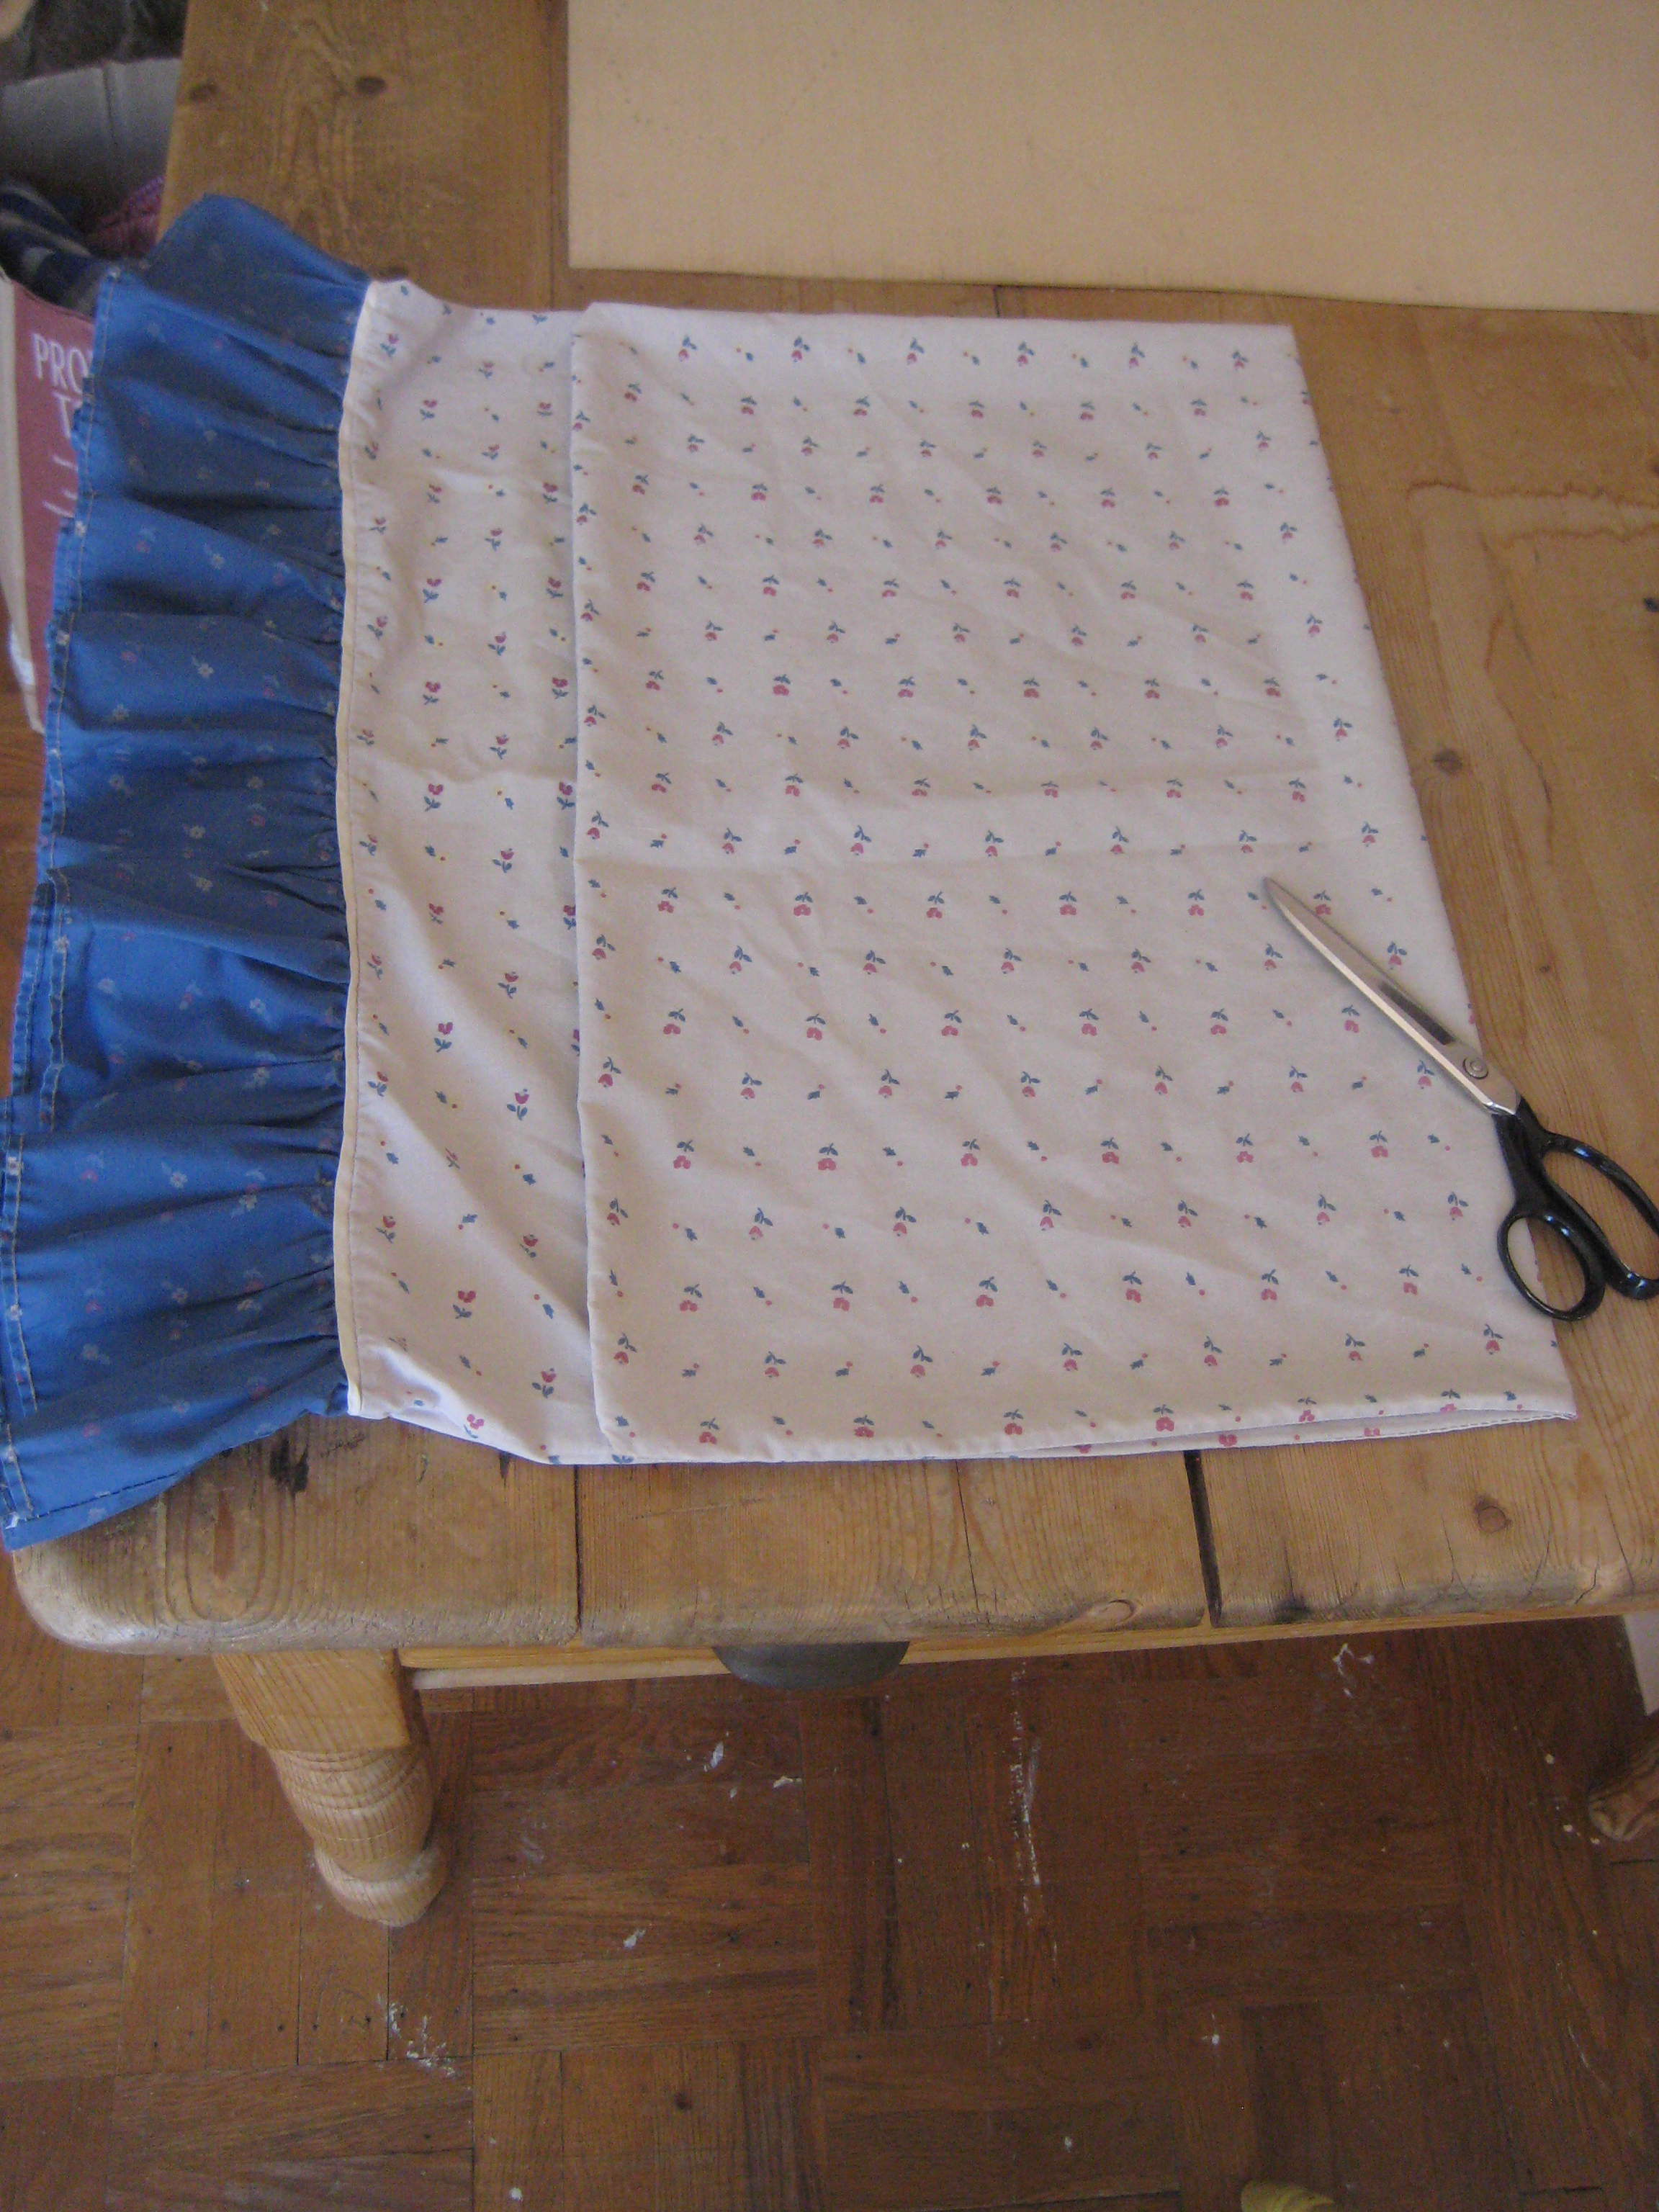
Then using fabric from a cotton comforter cover I cut out the waist tie.
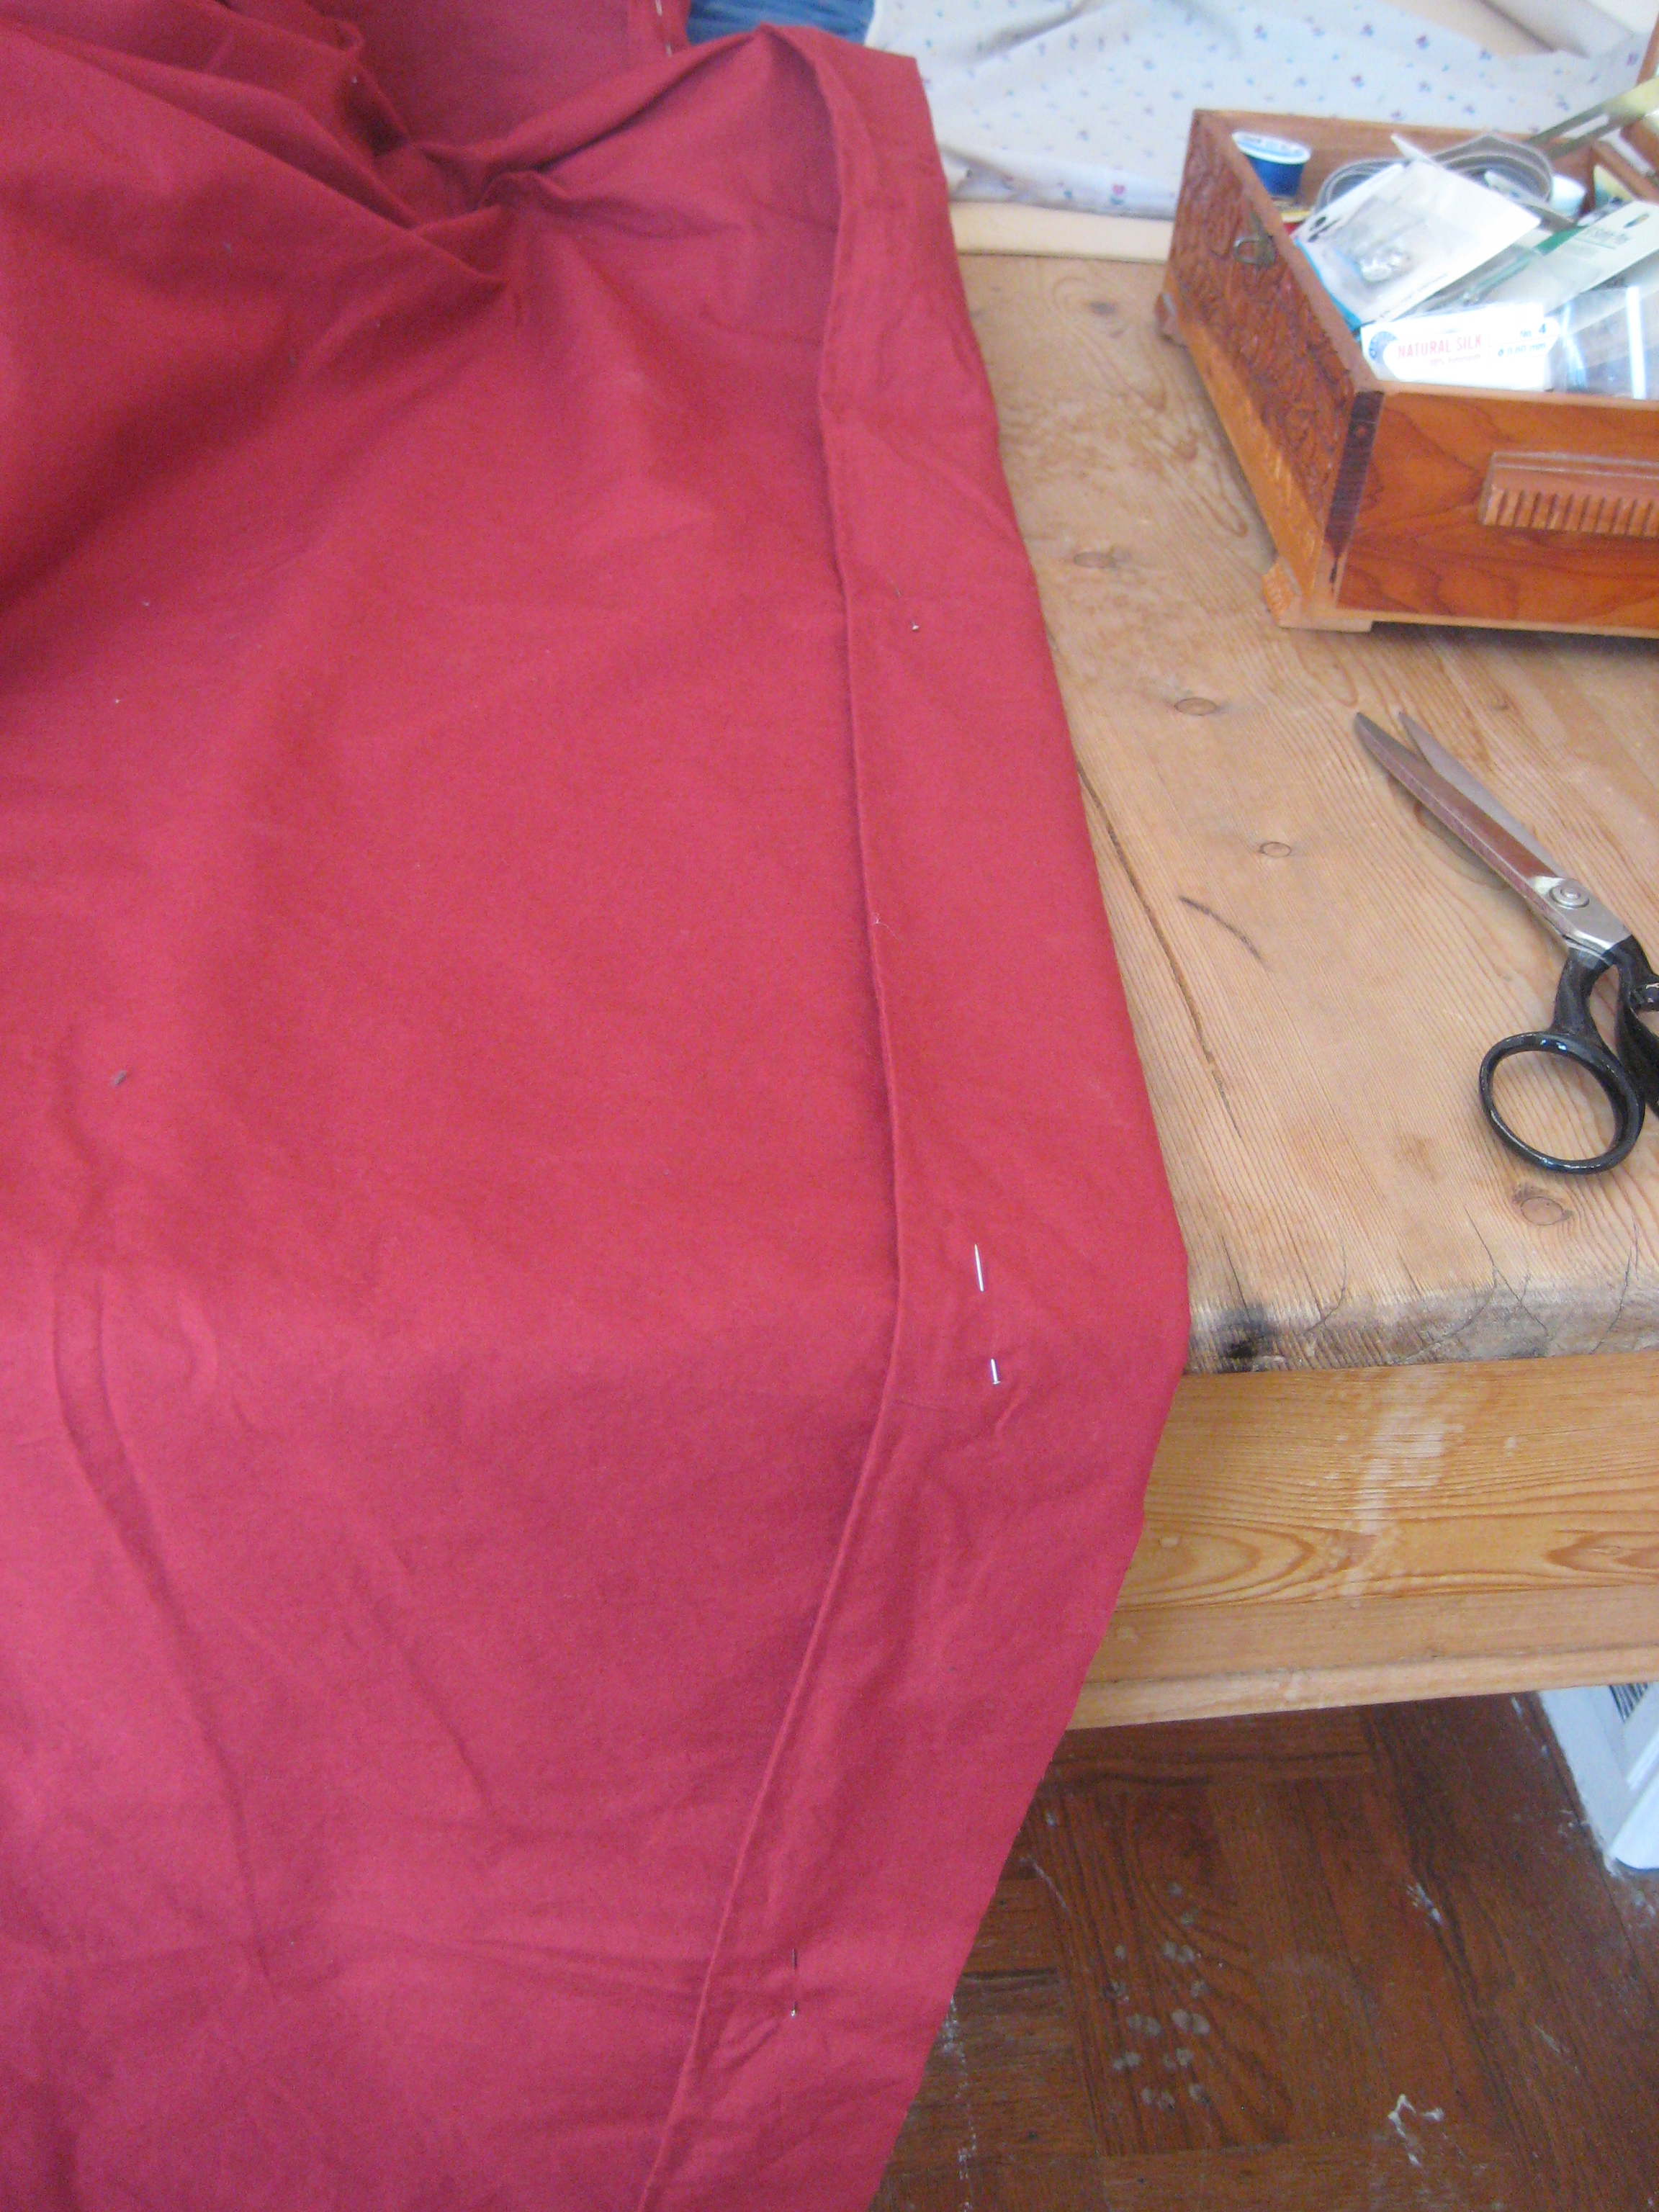
Sewed it up on the treadle.
ta daa! Little waist apron.
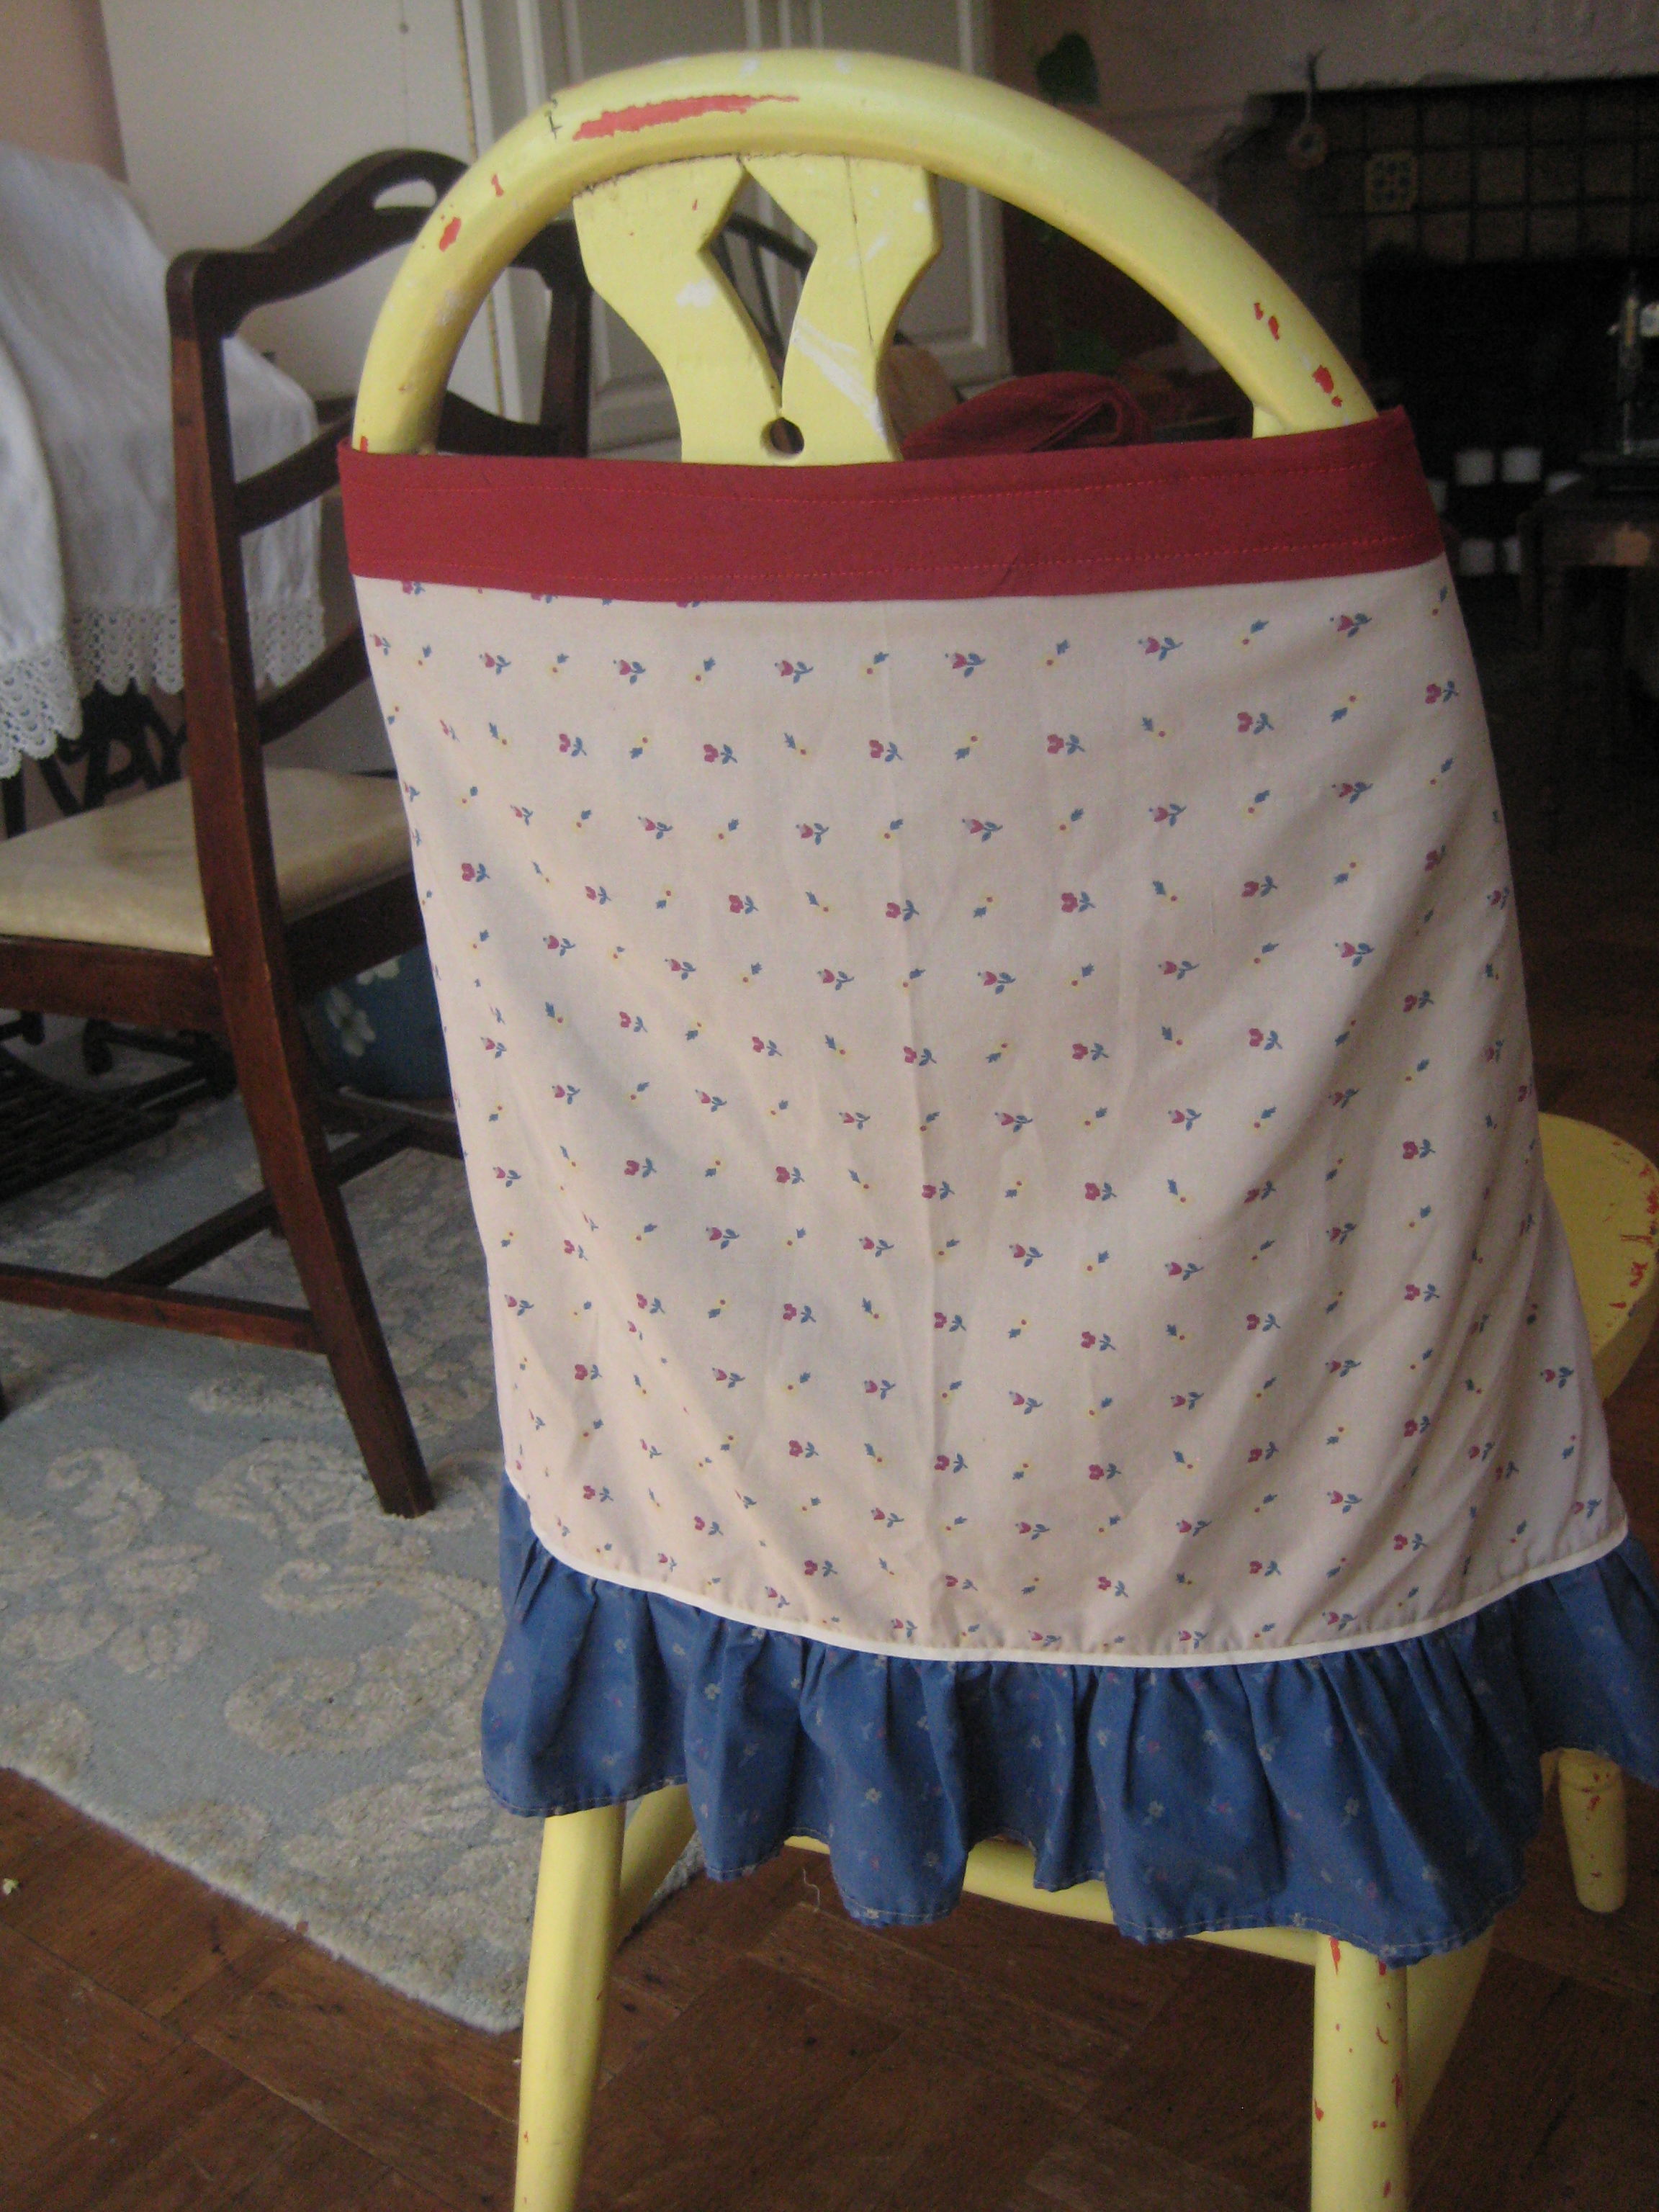
It looks kind of like a skirt…
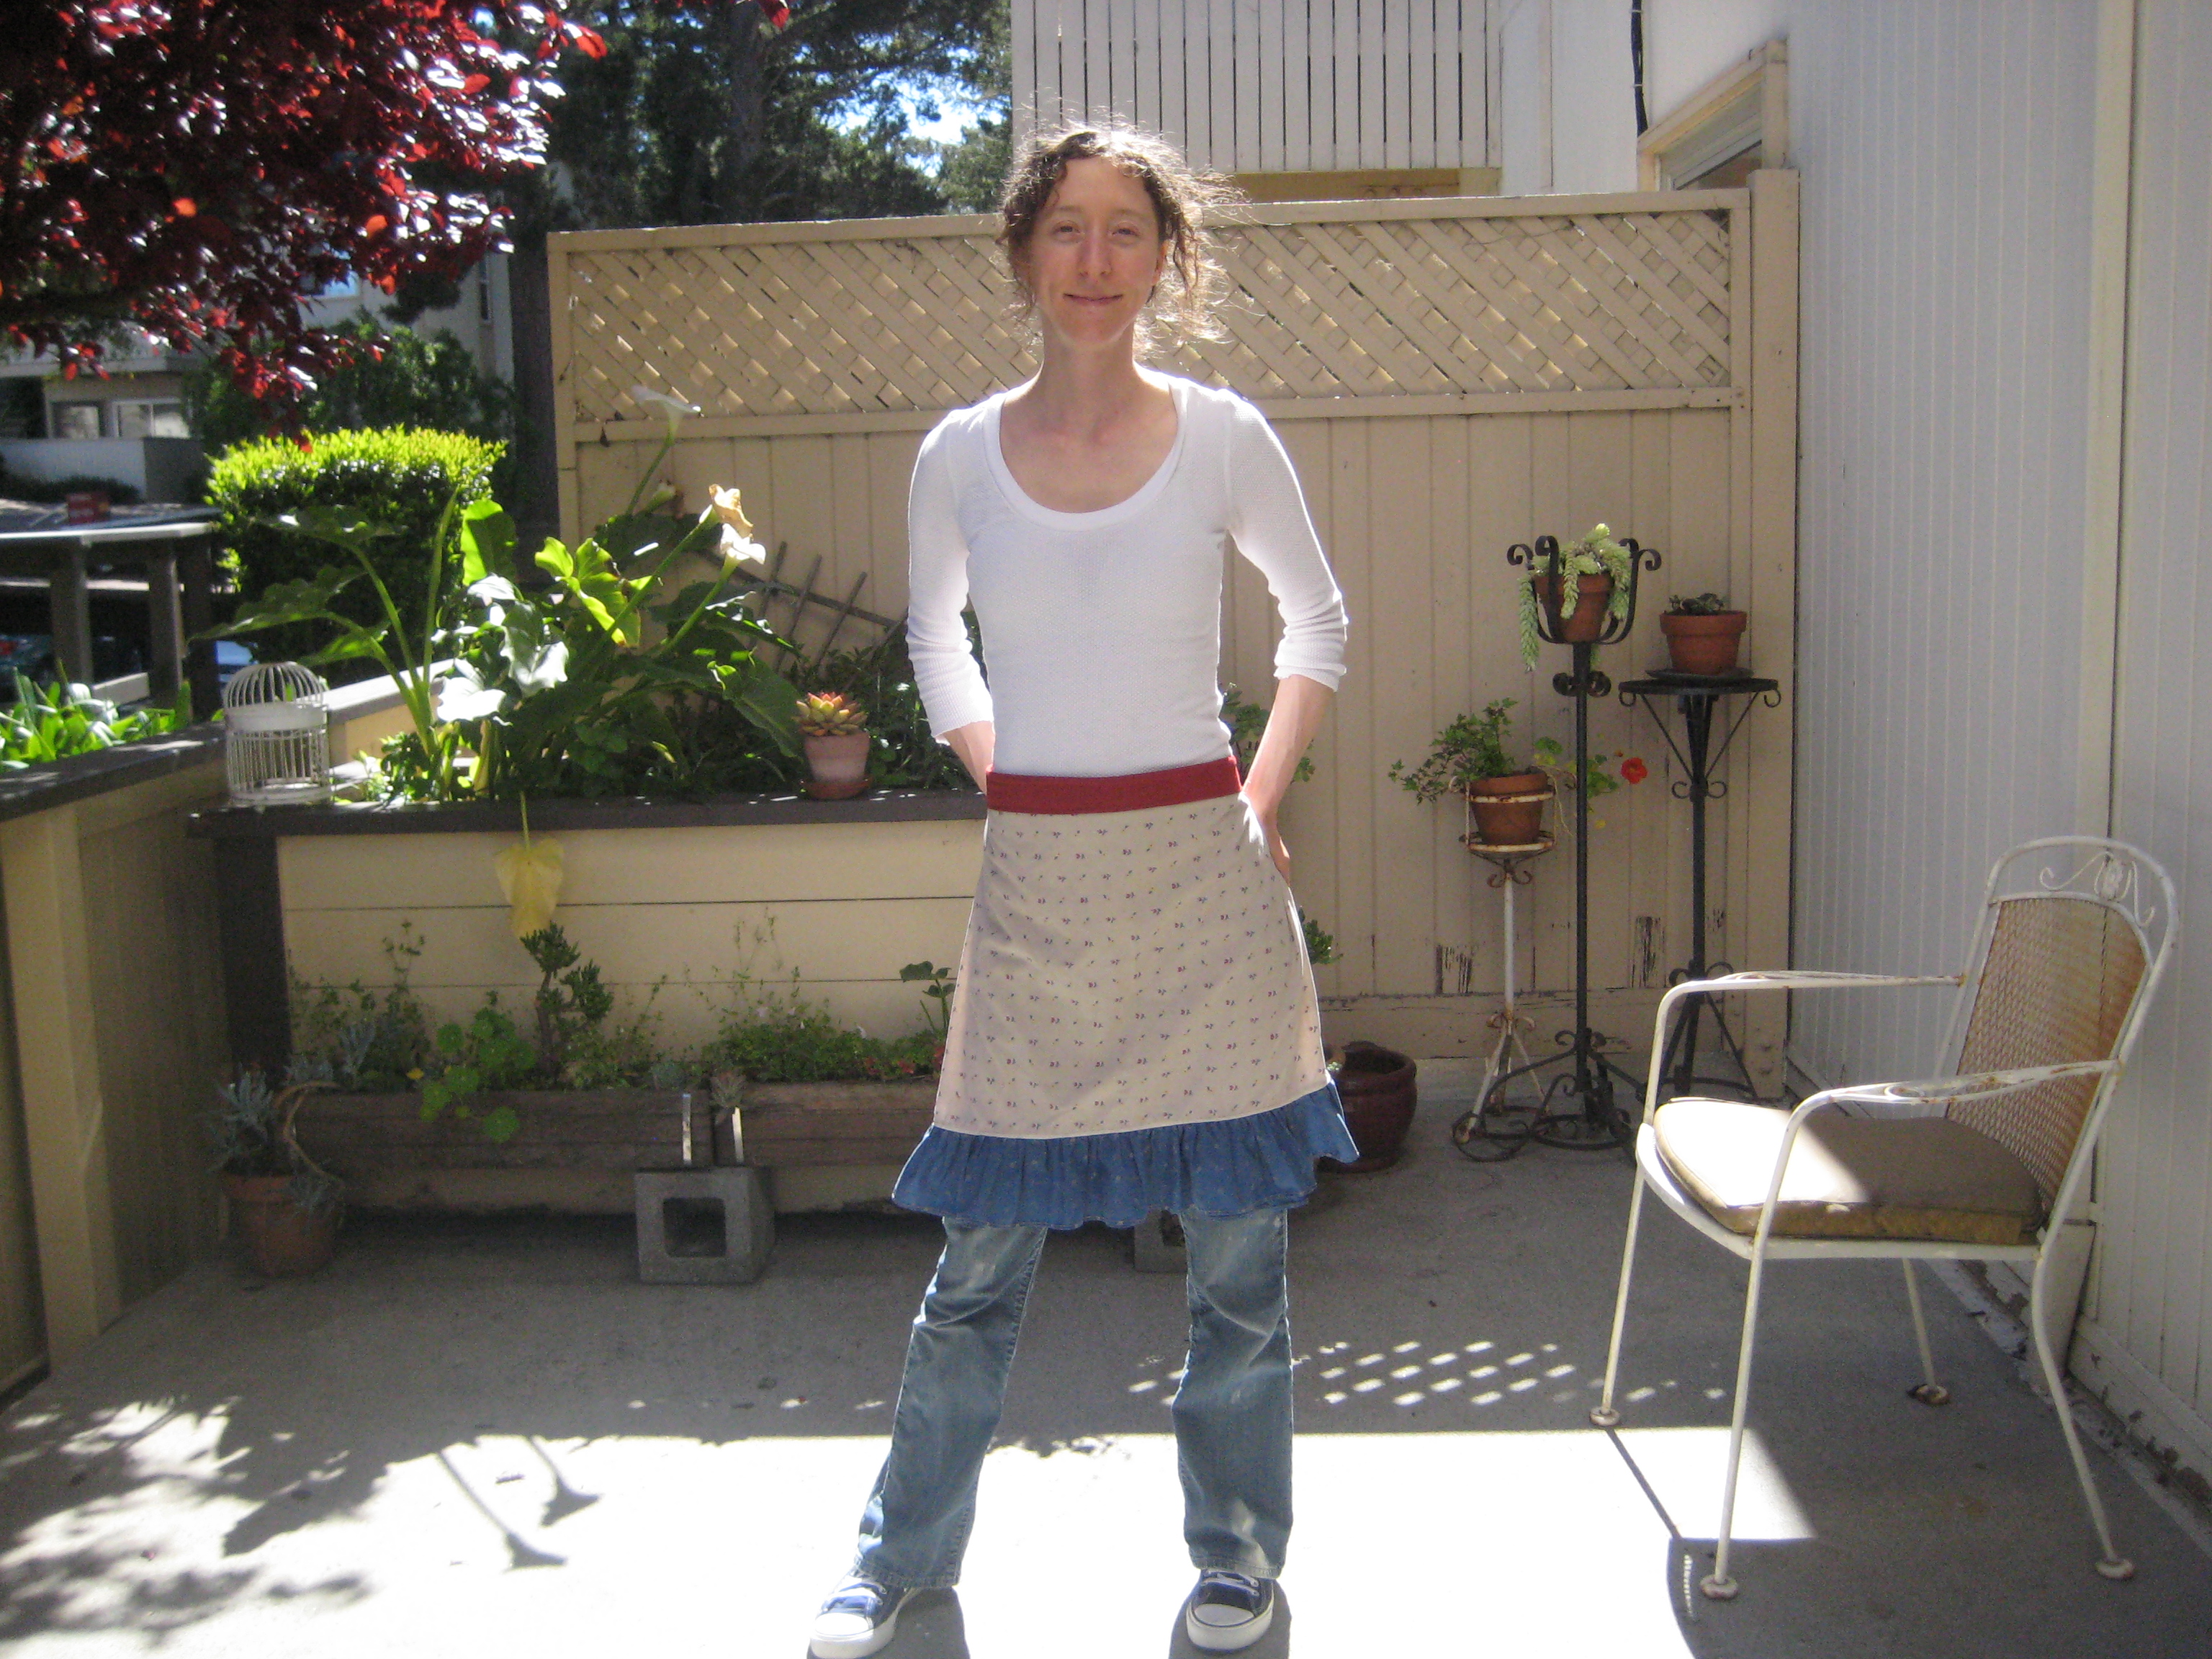
…but it’s an apron.
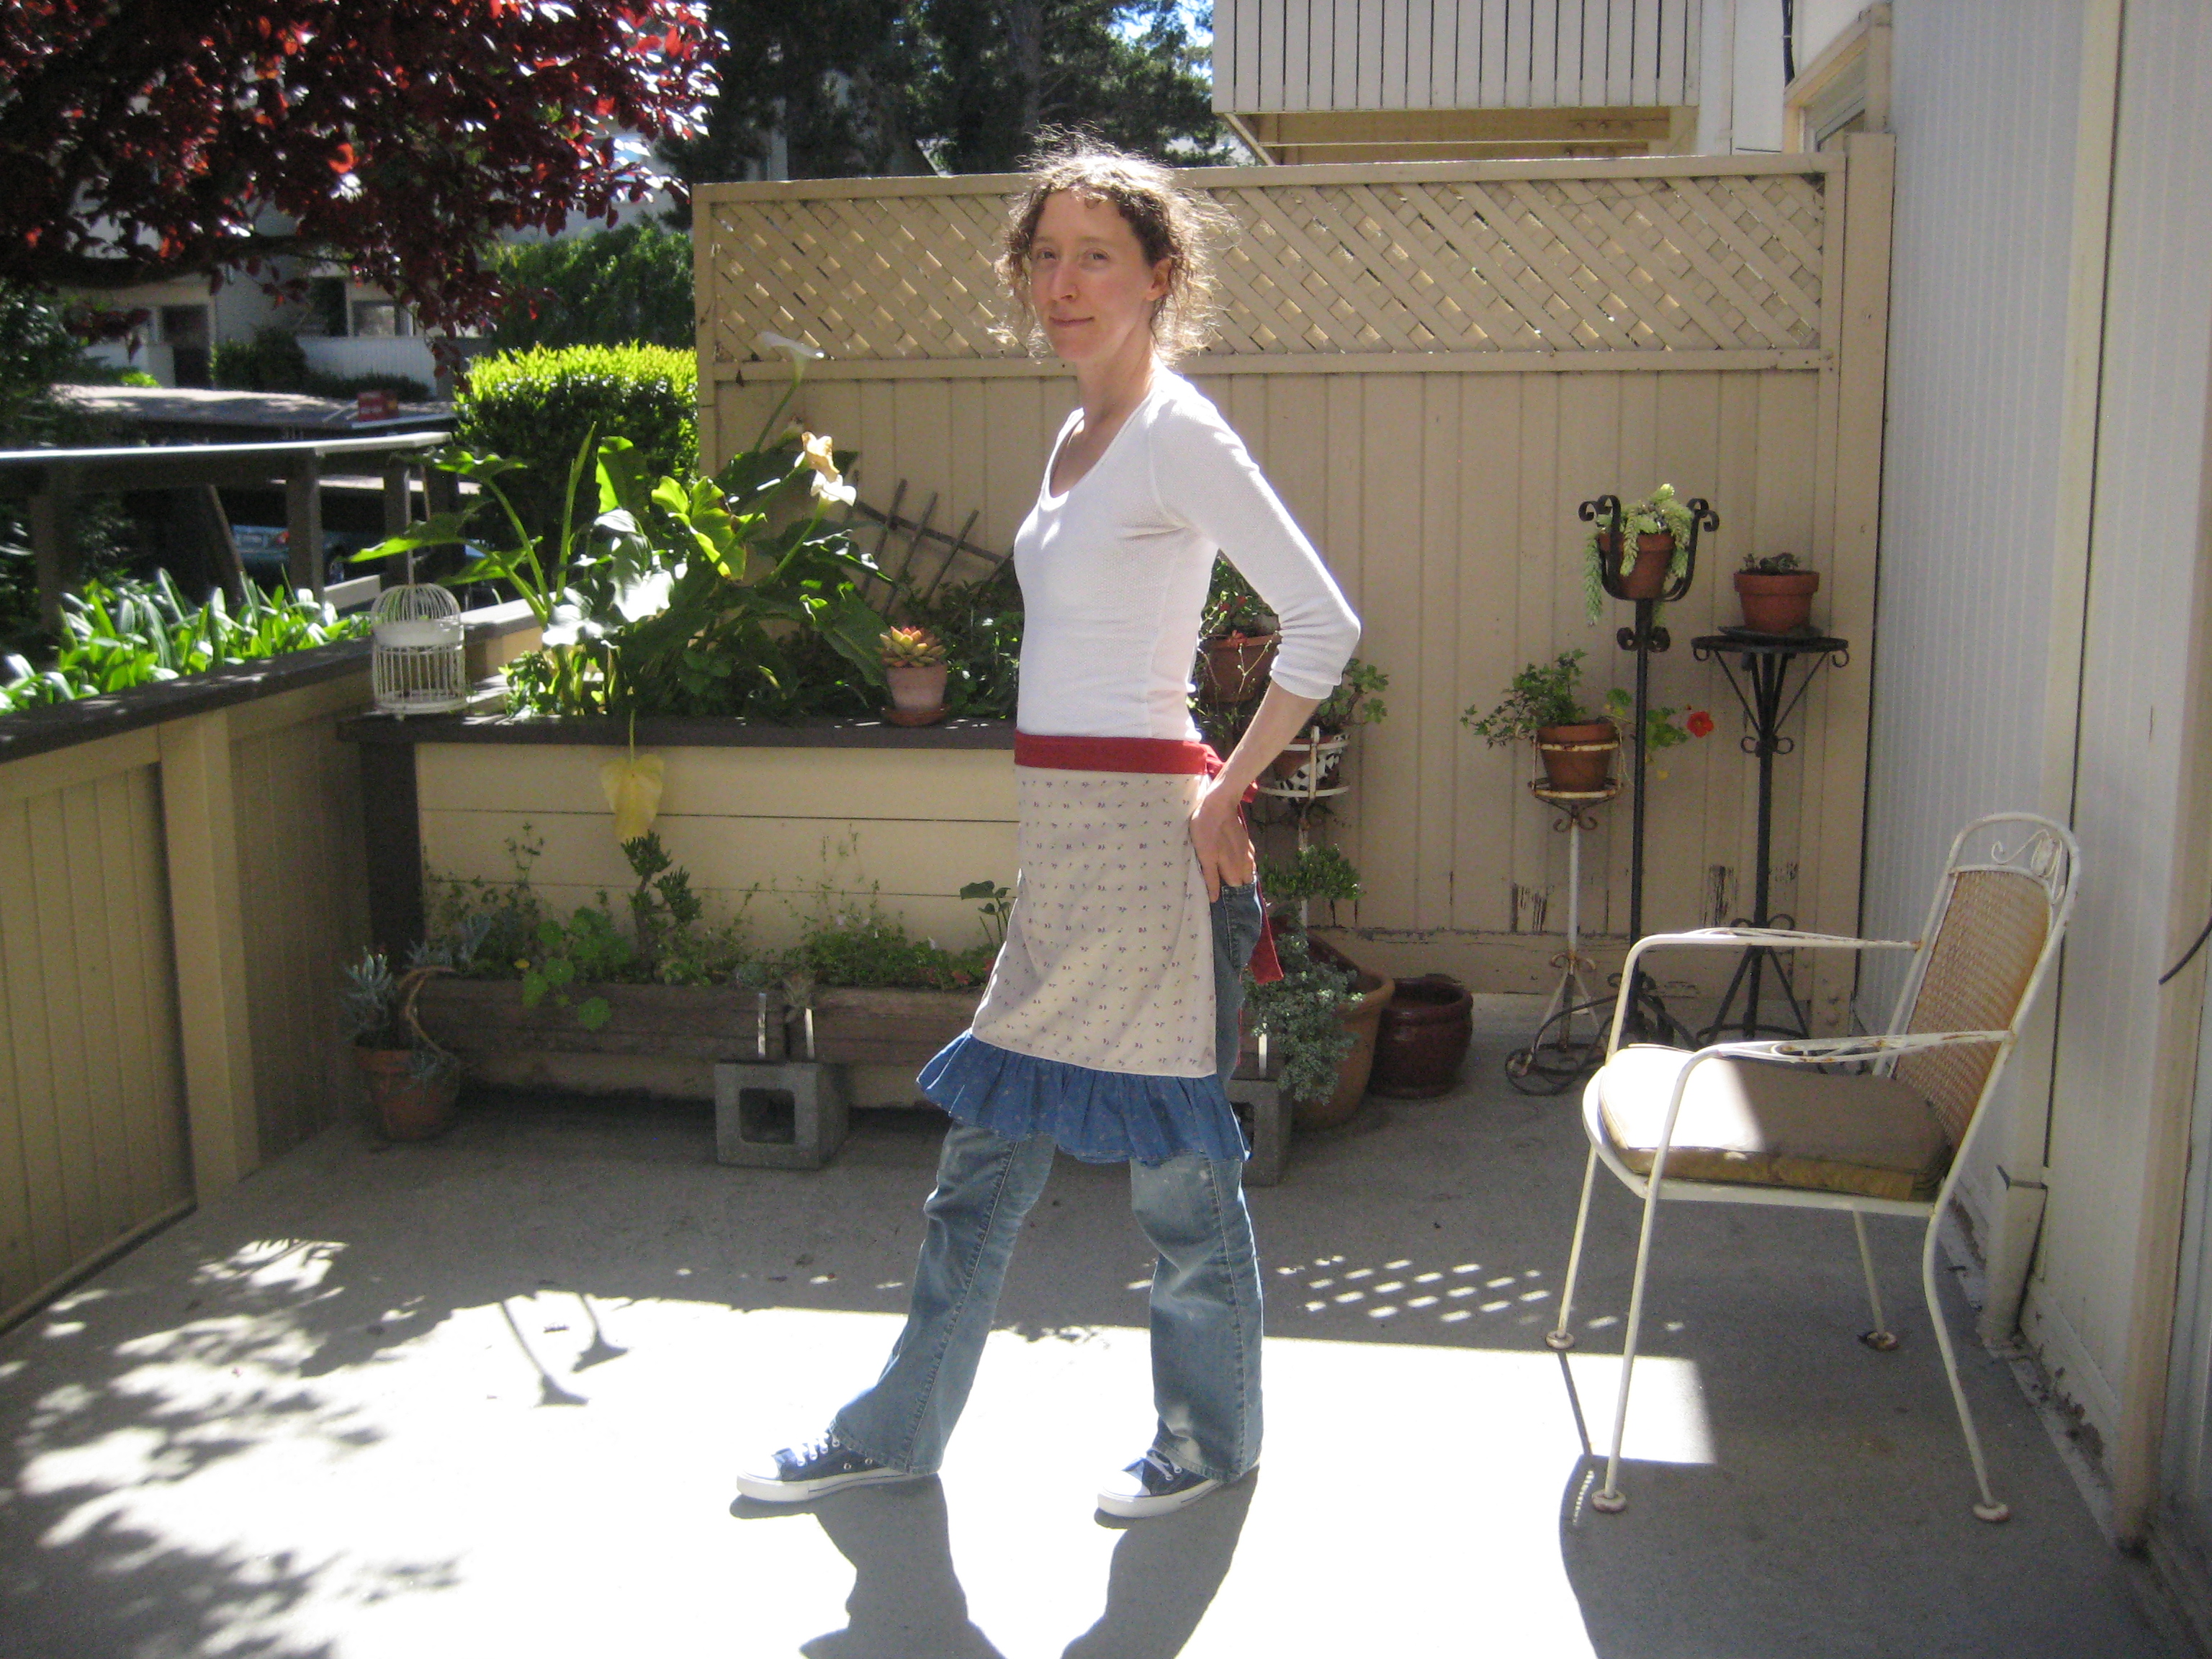
(thanks for taking the pics of me Ma. That’s her cute patio in San Bruno.)
Posted in Uncategorized | Leave a Comment »
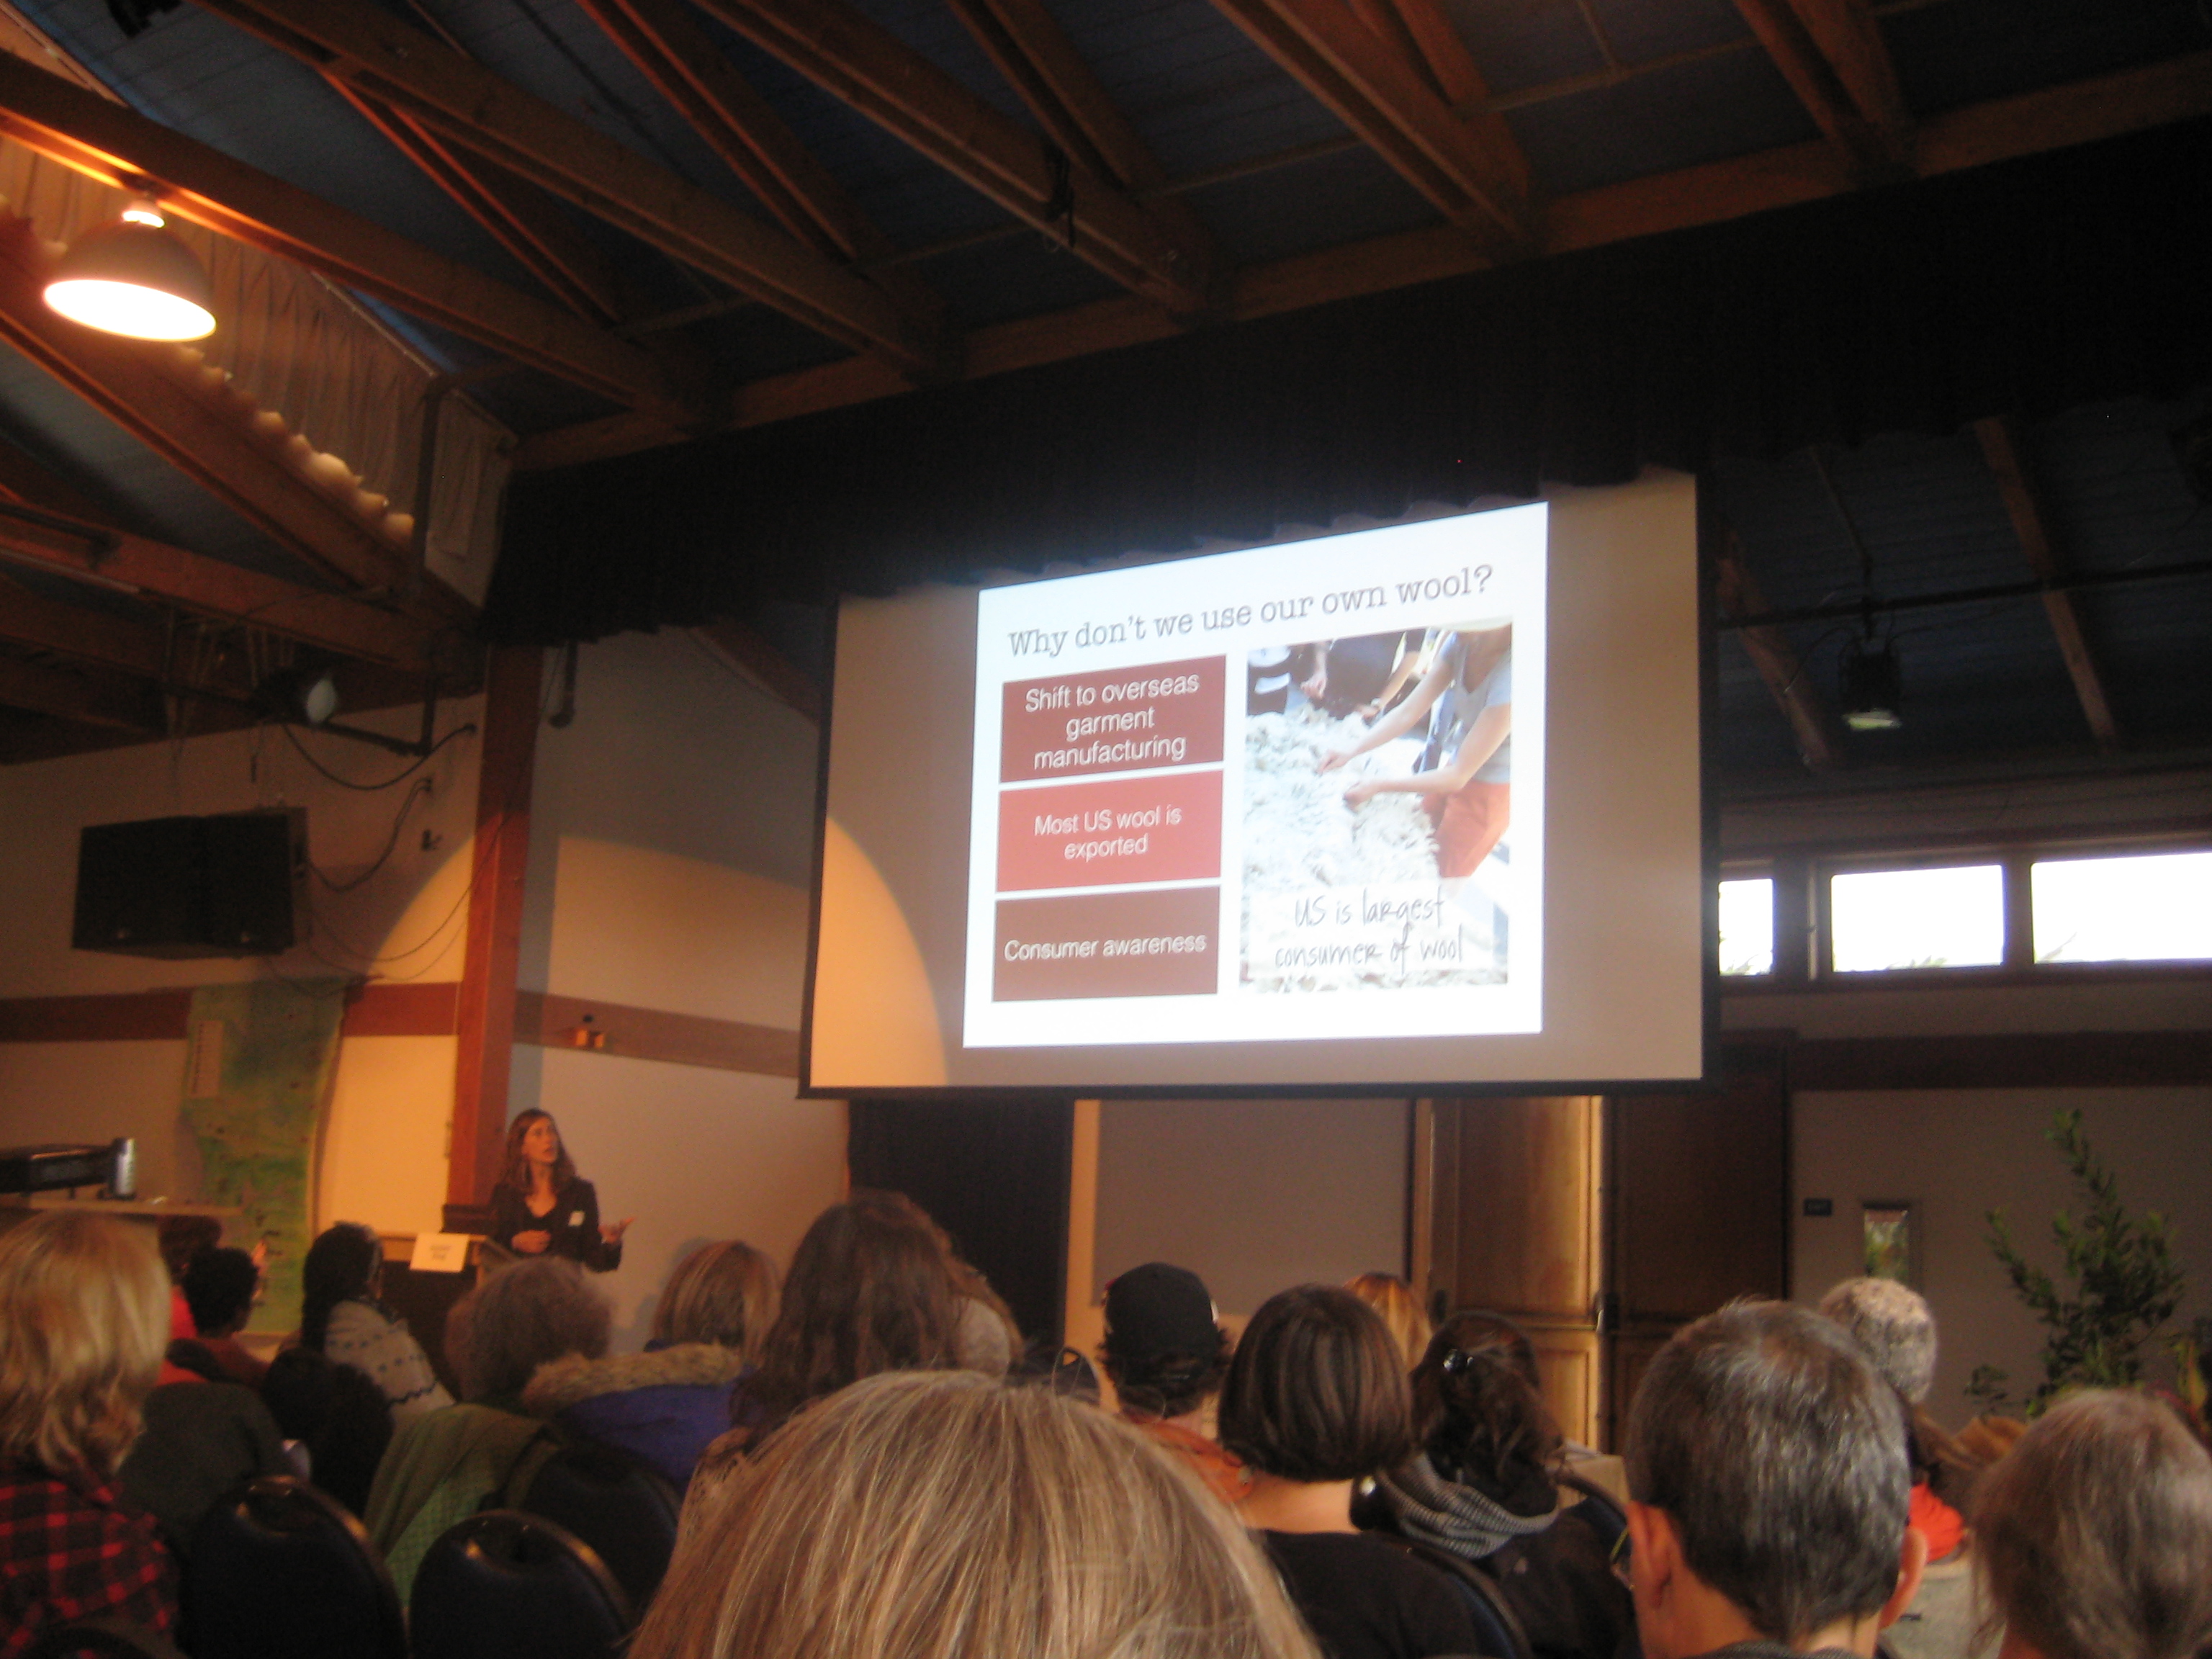
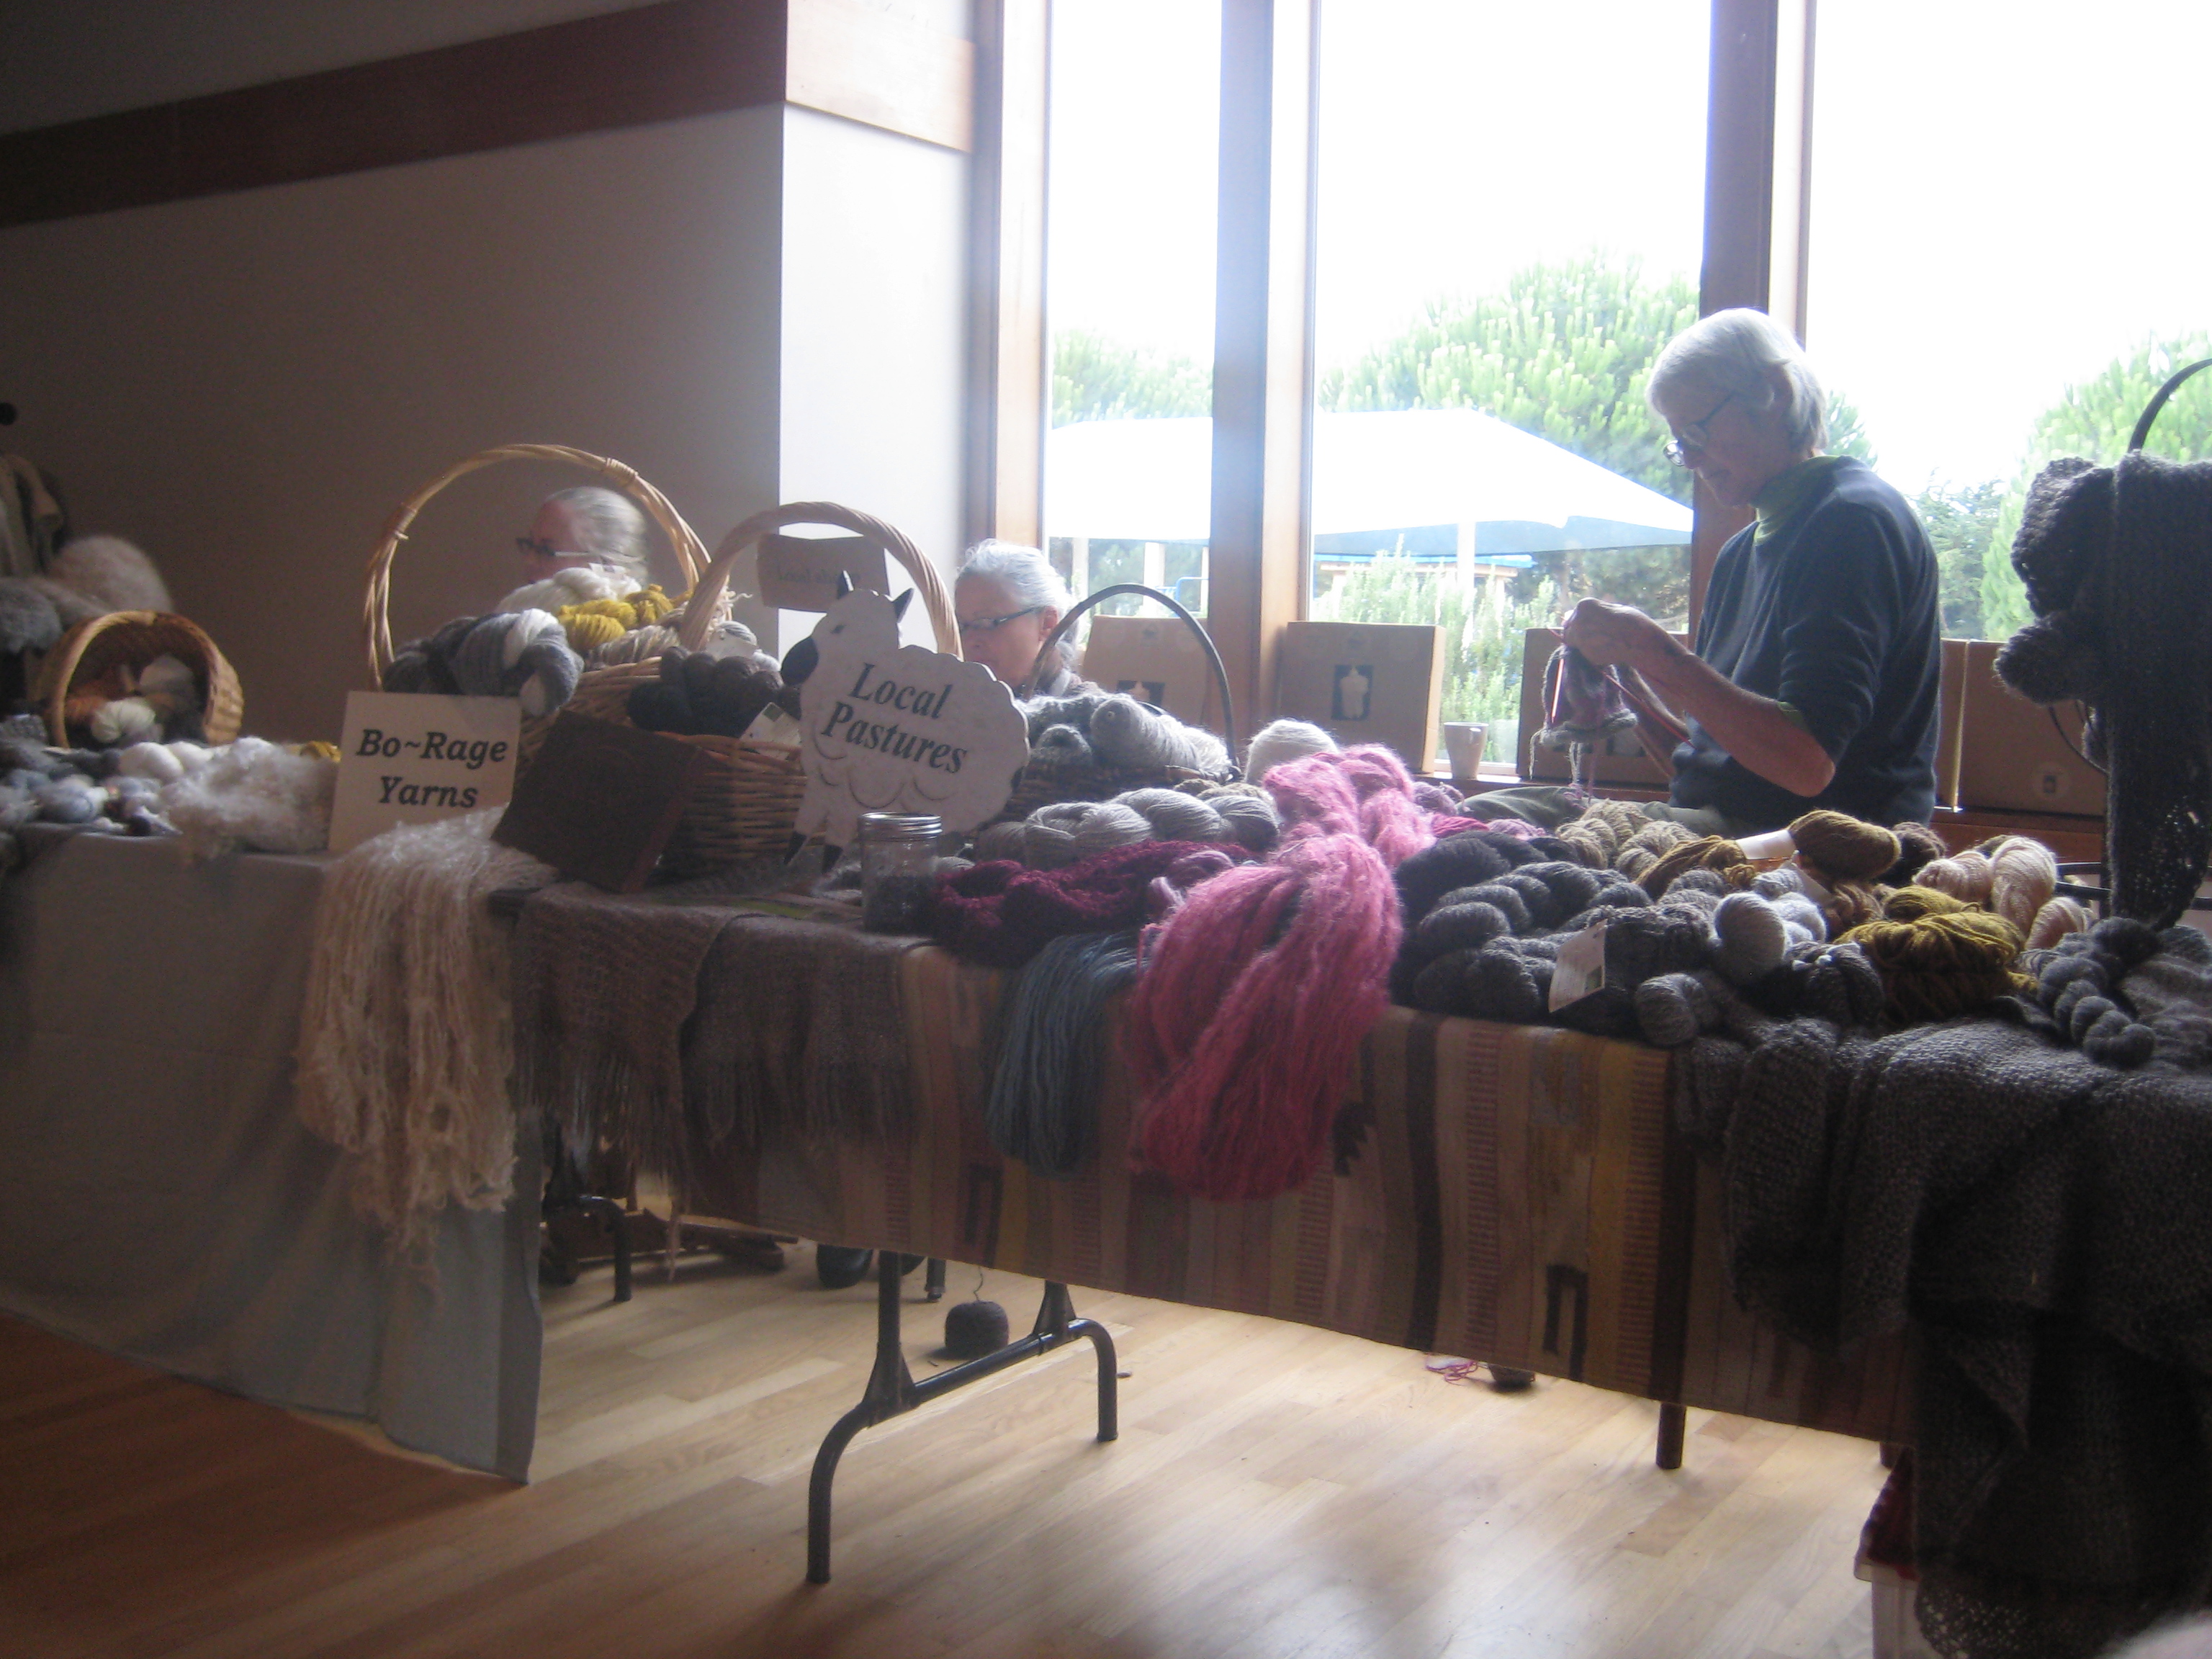
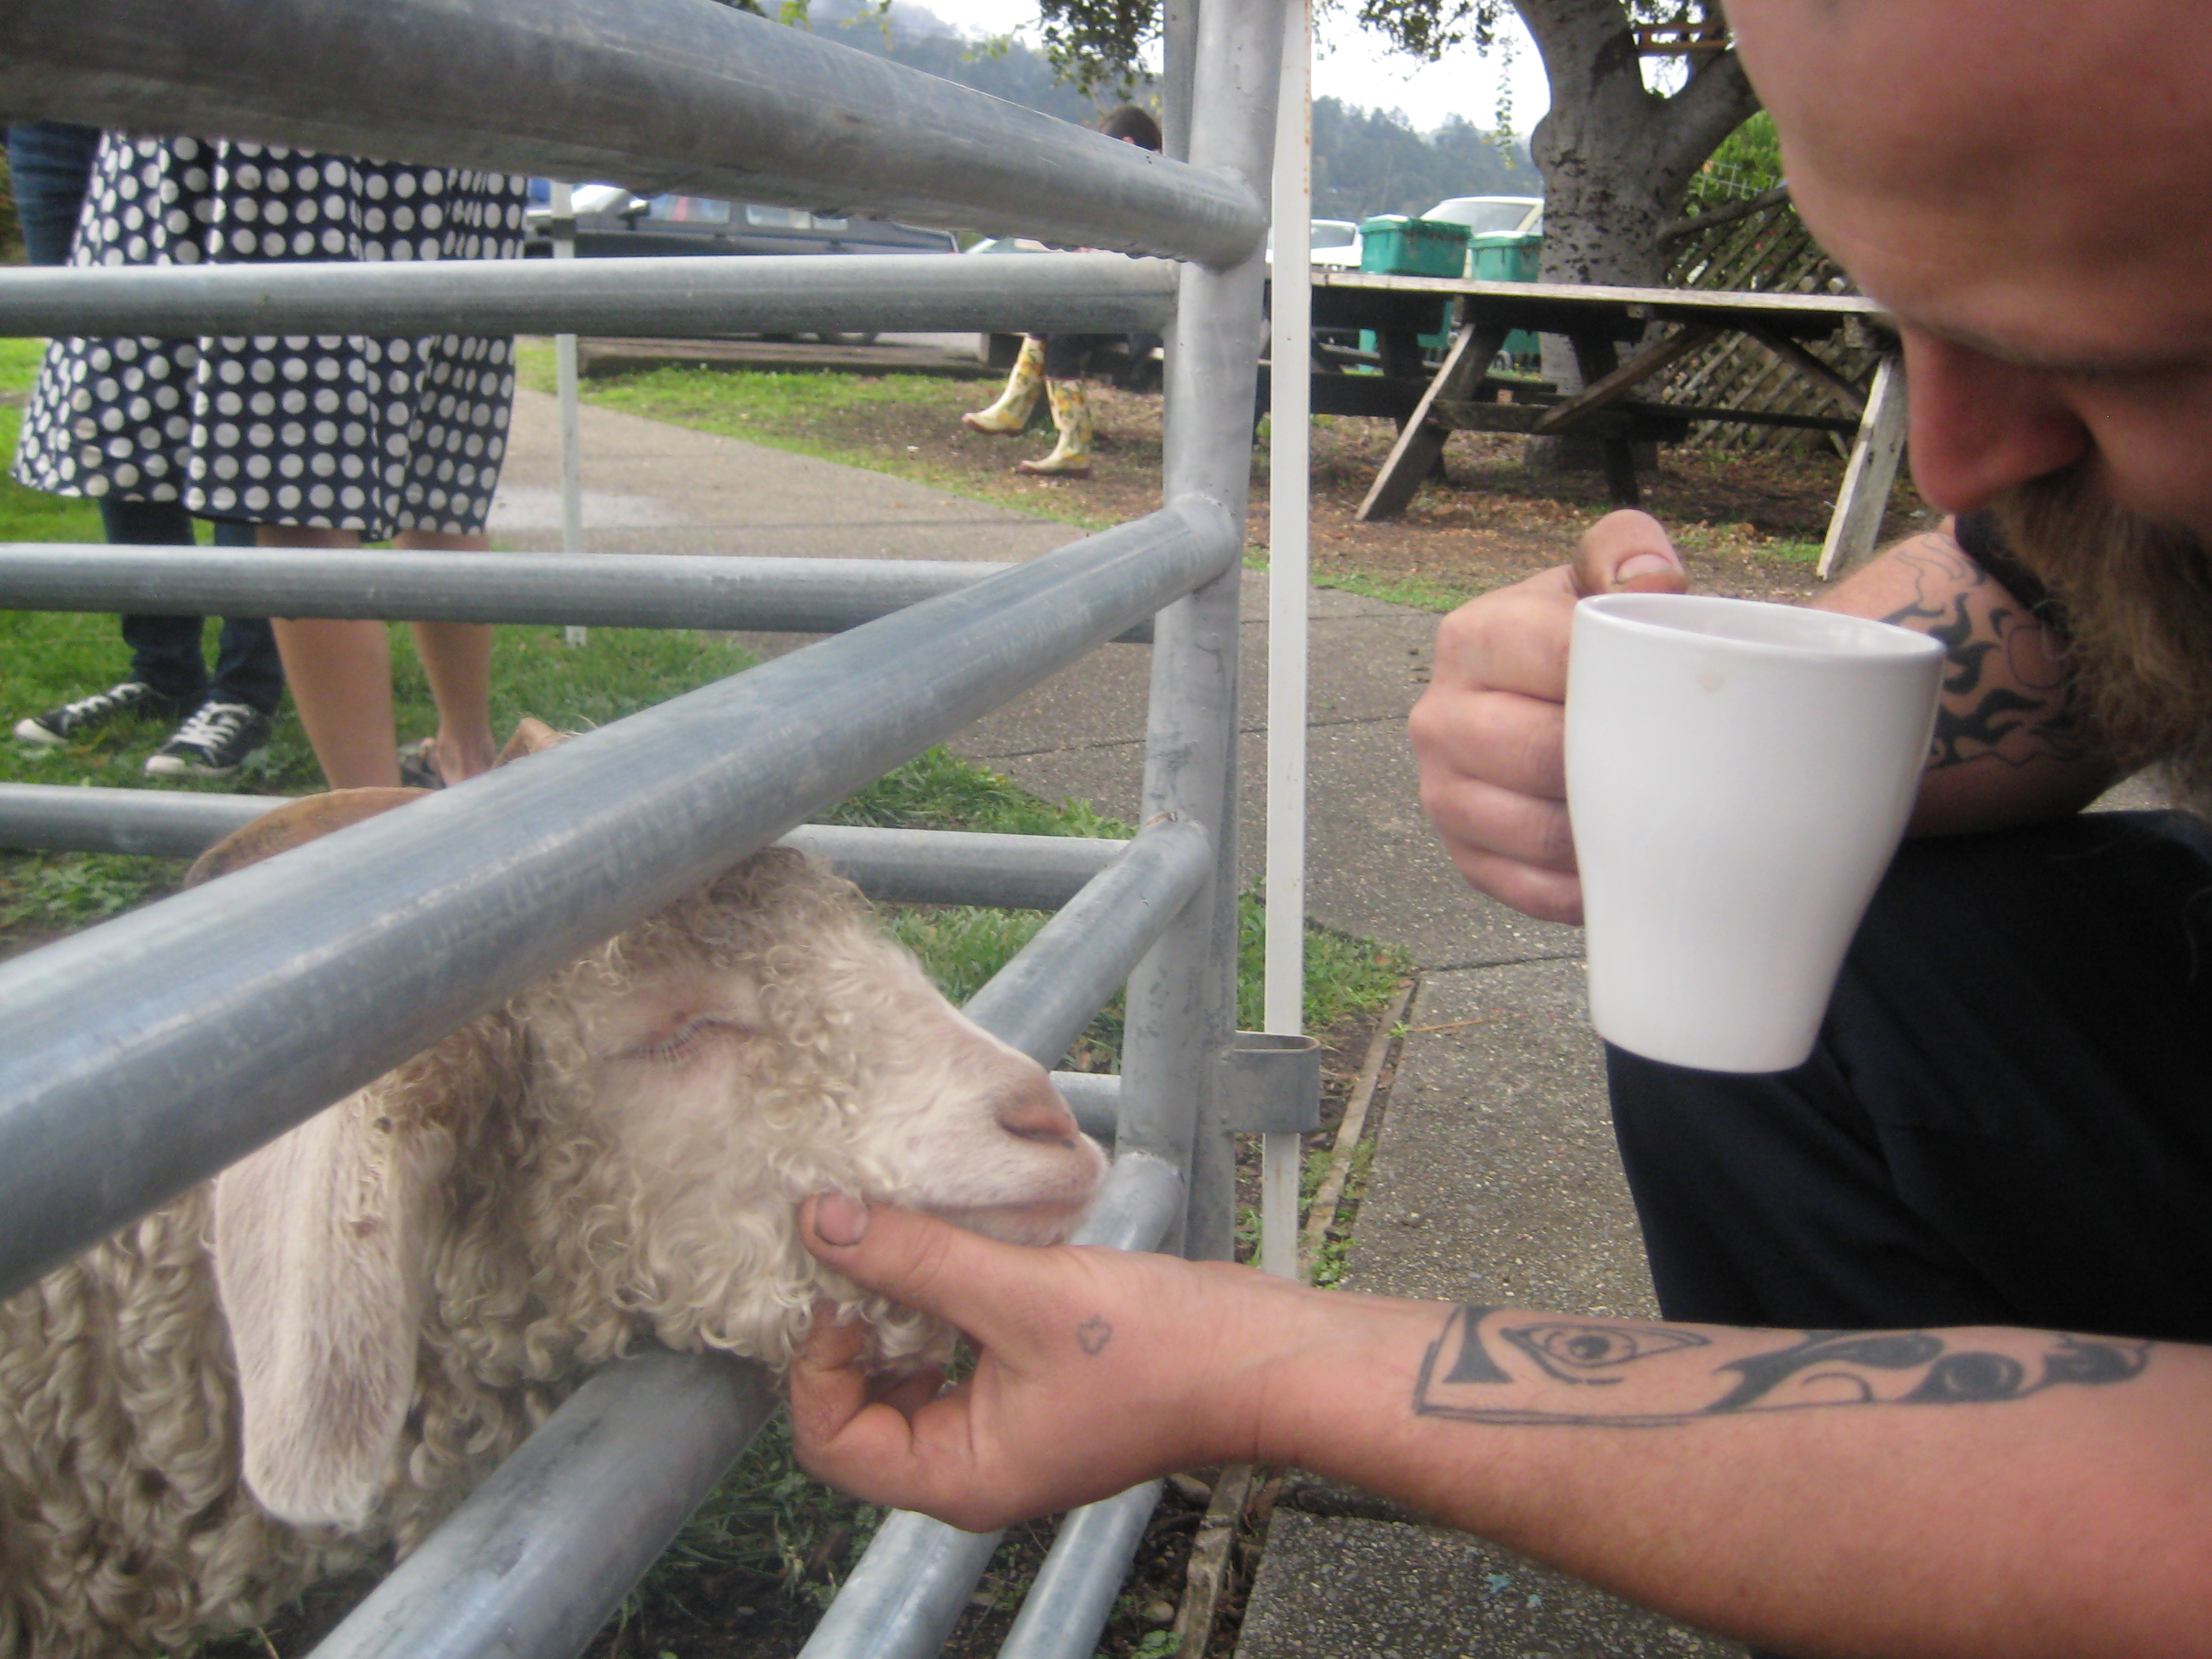
Sean and I went to the first annual Wool & Fine Fiber Symposium in Point Reyes Station back in November.

It was an inspirational event updating the community about the state of the local Fibershed project, uniting artisans, farmers, shepherds, shearers and entrepreneurs.
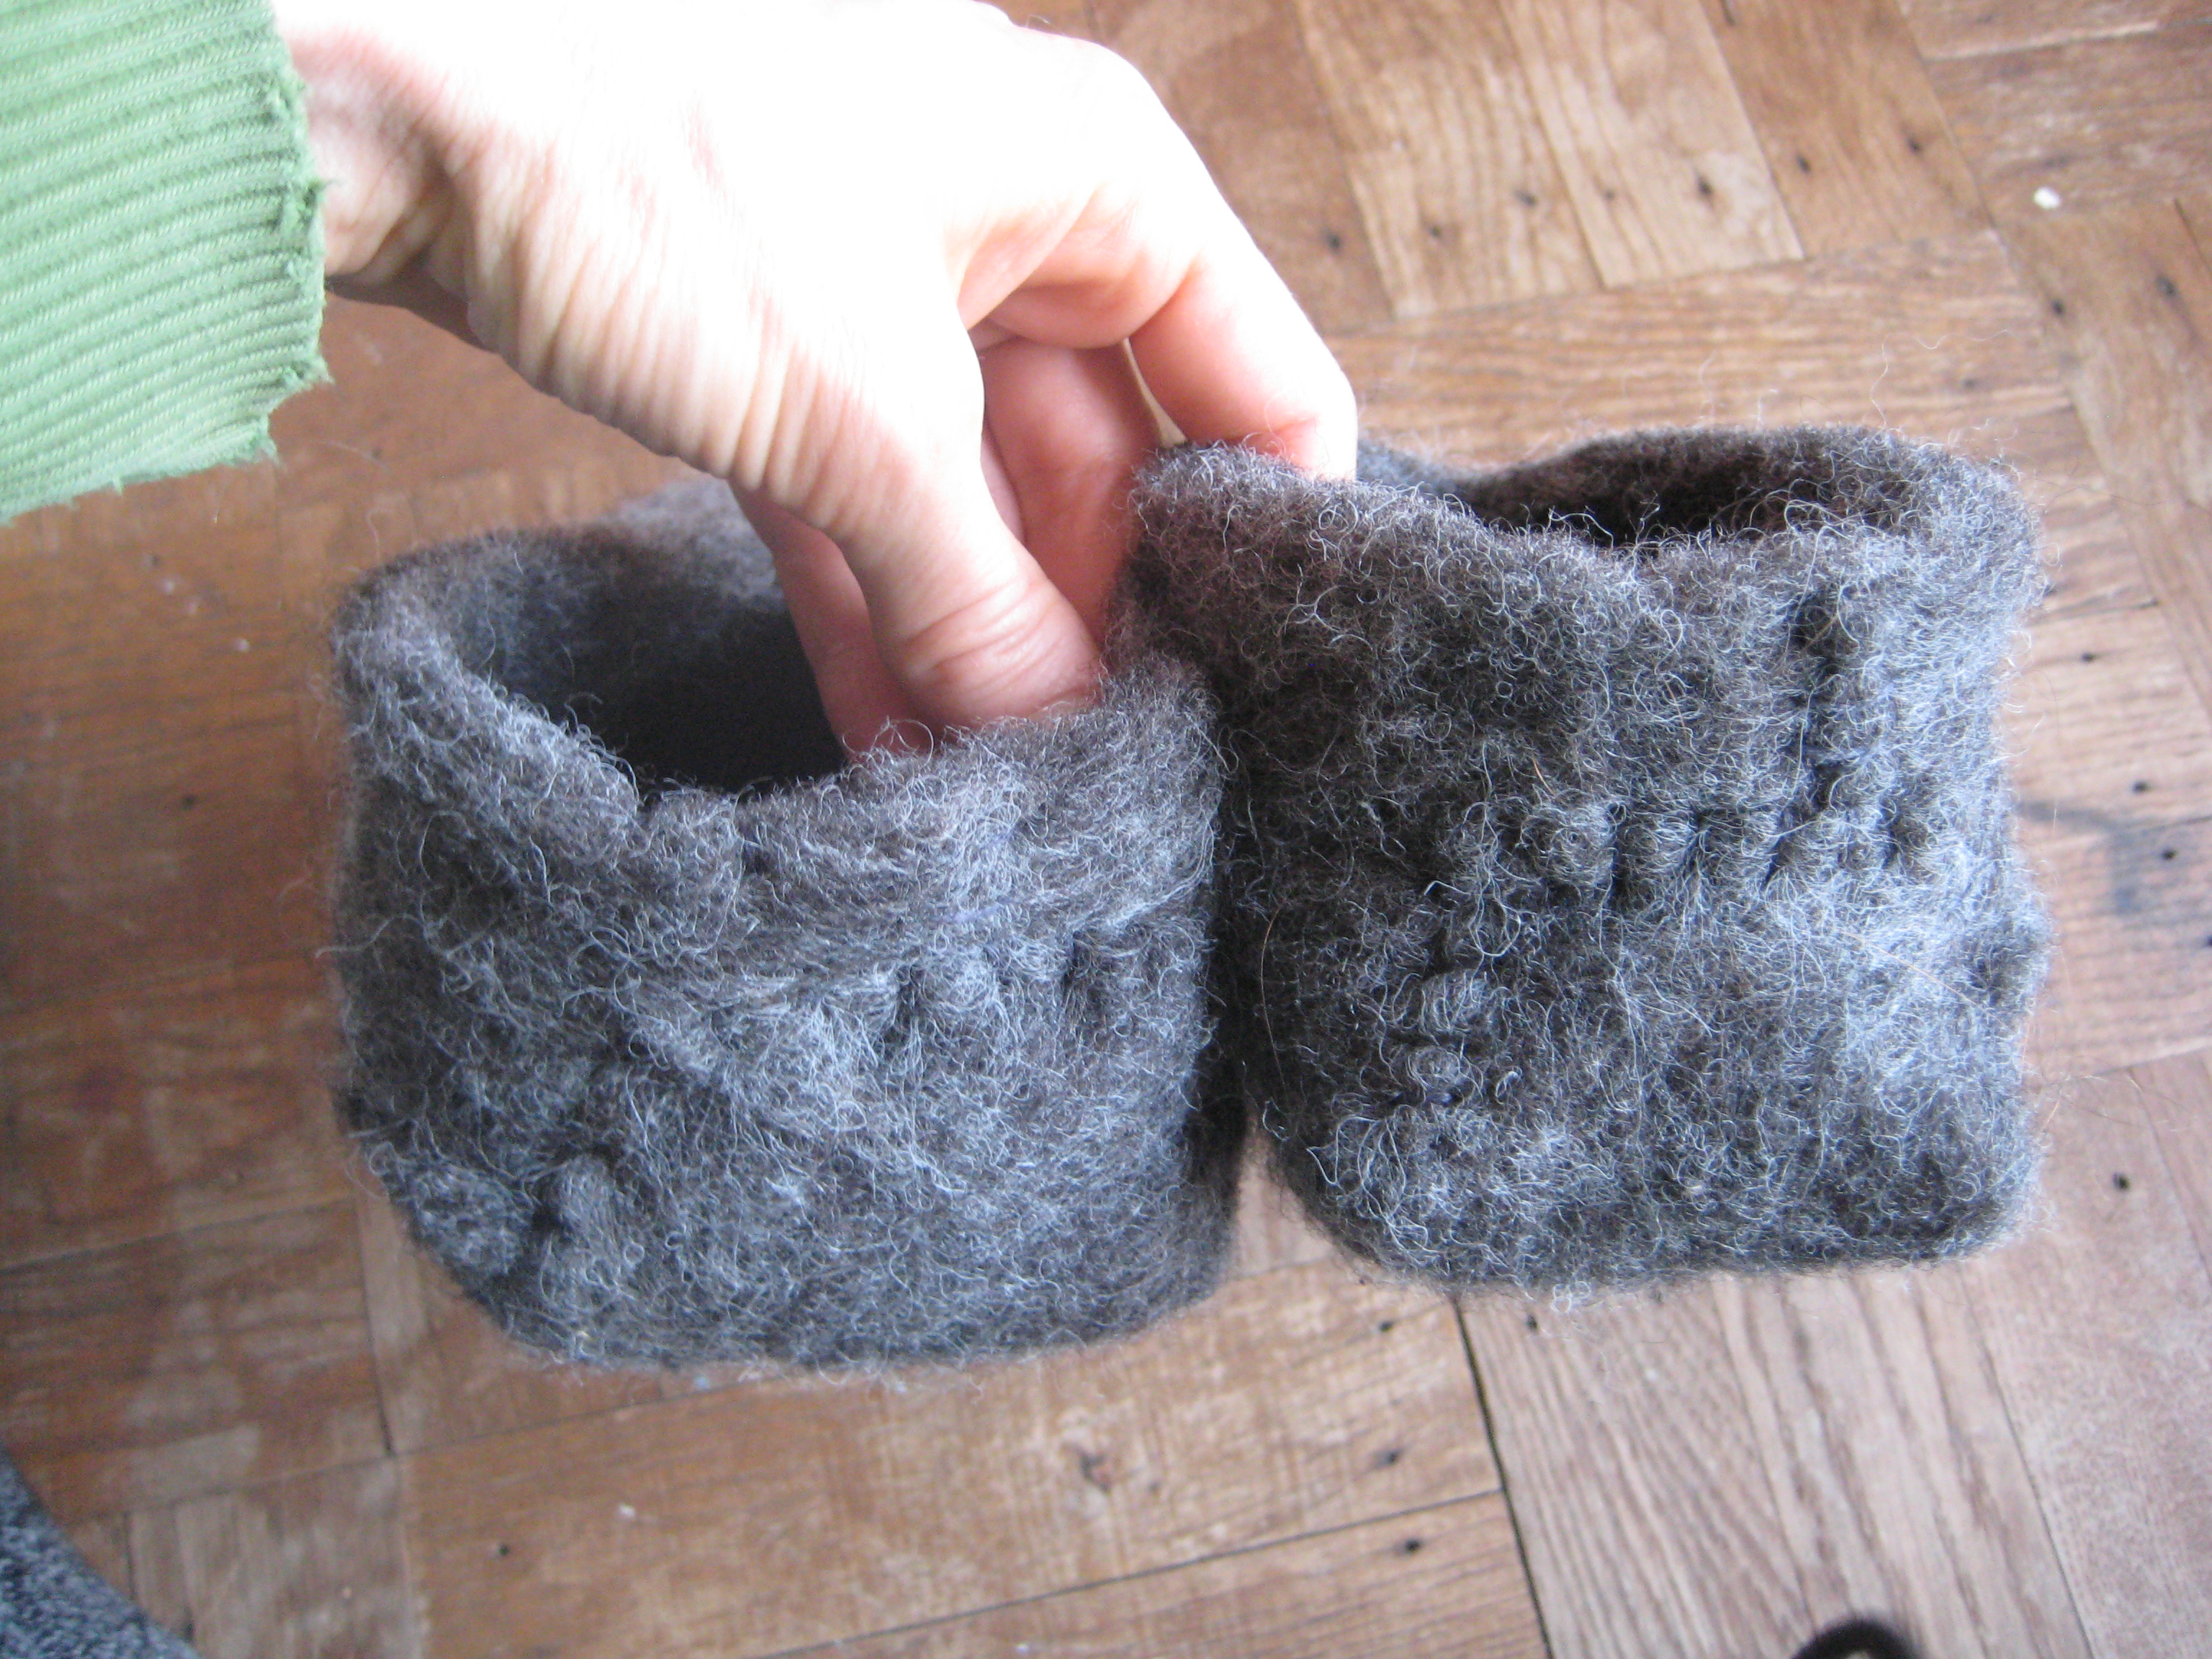
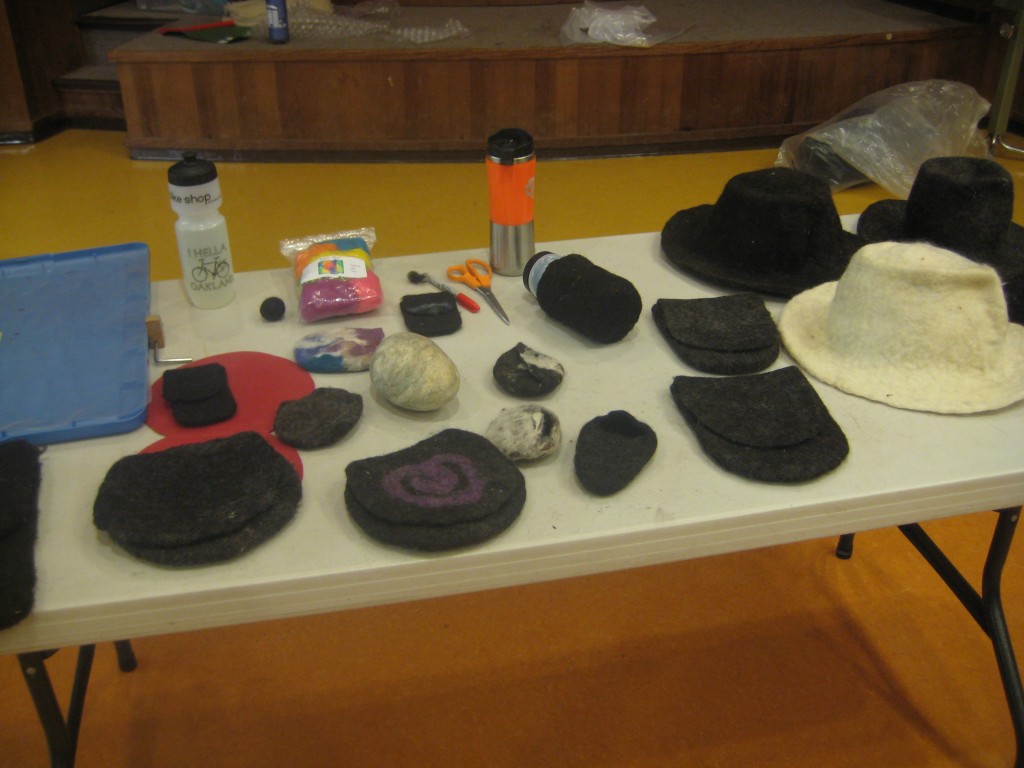
We were inspired by this pair of slippers we saw there.
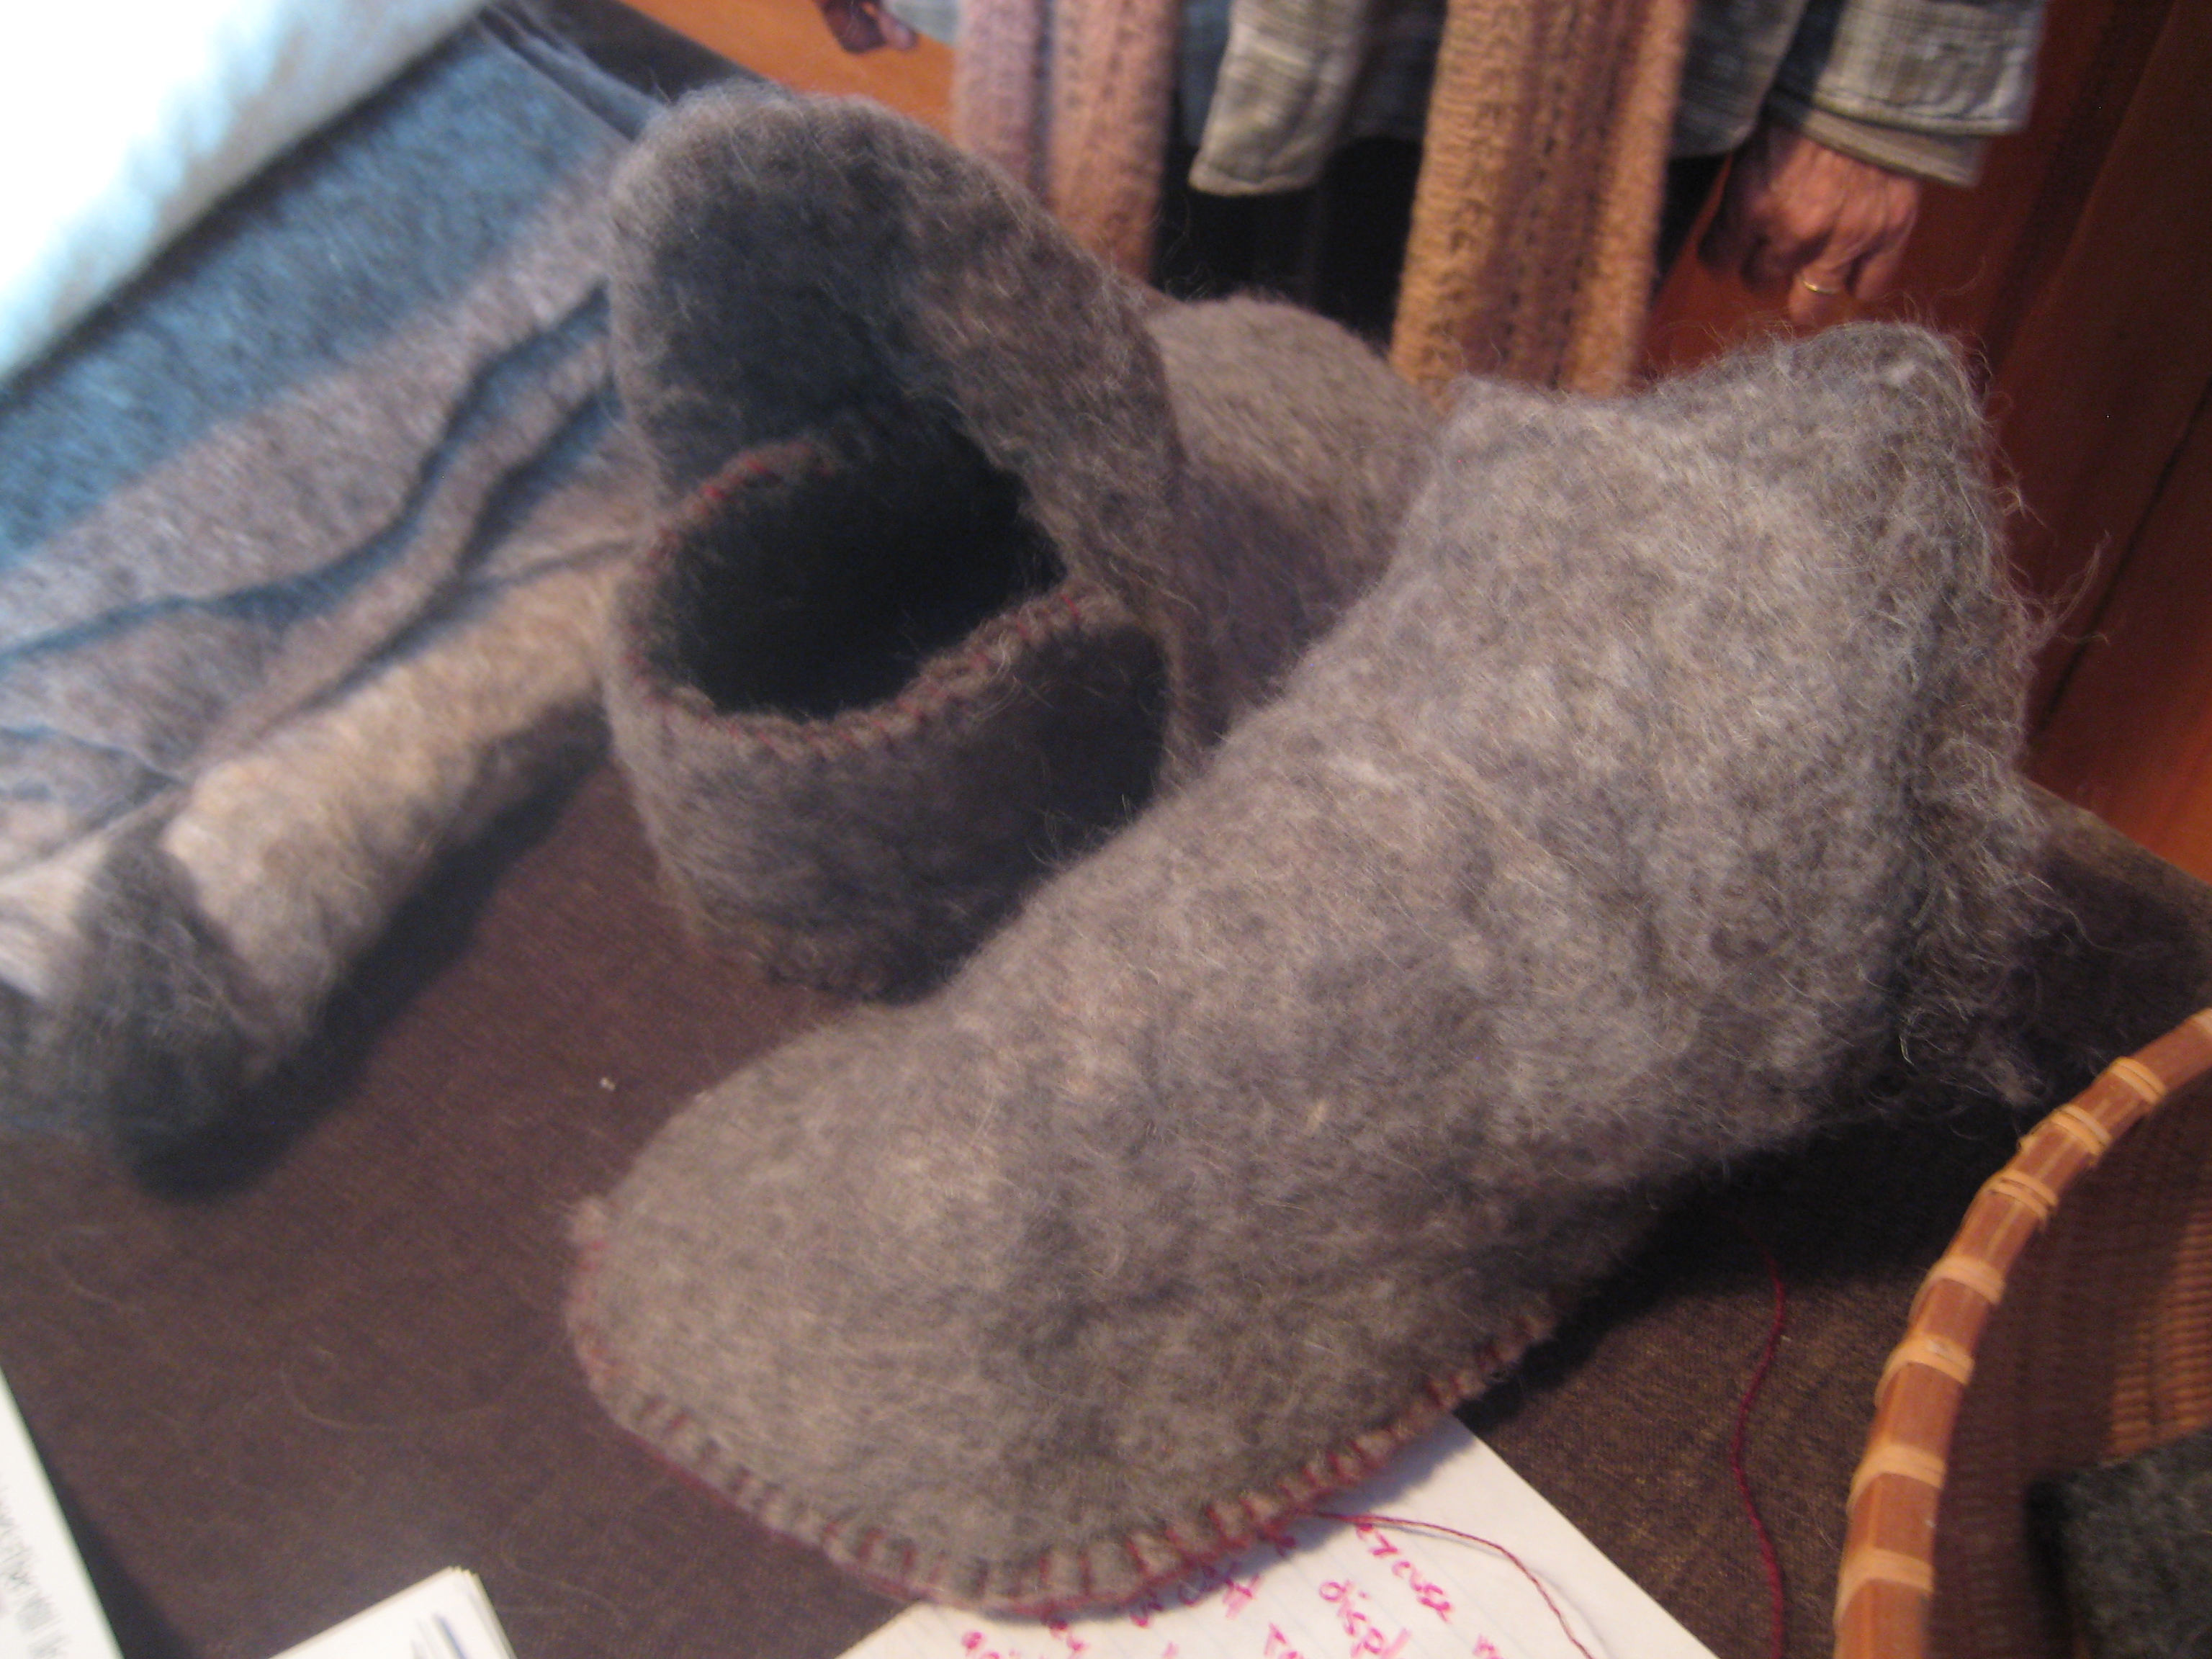
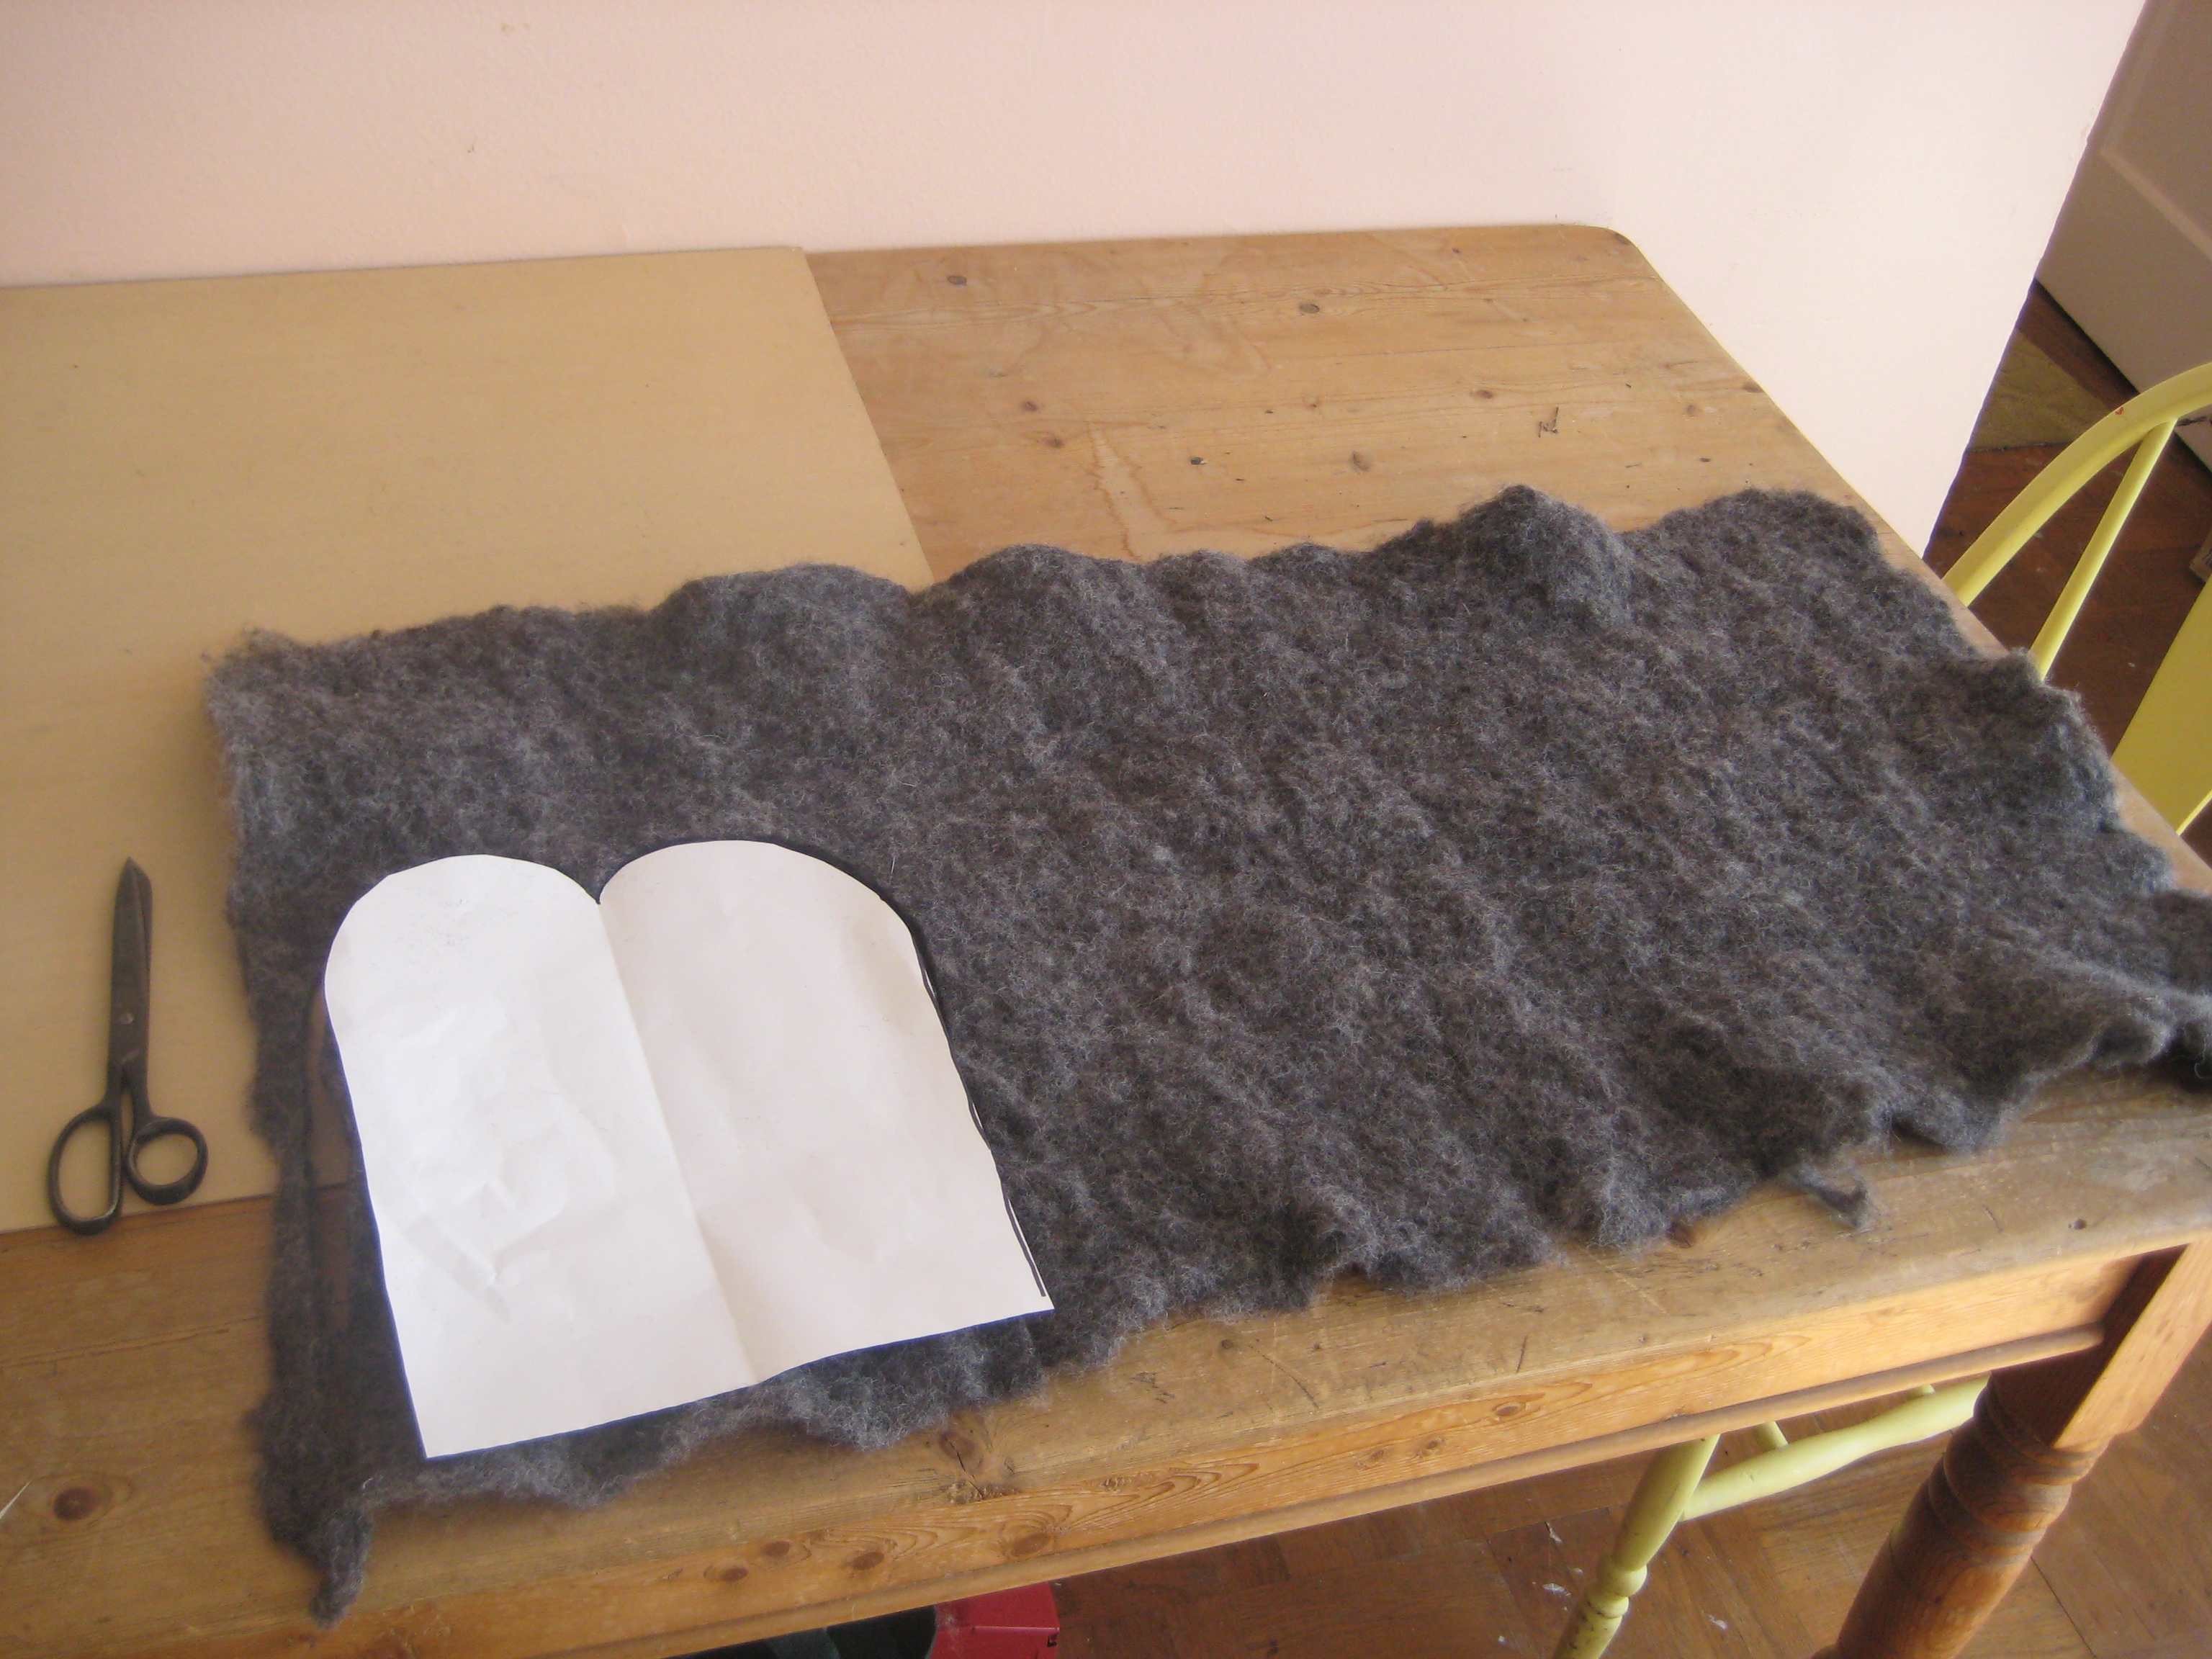
We wanted to make our own. Sean bought some nice brown felt while we were there. I bought some processed wool from Meridien Jacobs to make a sheet of felt myself.
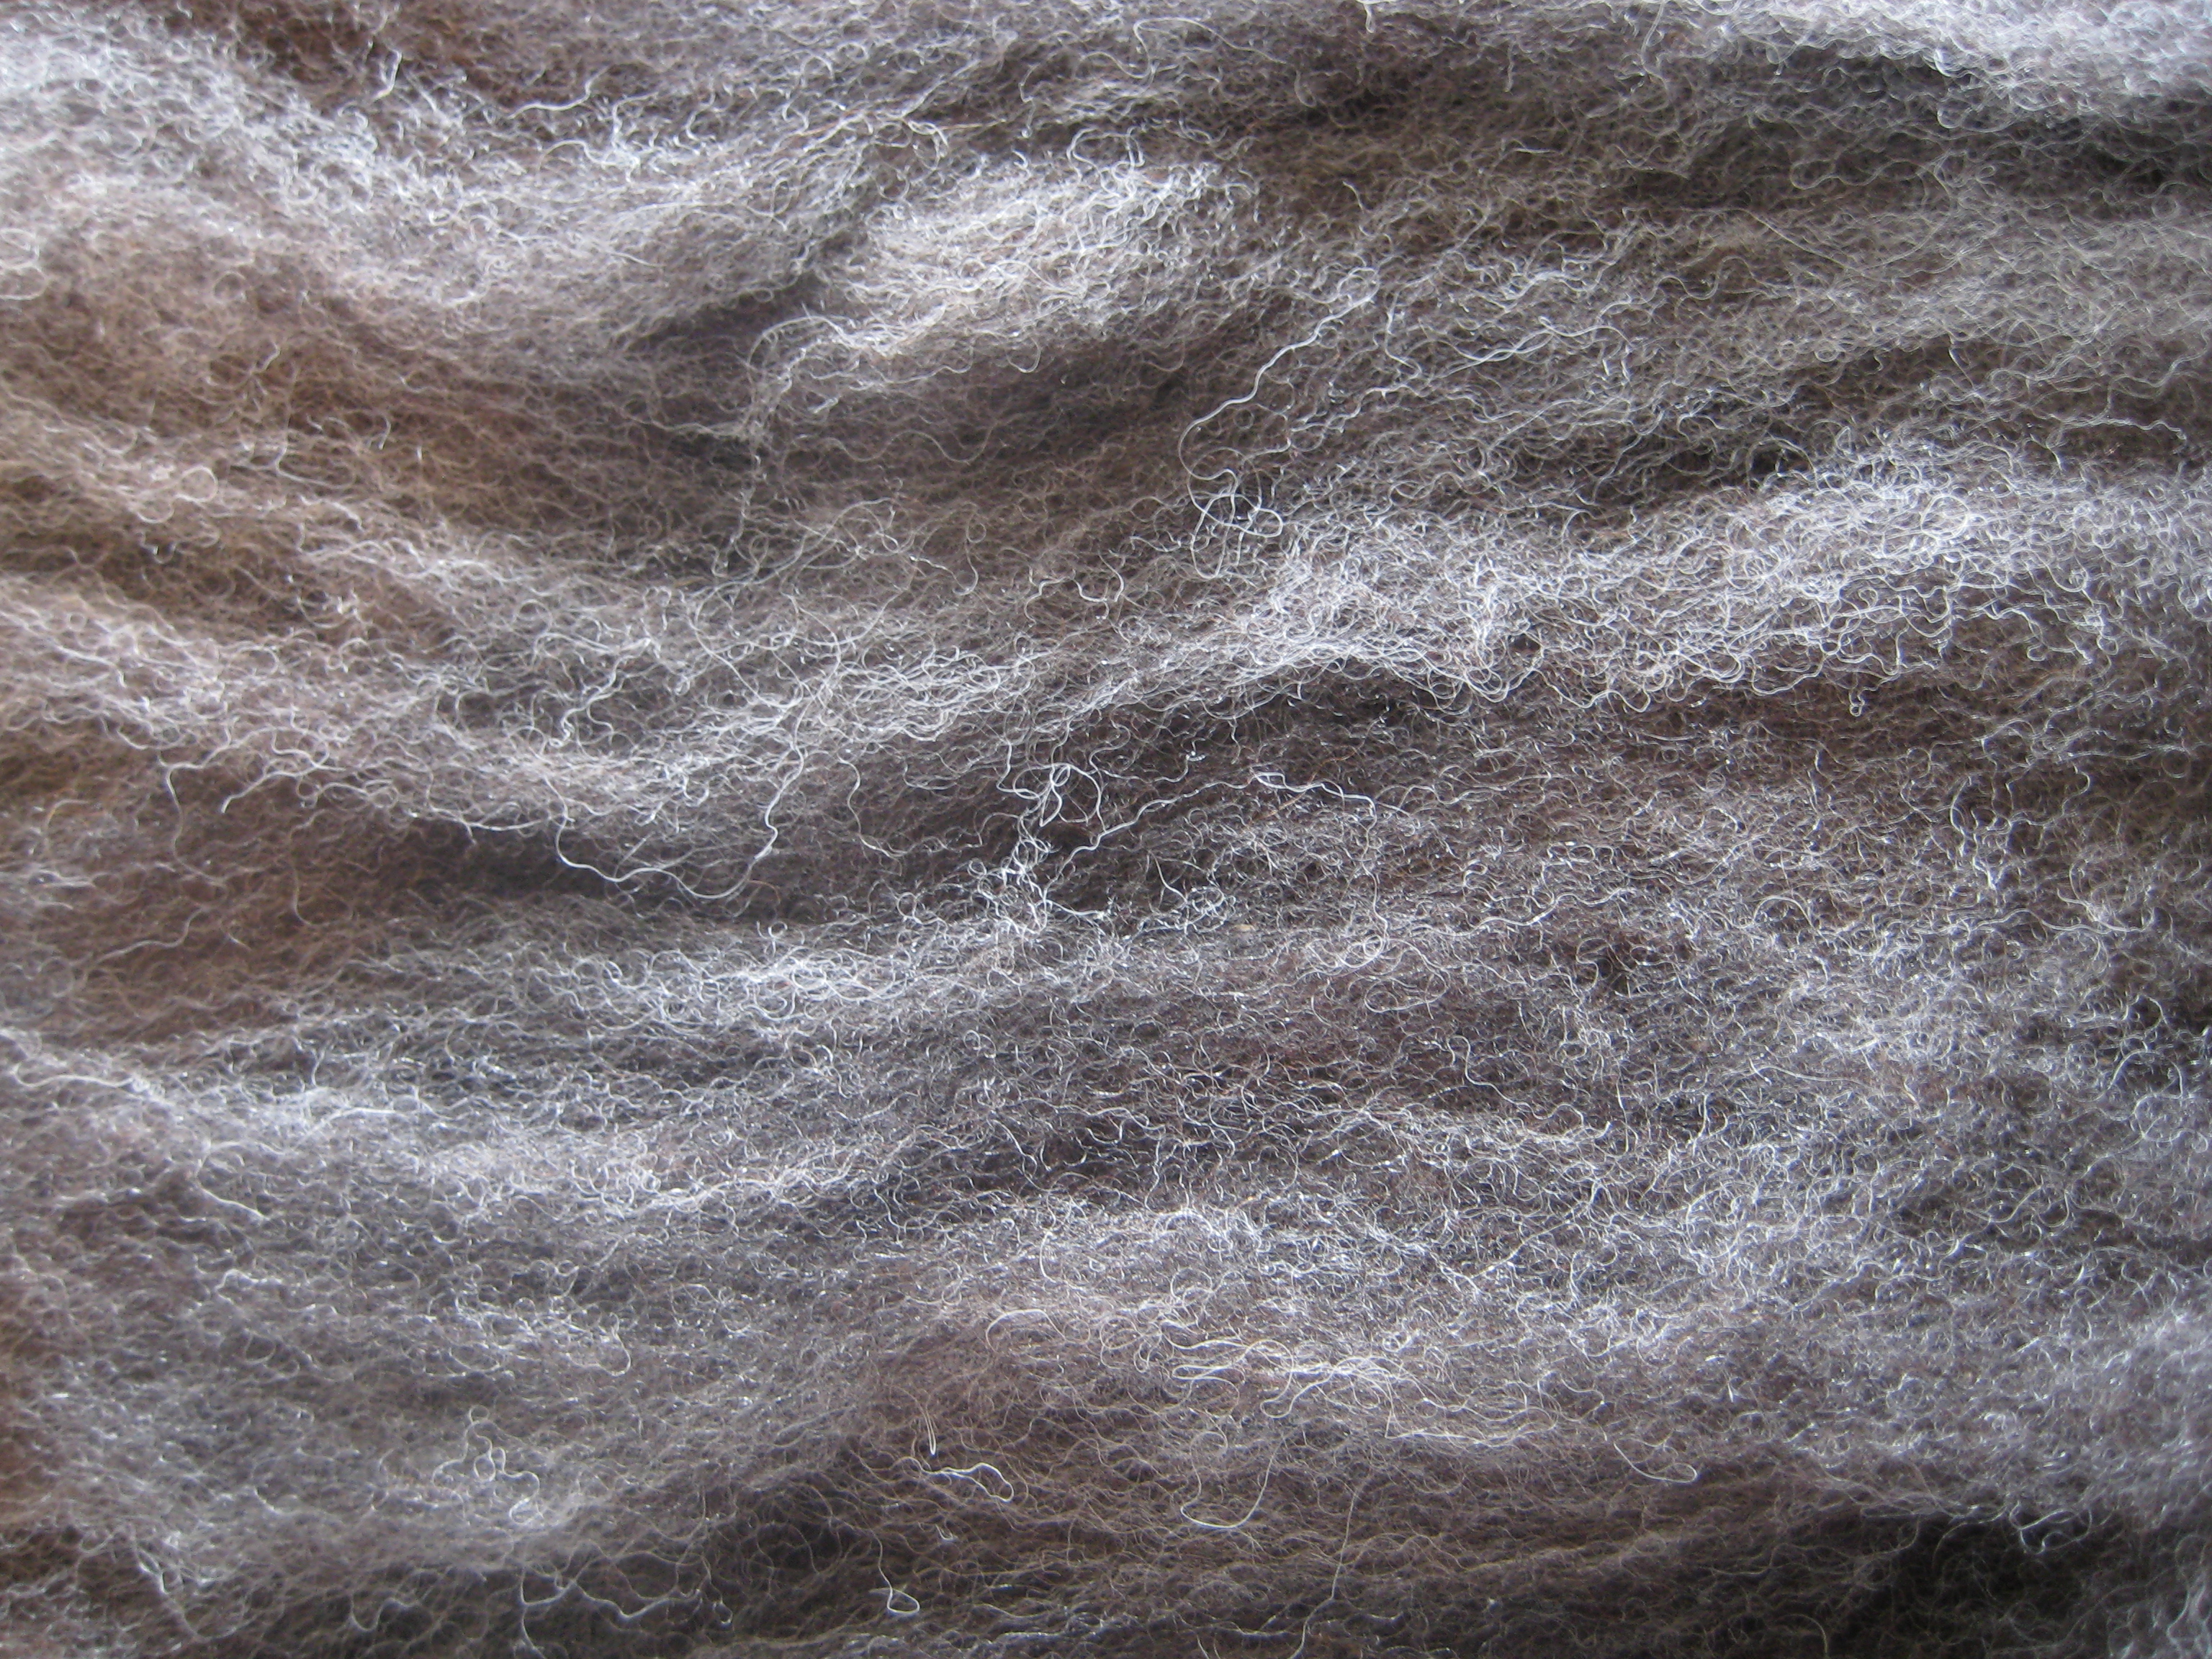
So first I had to make the felt. I laid out strips in one direction.
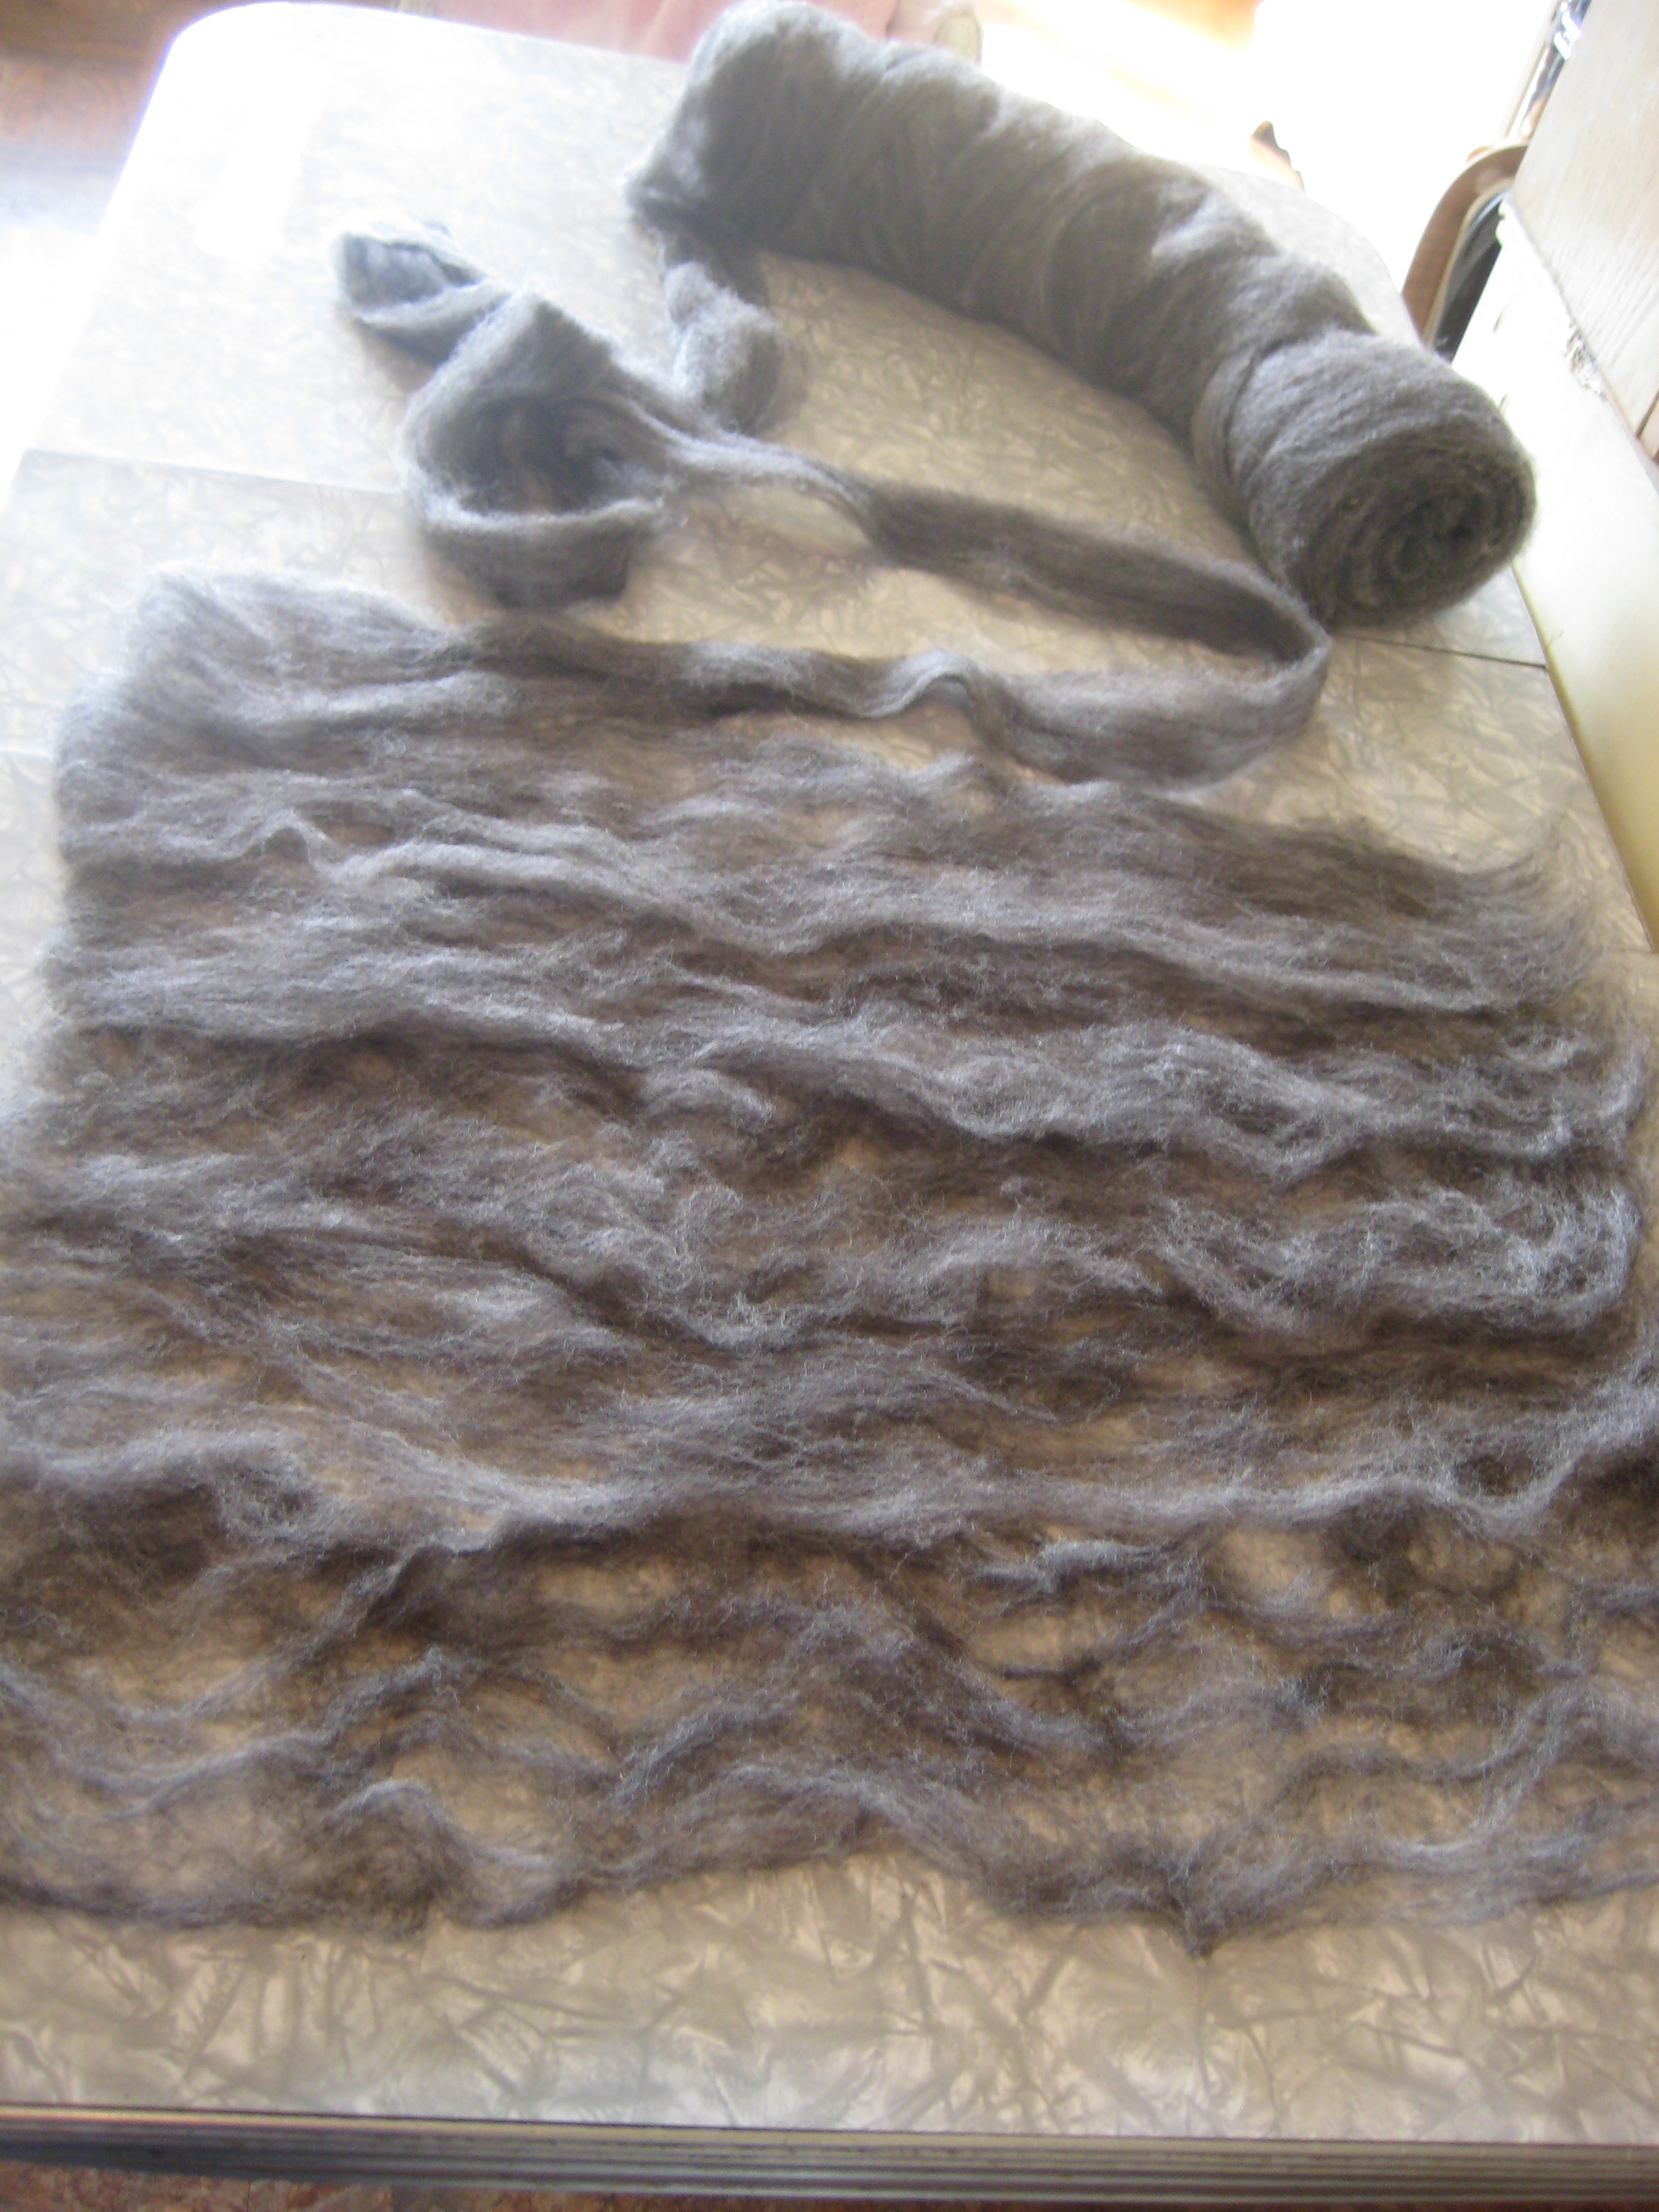
Then I laid more strips on top of that in the opposite direction.
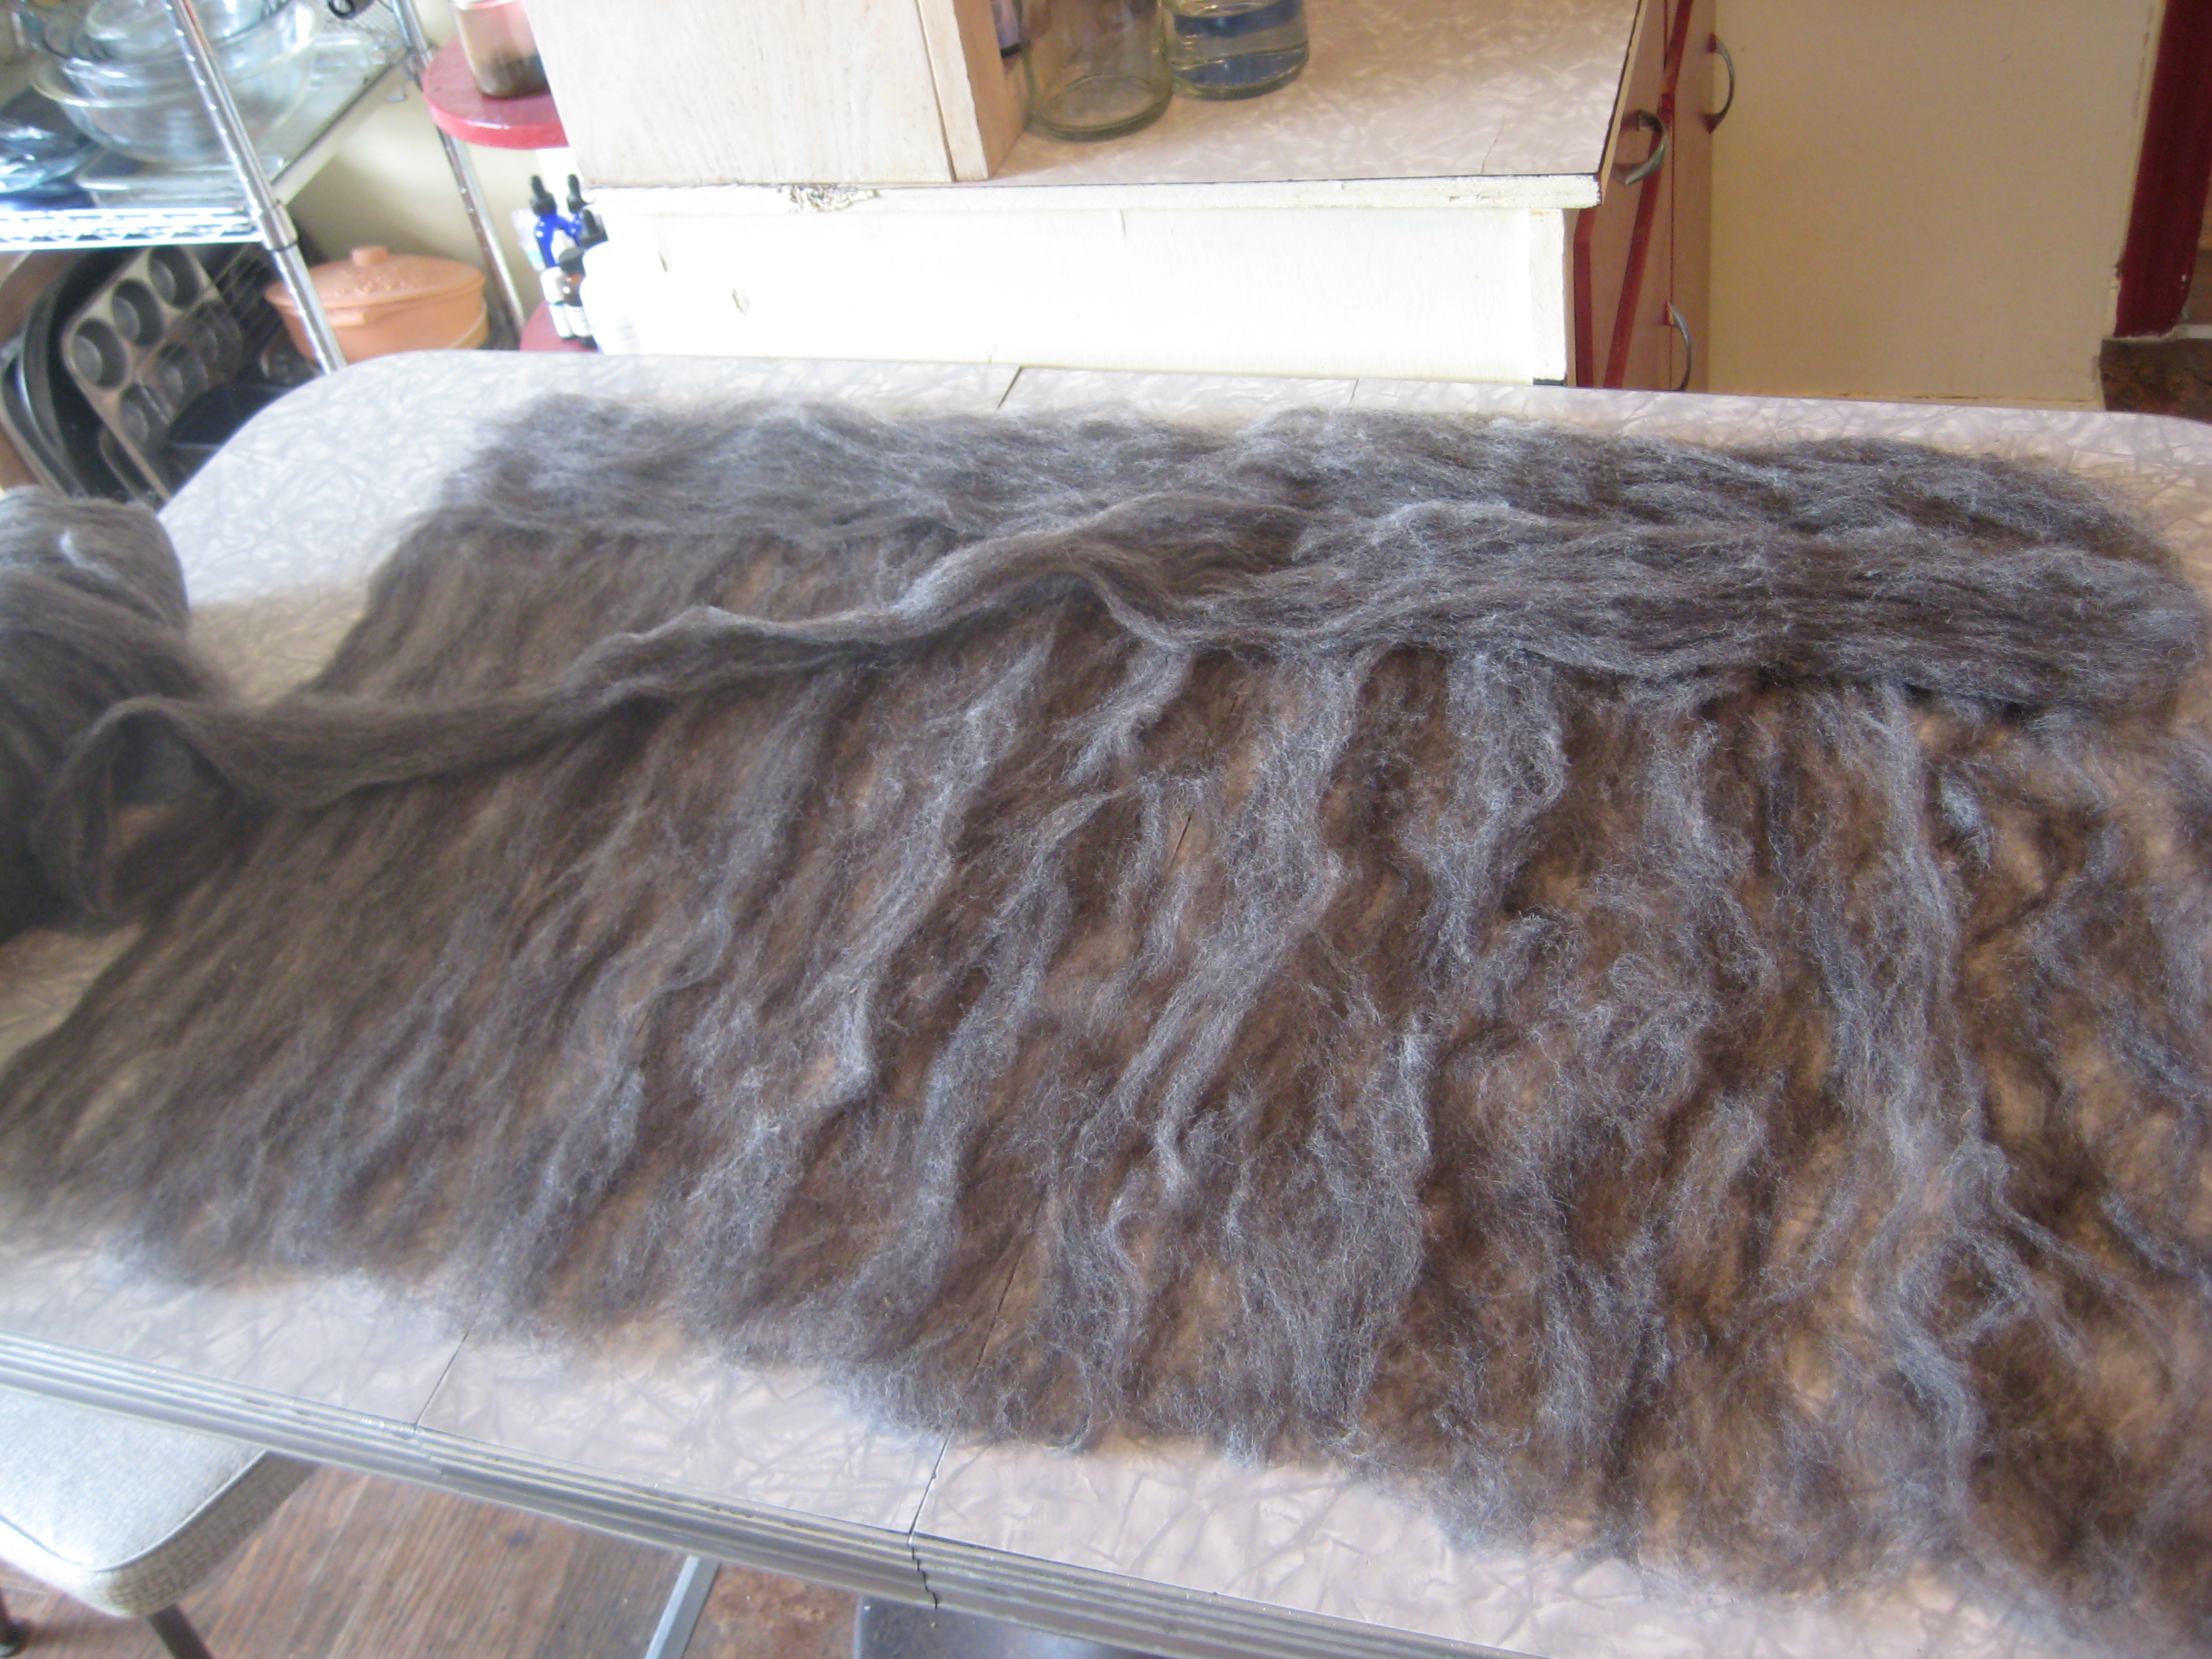
And a few more layers until I had a nice thick pile.
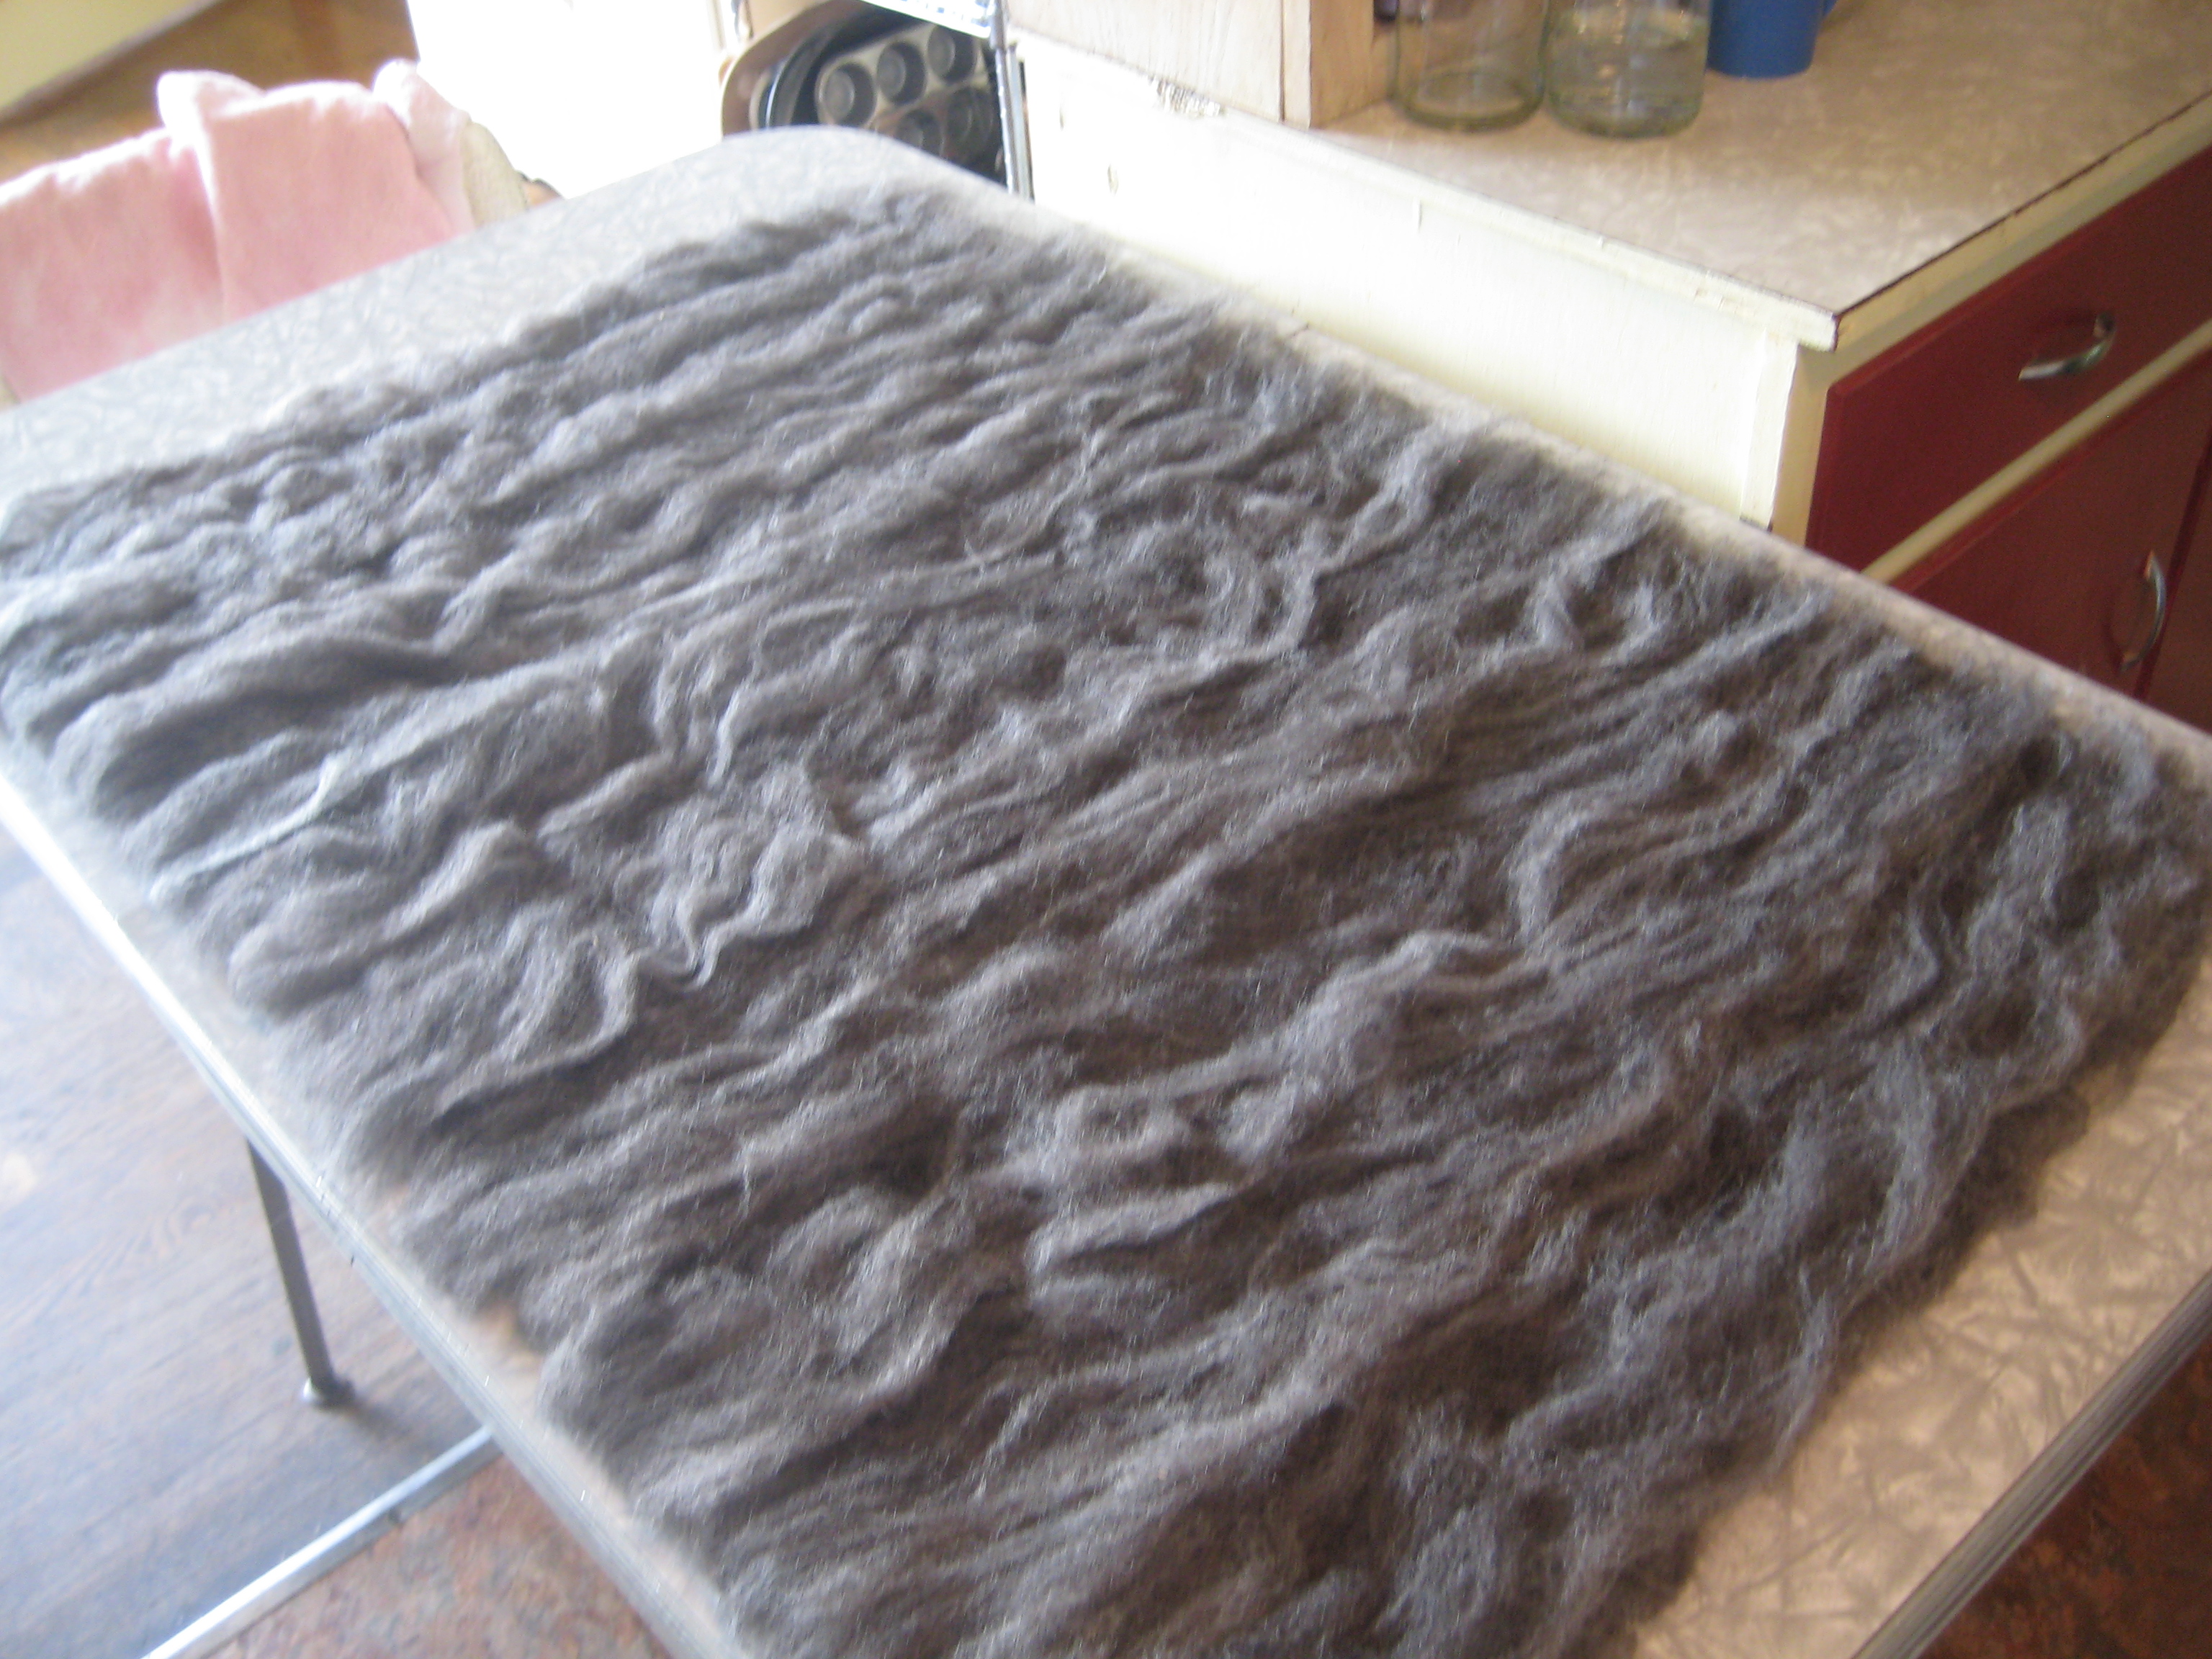
Close up.
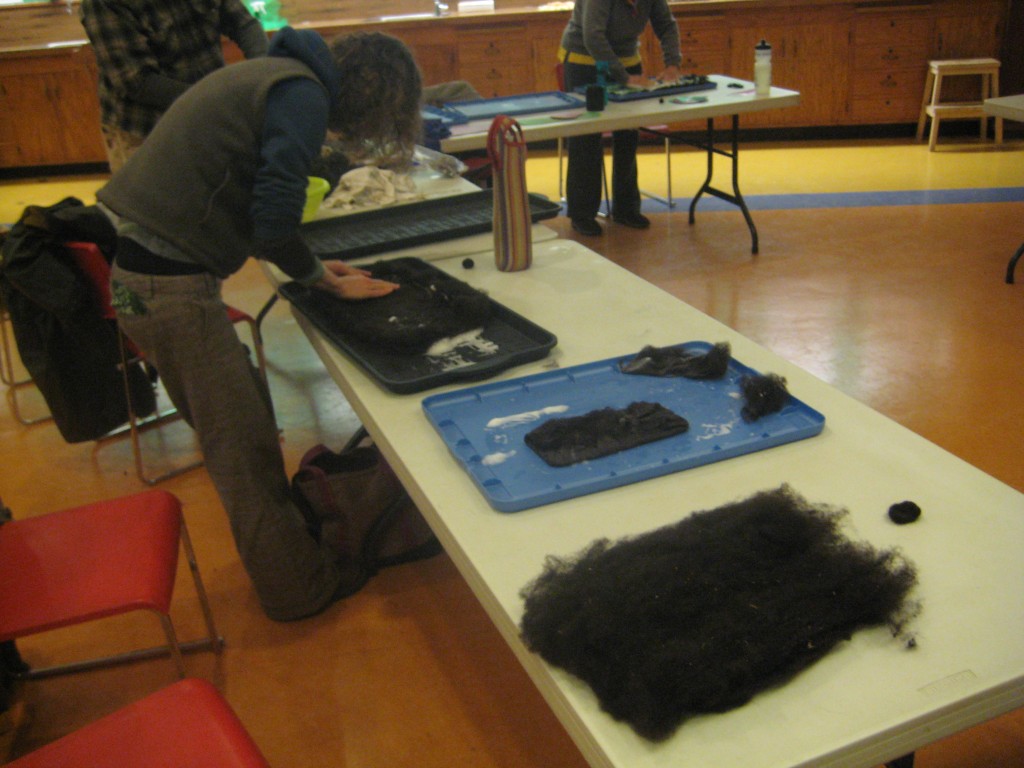
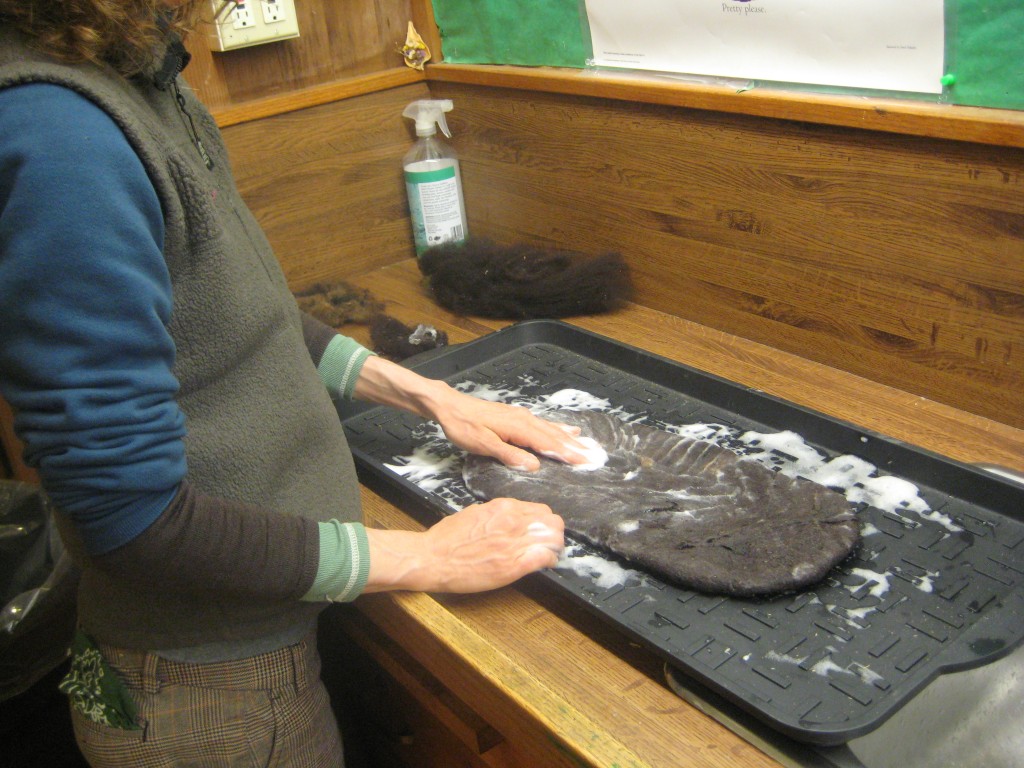
Then I dribbled warm soapy water all over it.
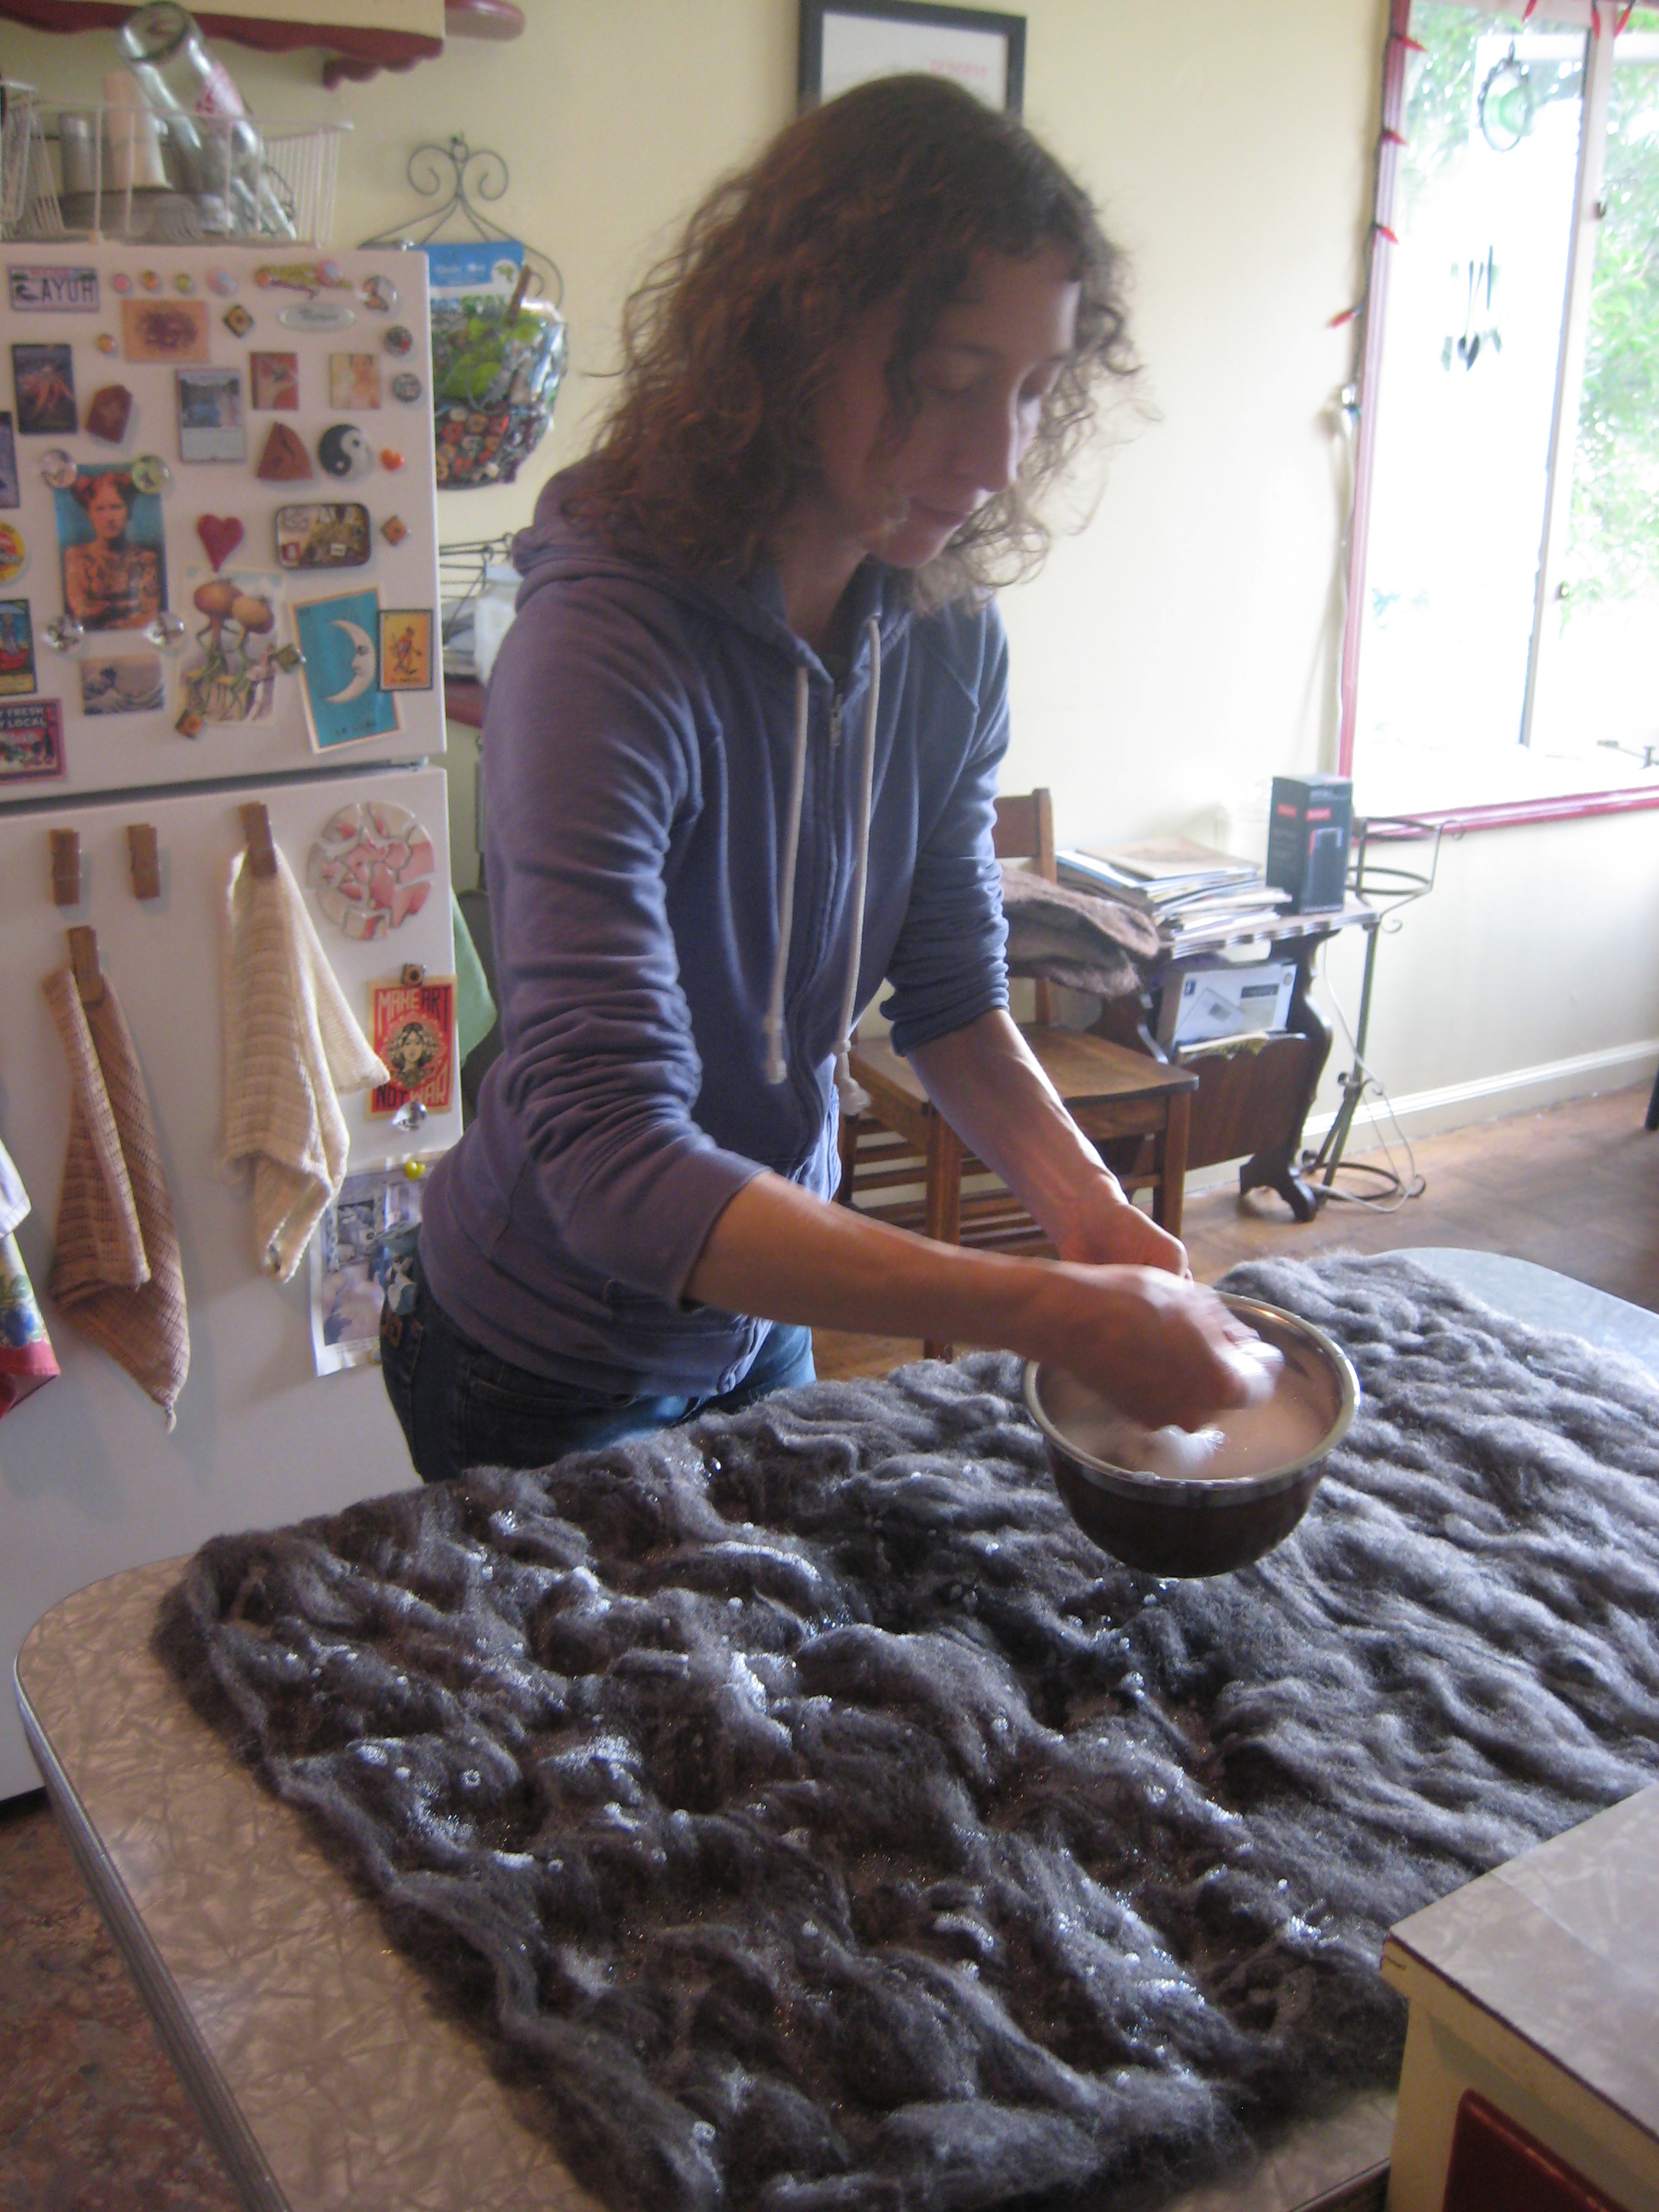
Then I began to gently PRESS the wool, letting it soak up the water and start to squish together.
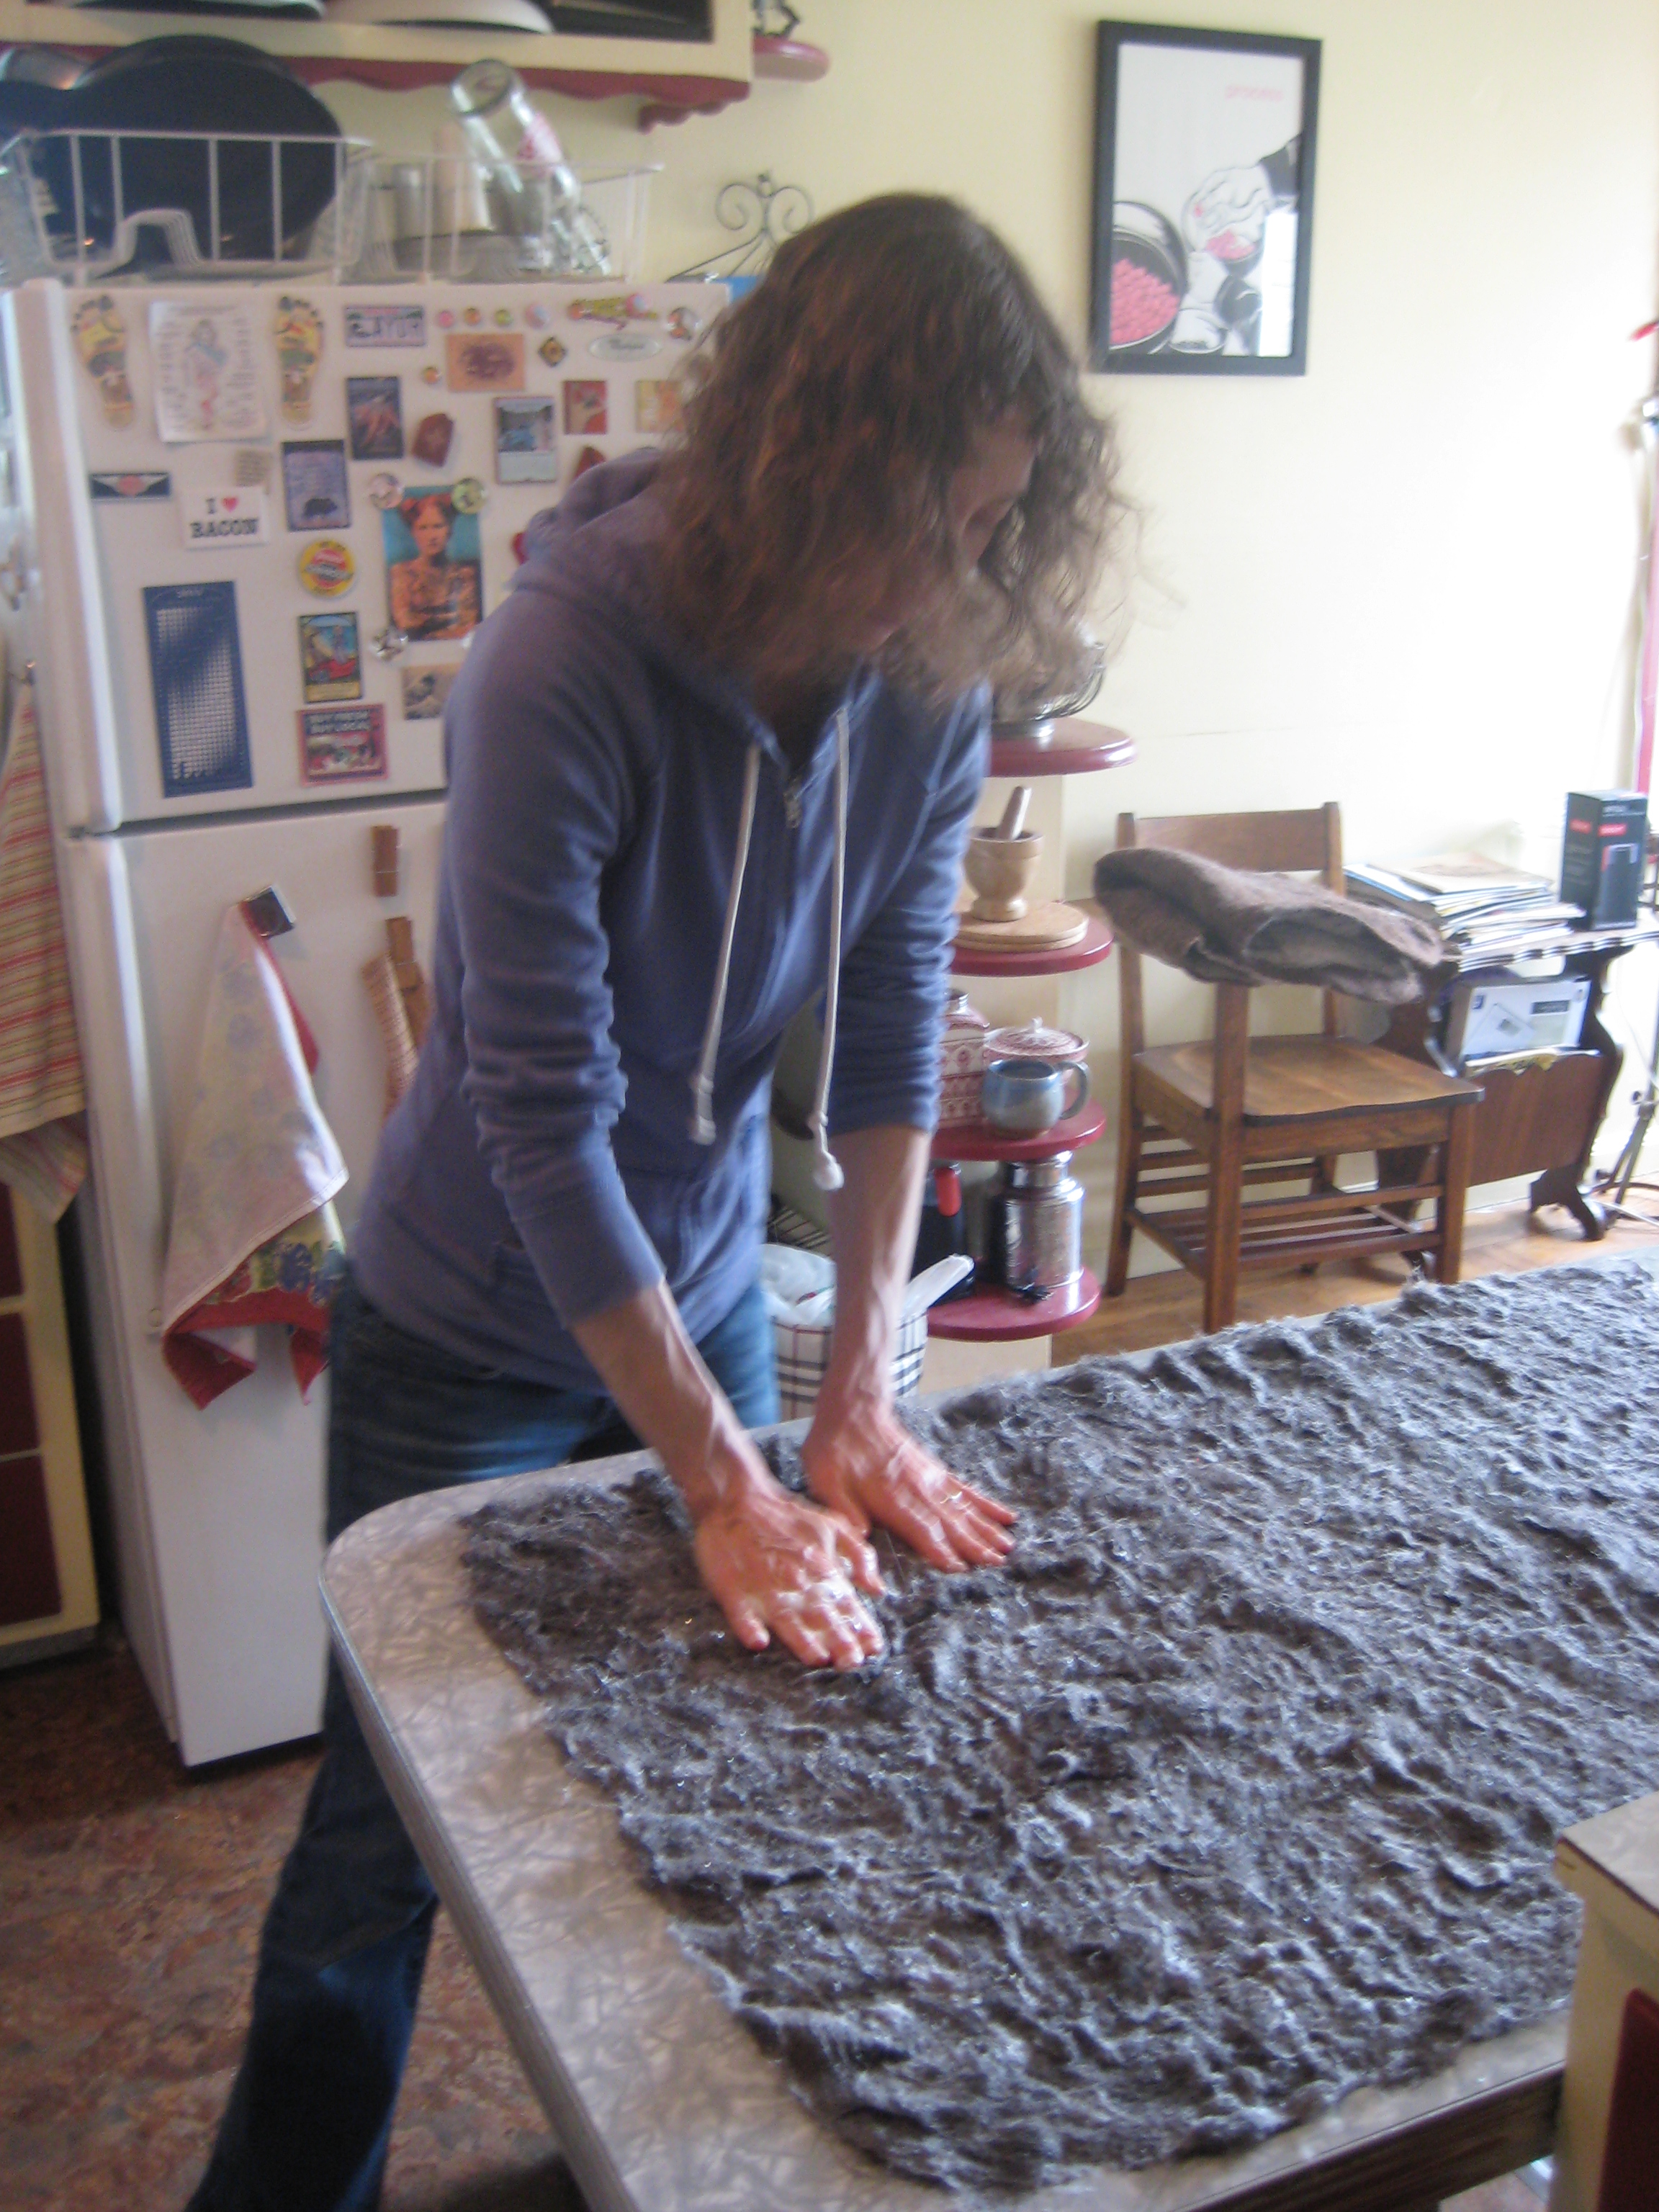
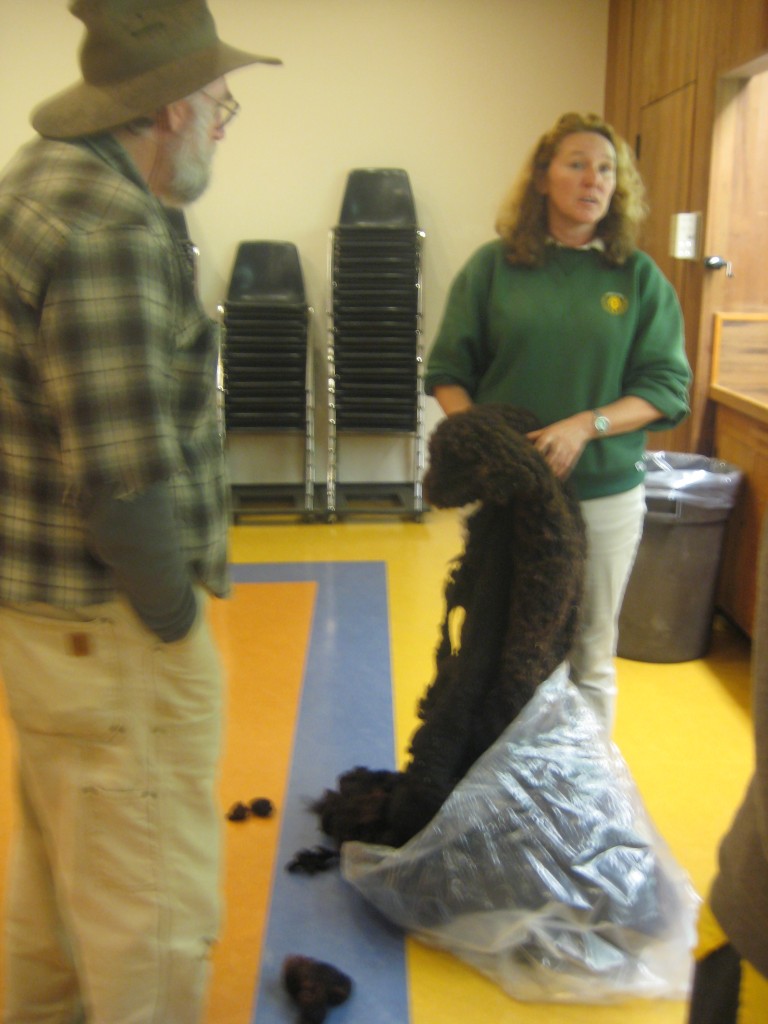
After a while of that I started to gently rub with my hands back and forth, creating friction. I used a little plastic mesh bag to help create friction without disturbing the fibers too much until they really started to cling strongly together. Then I began to rub pretty vigorously as the fibers shrank and got more tightly enmeshed.
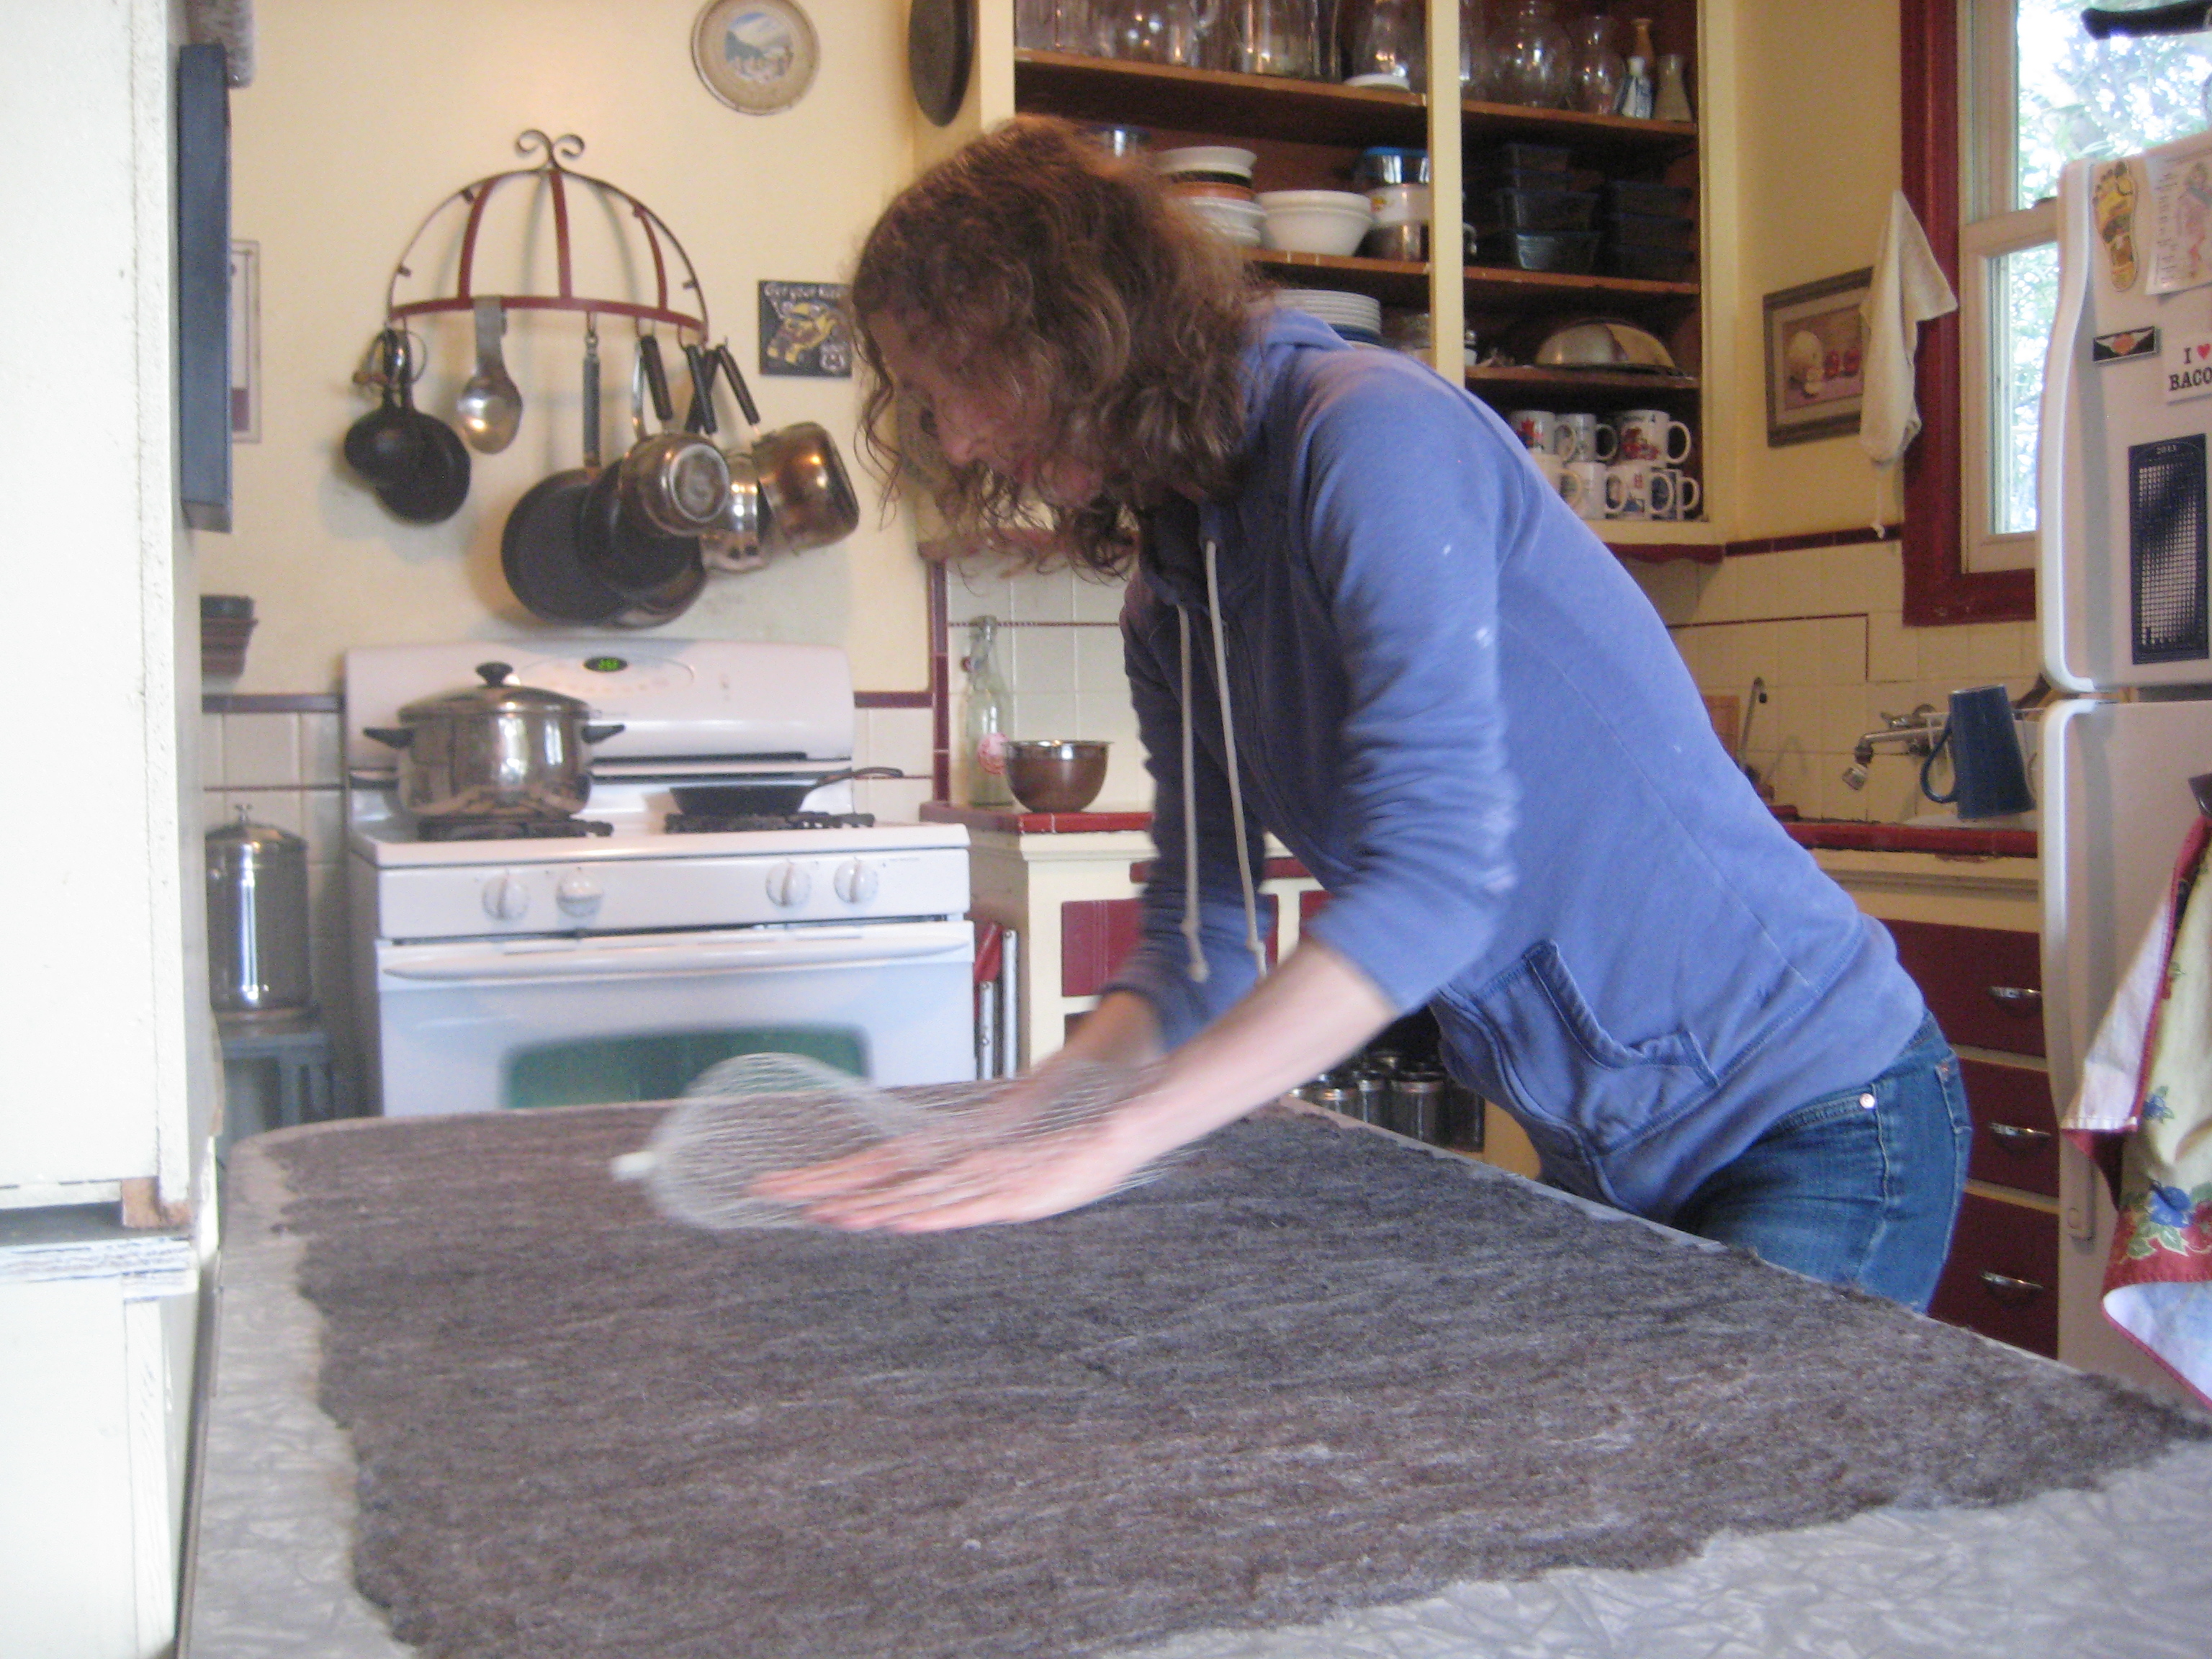
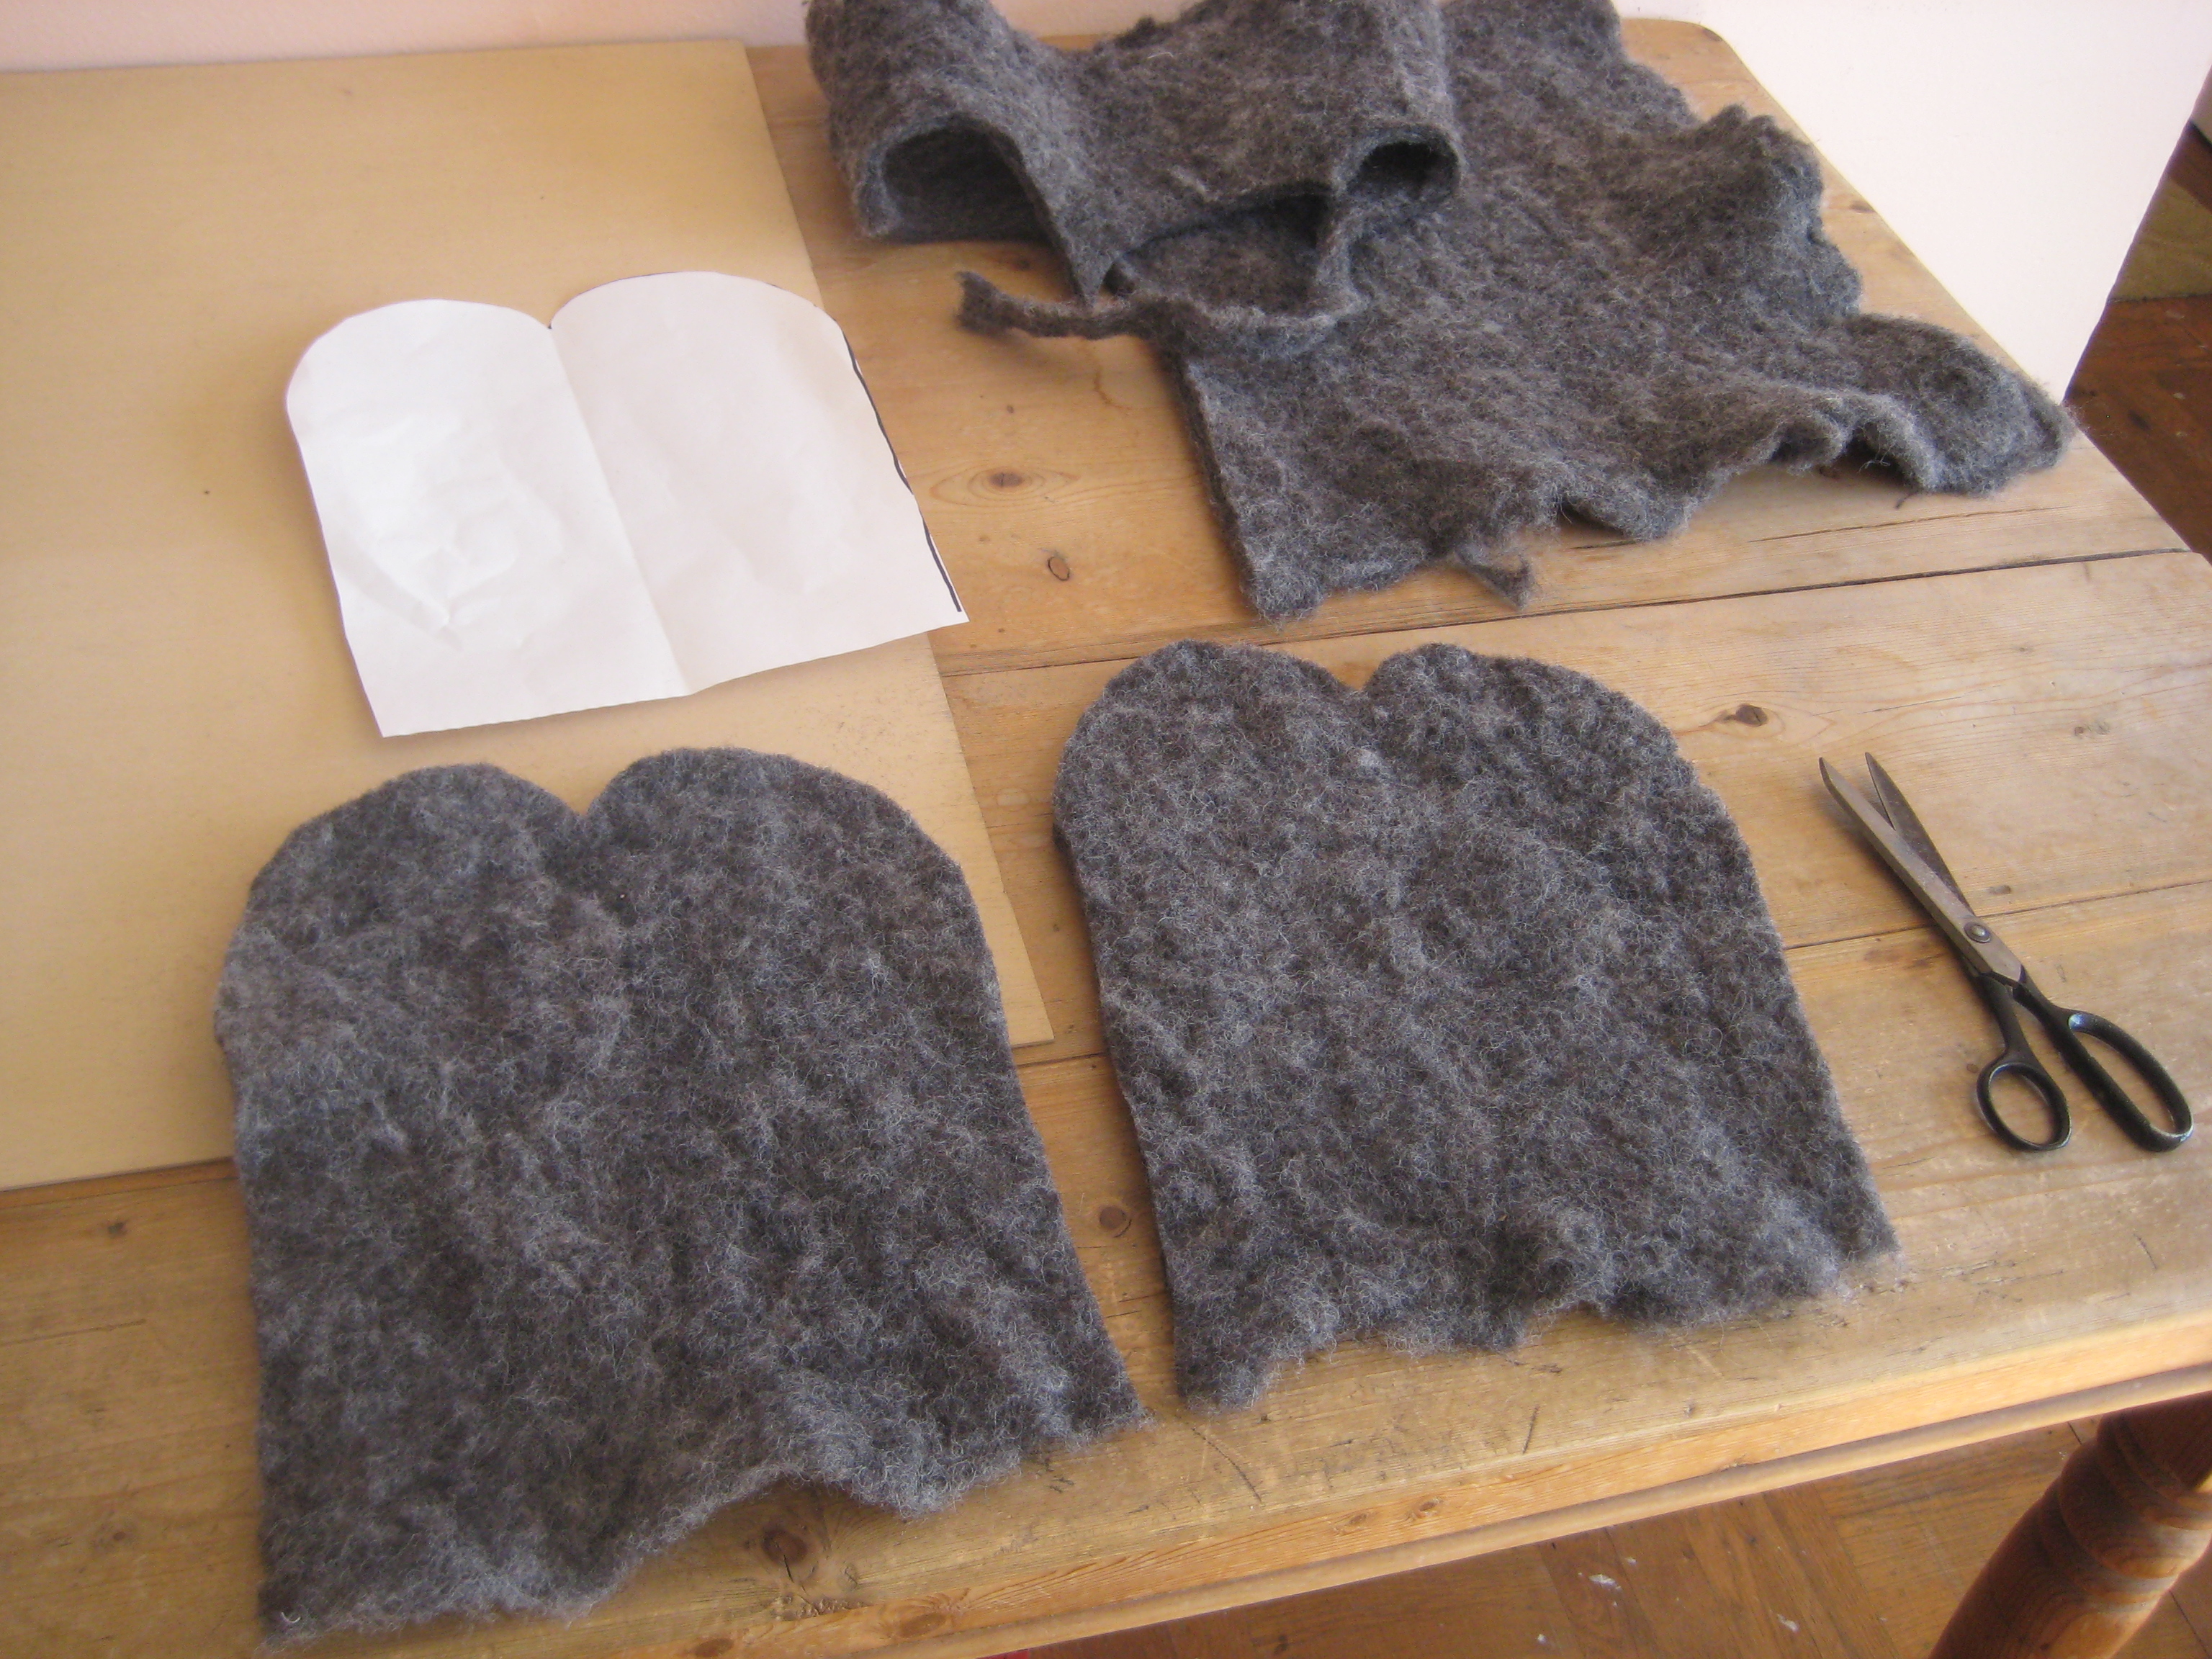
I actually ended up throwing it in a quick wash and spin cycle of the washing machine to felt it further, then let it air dry.
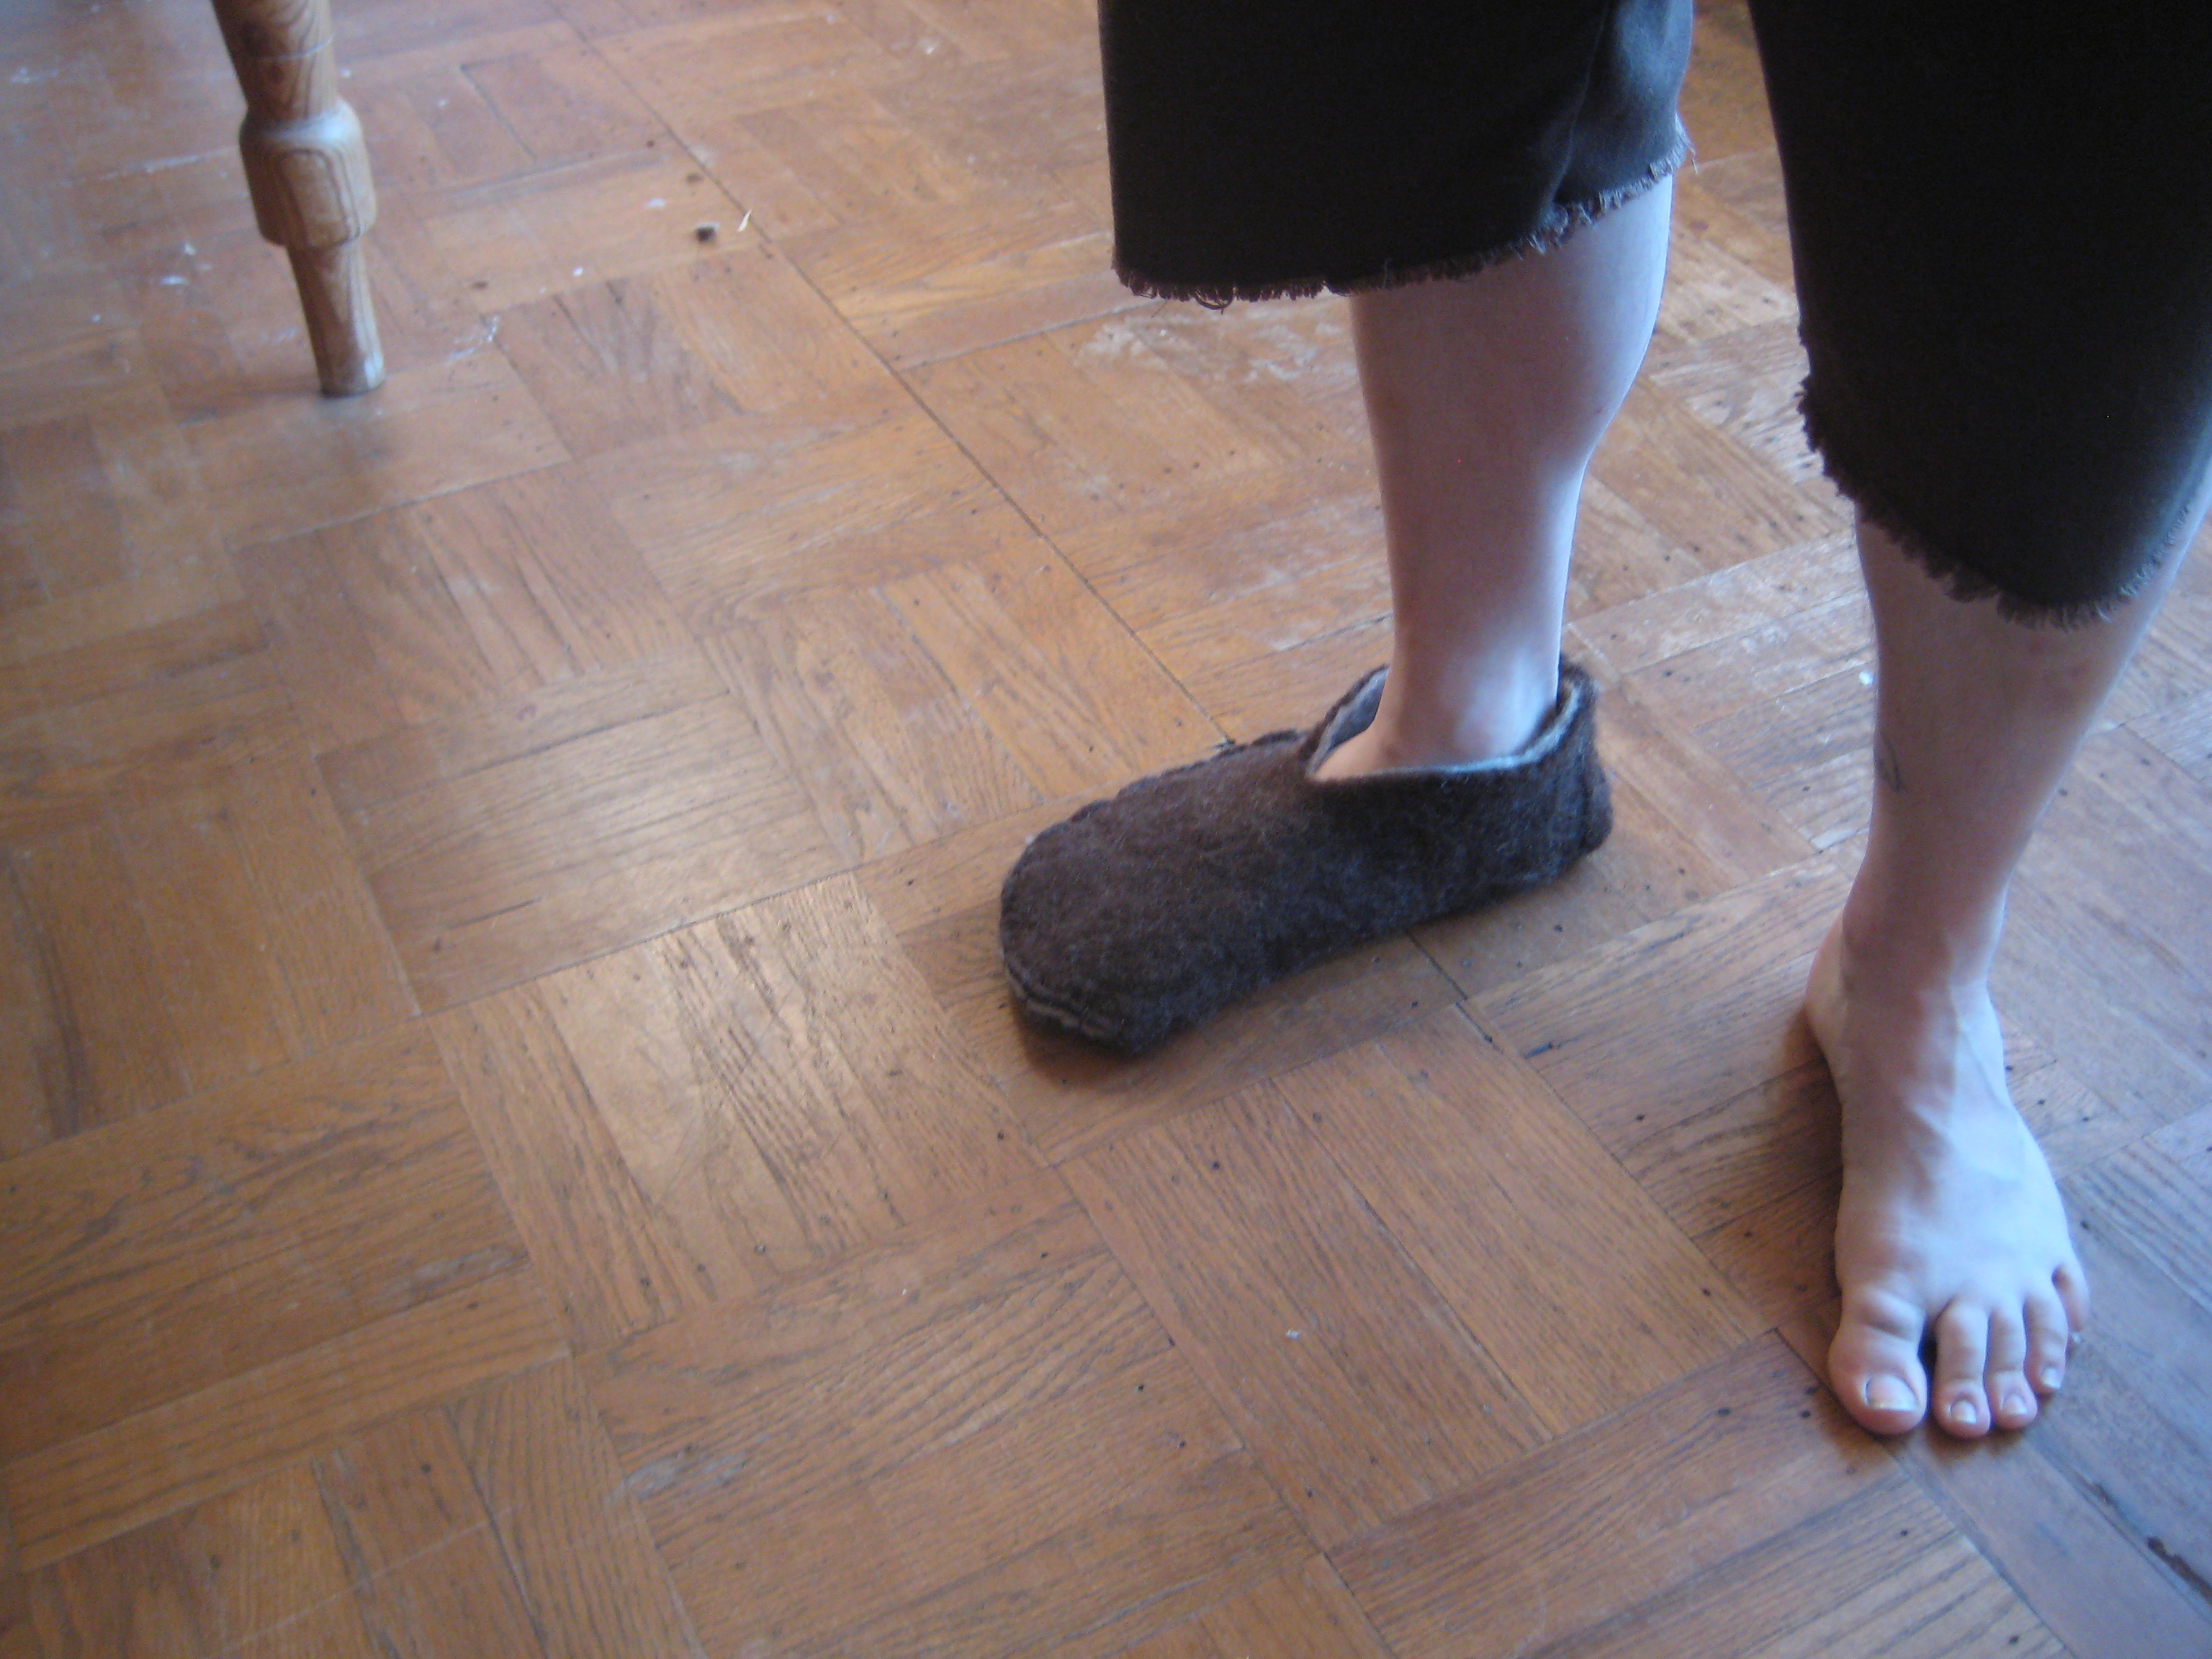
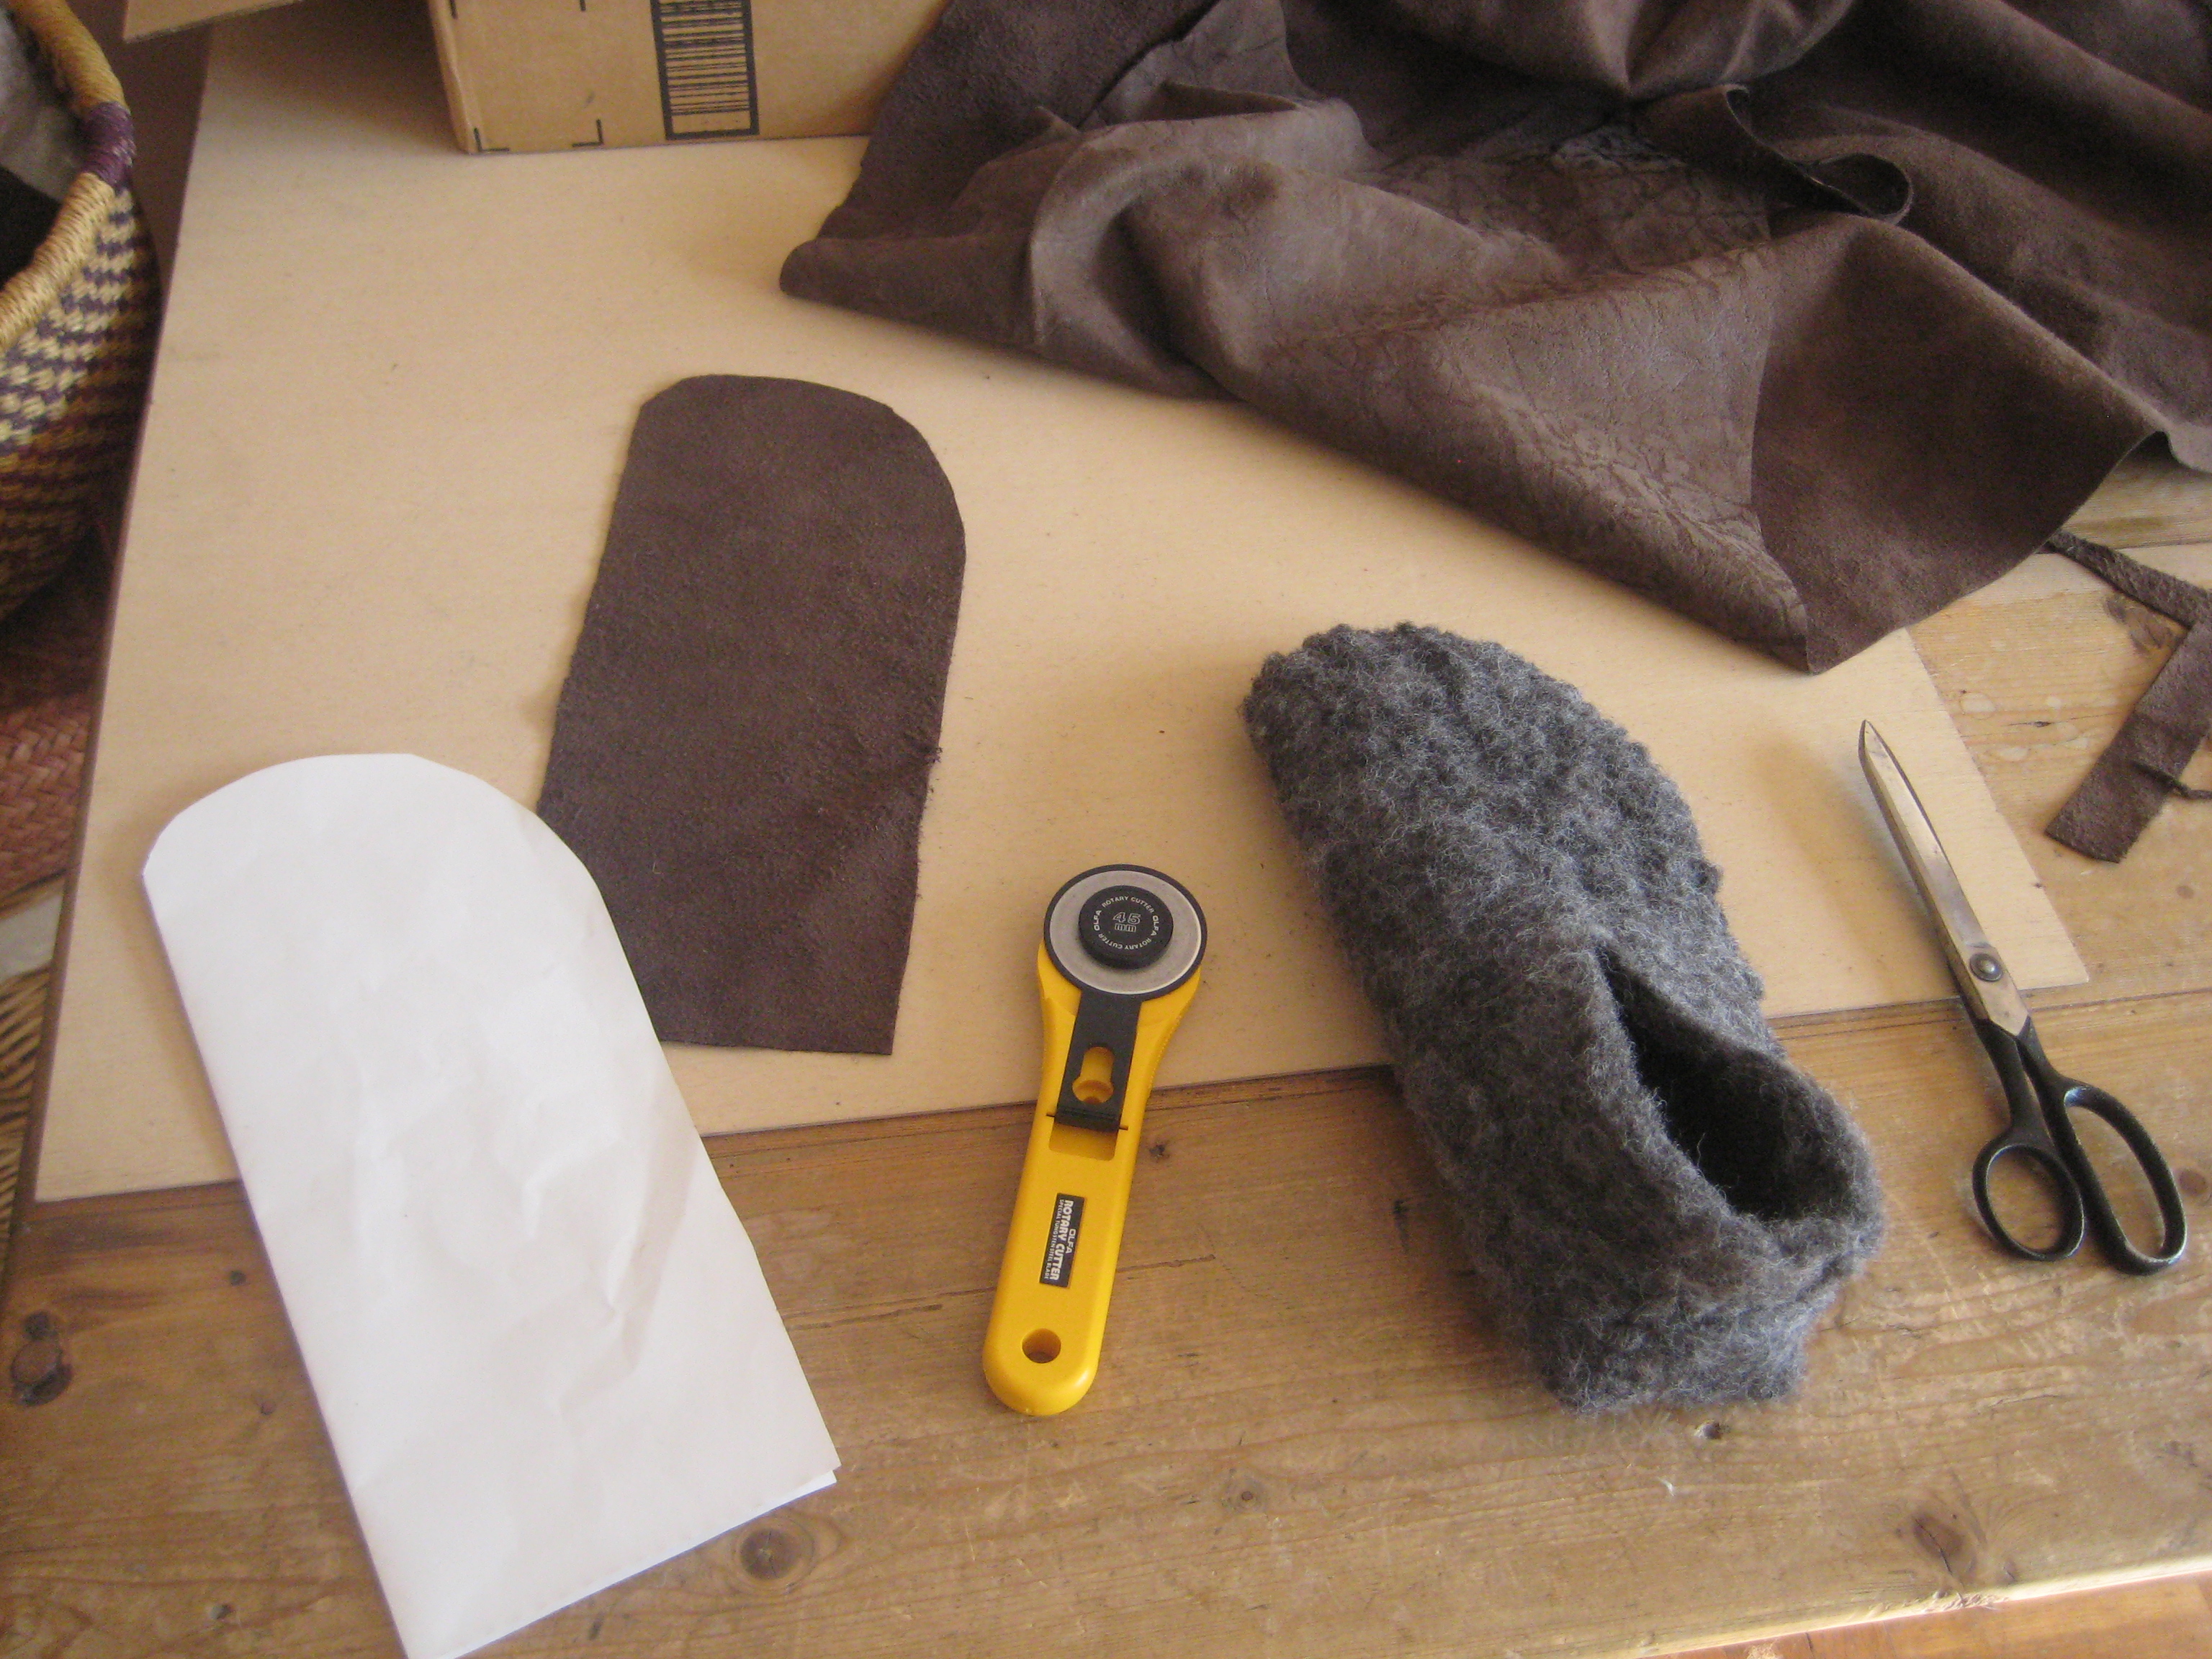
Once it was all dry we were ready to cut out our slipper patterns we had found online here.
tools.
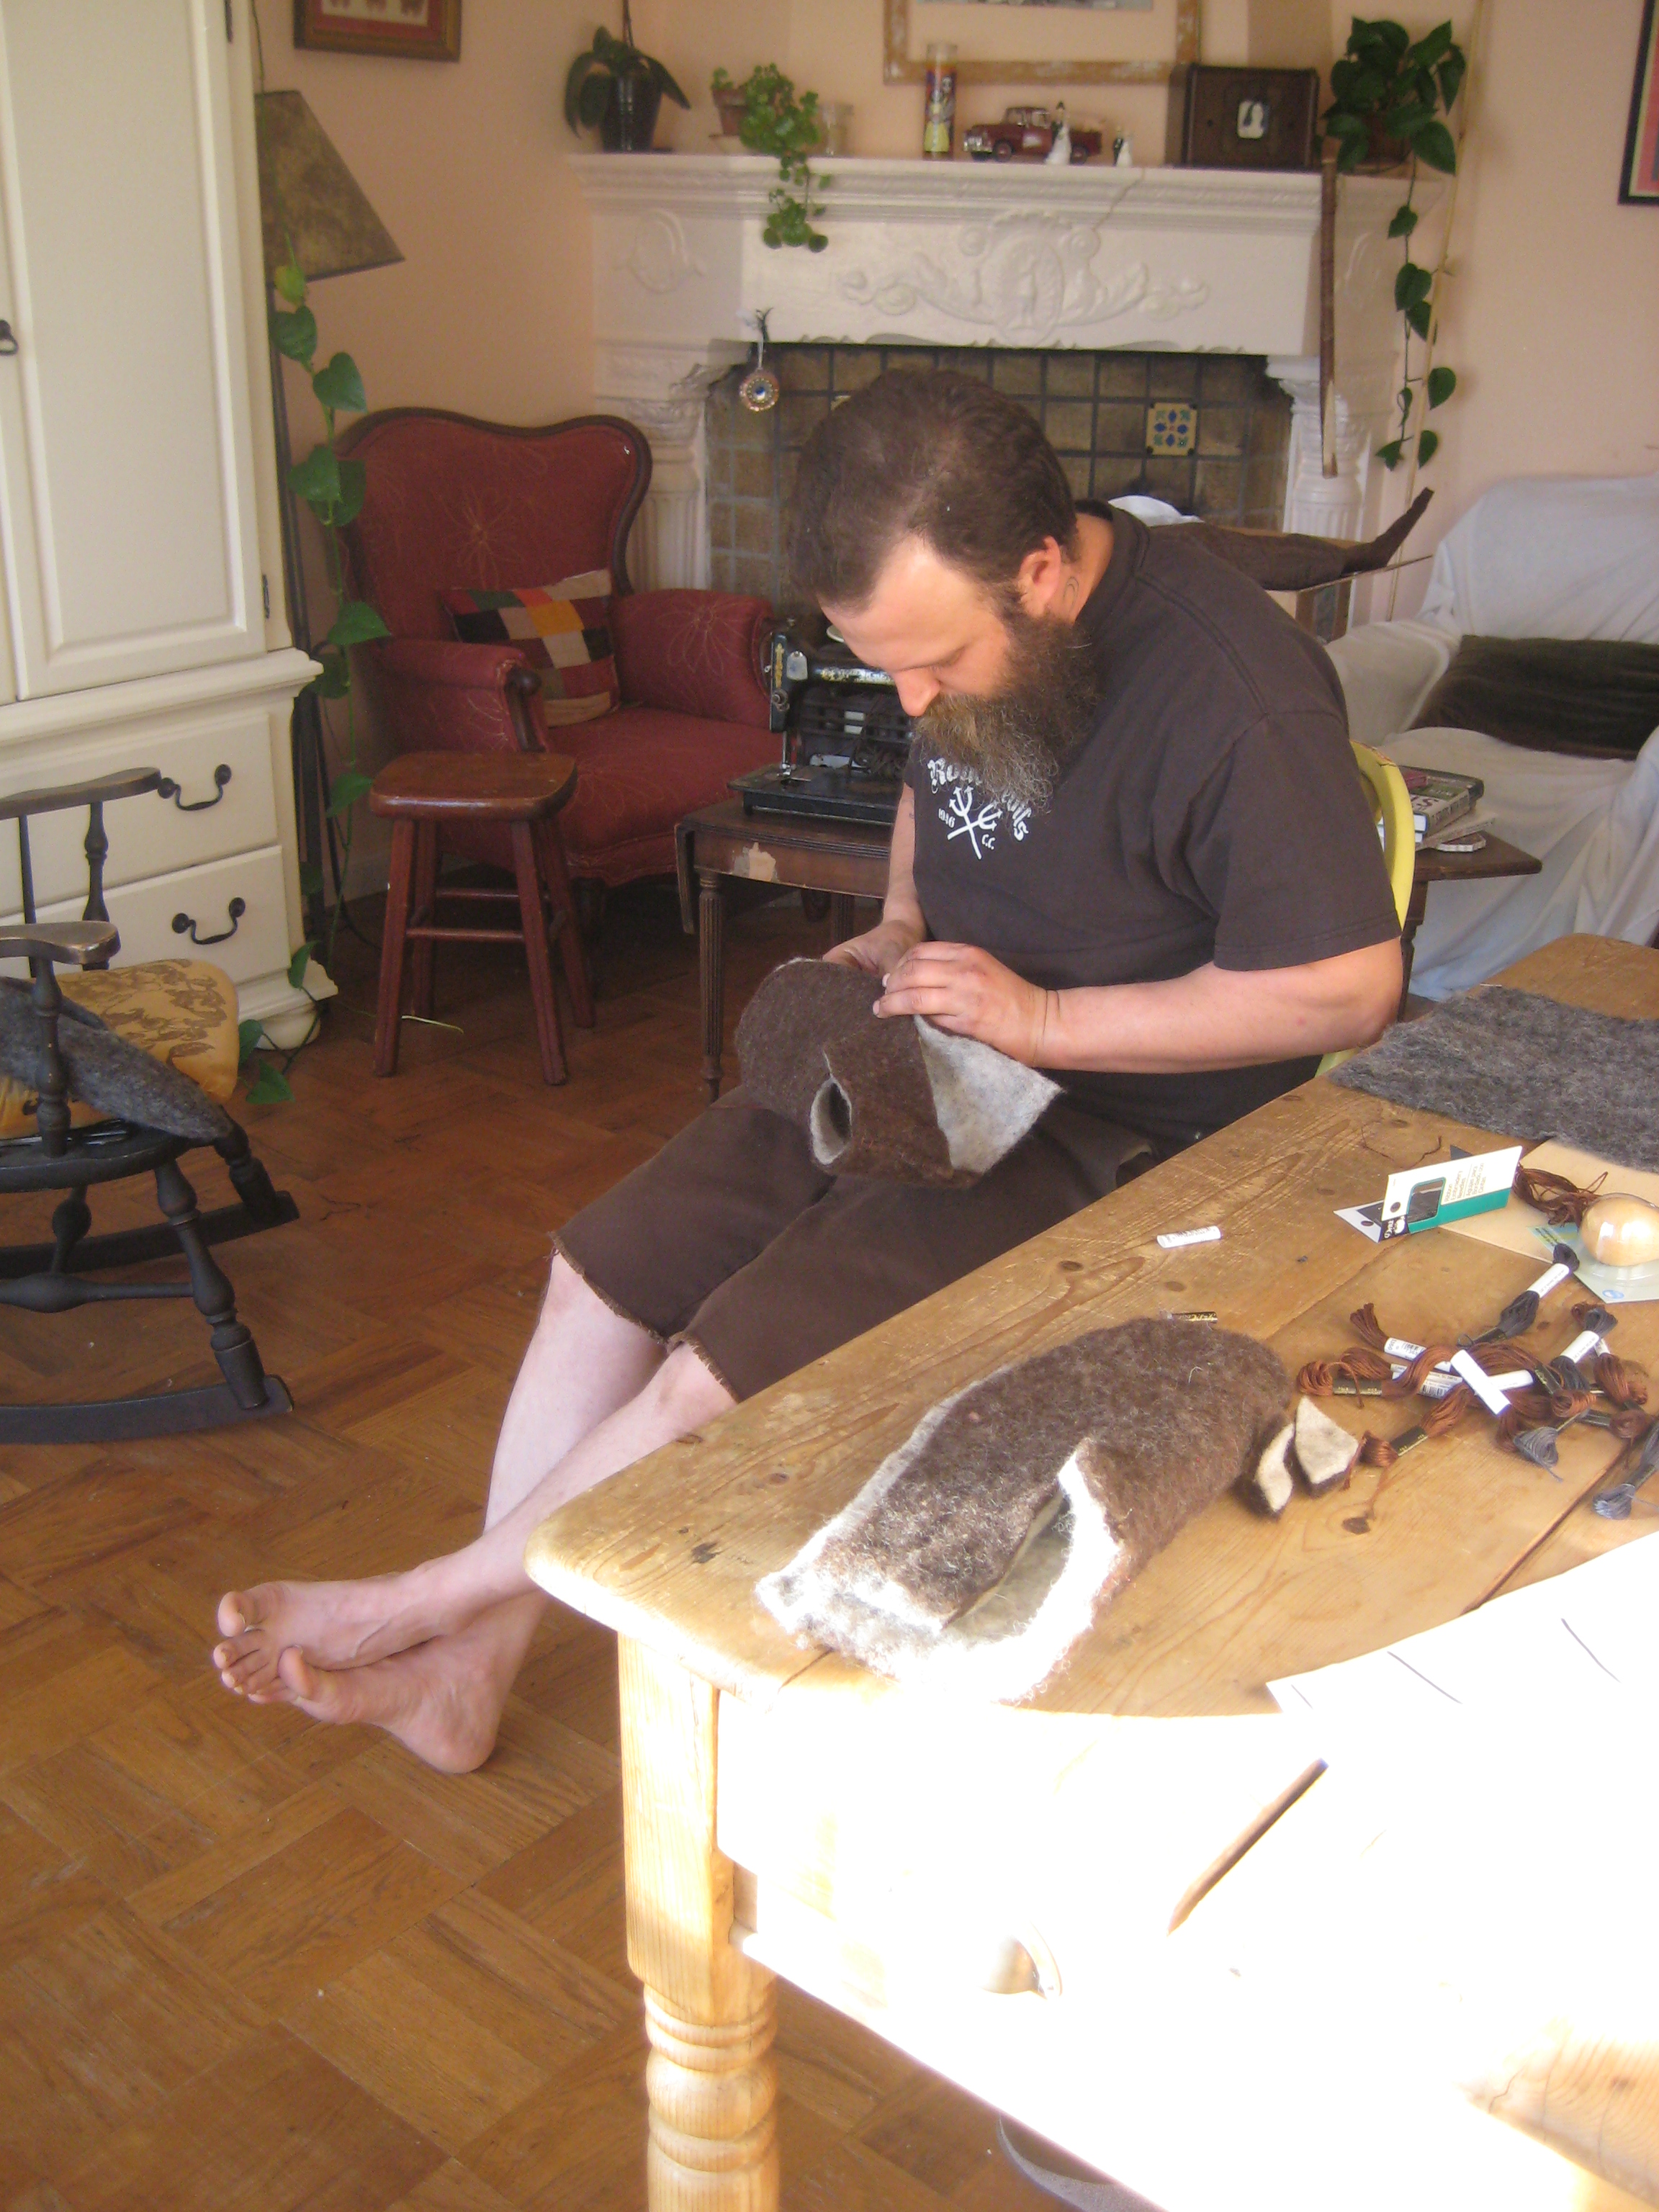
Sean and his slipper.

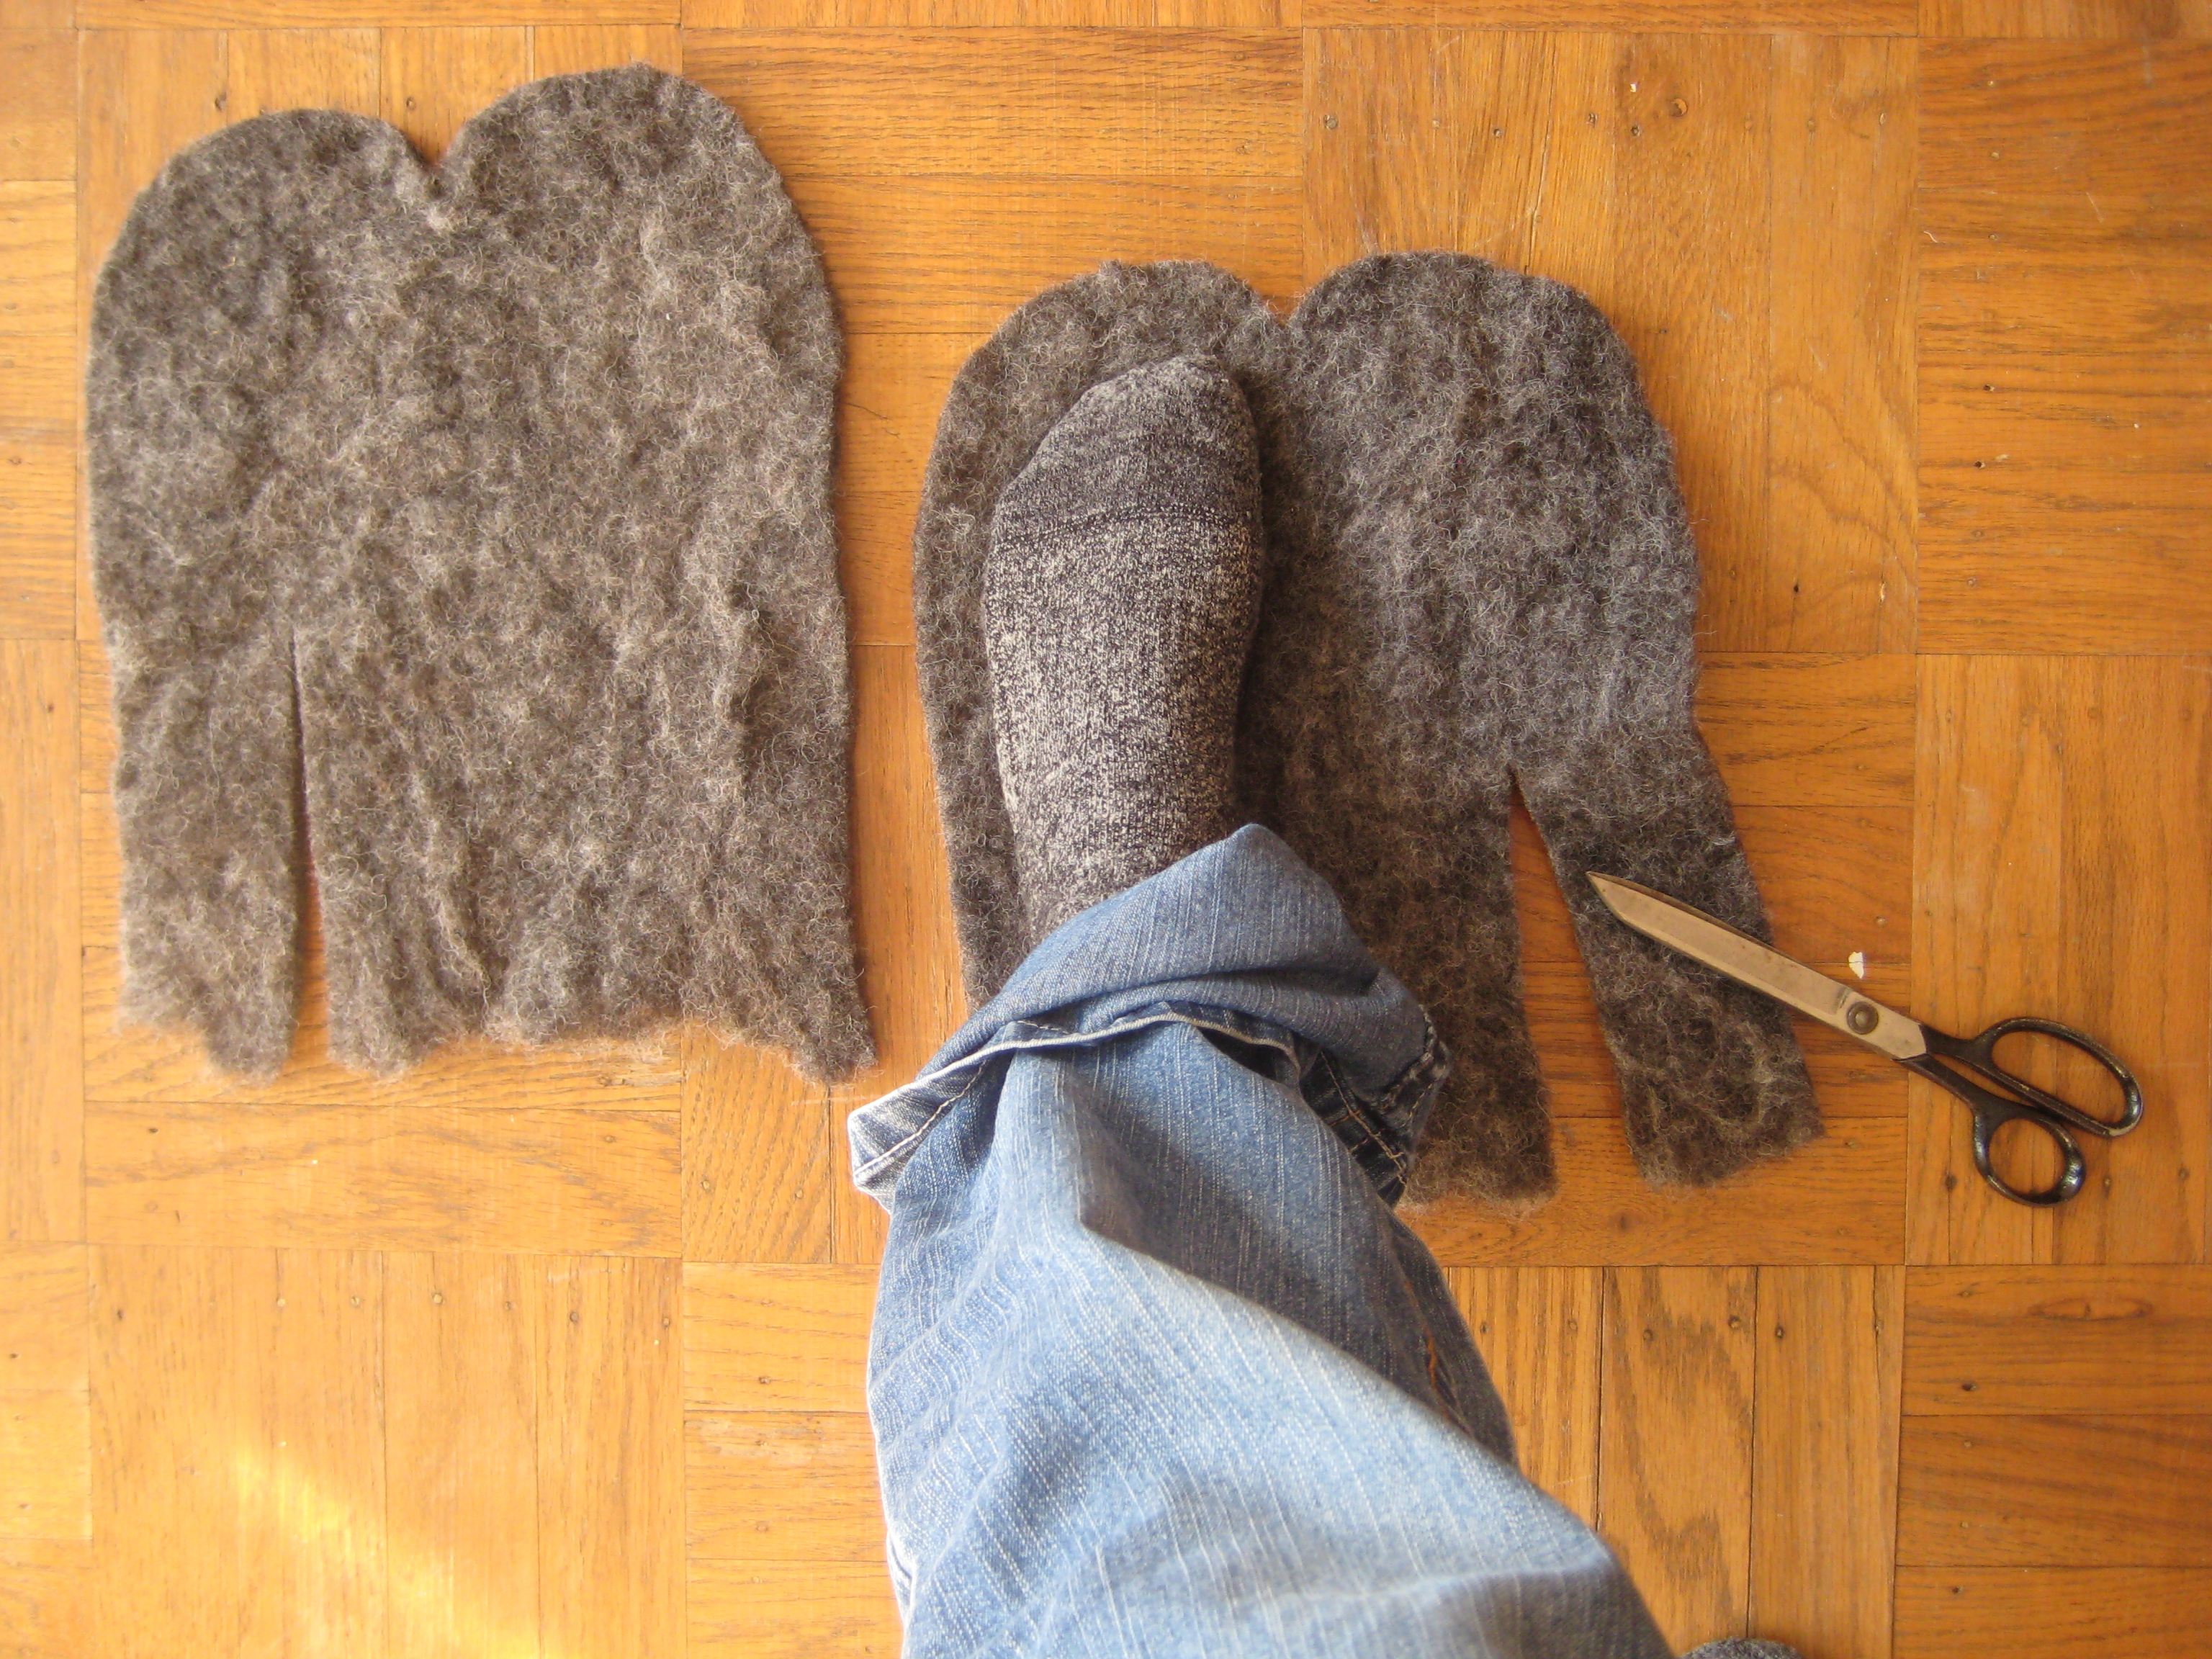
the heel.
Sean has only finished one so far.
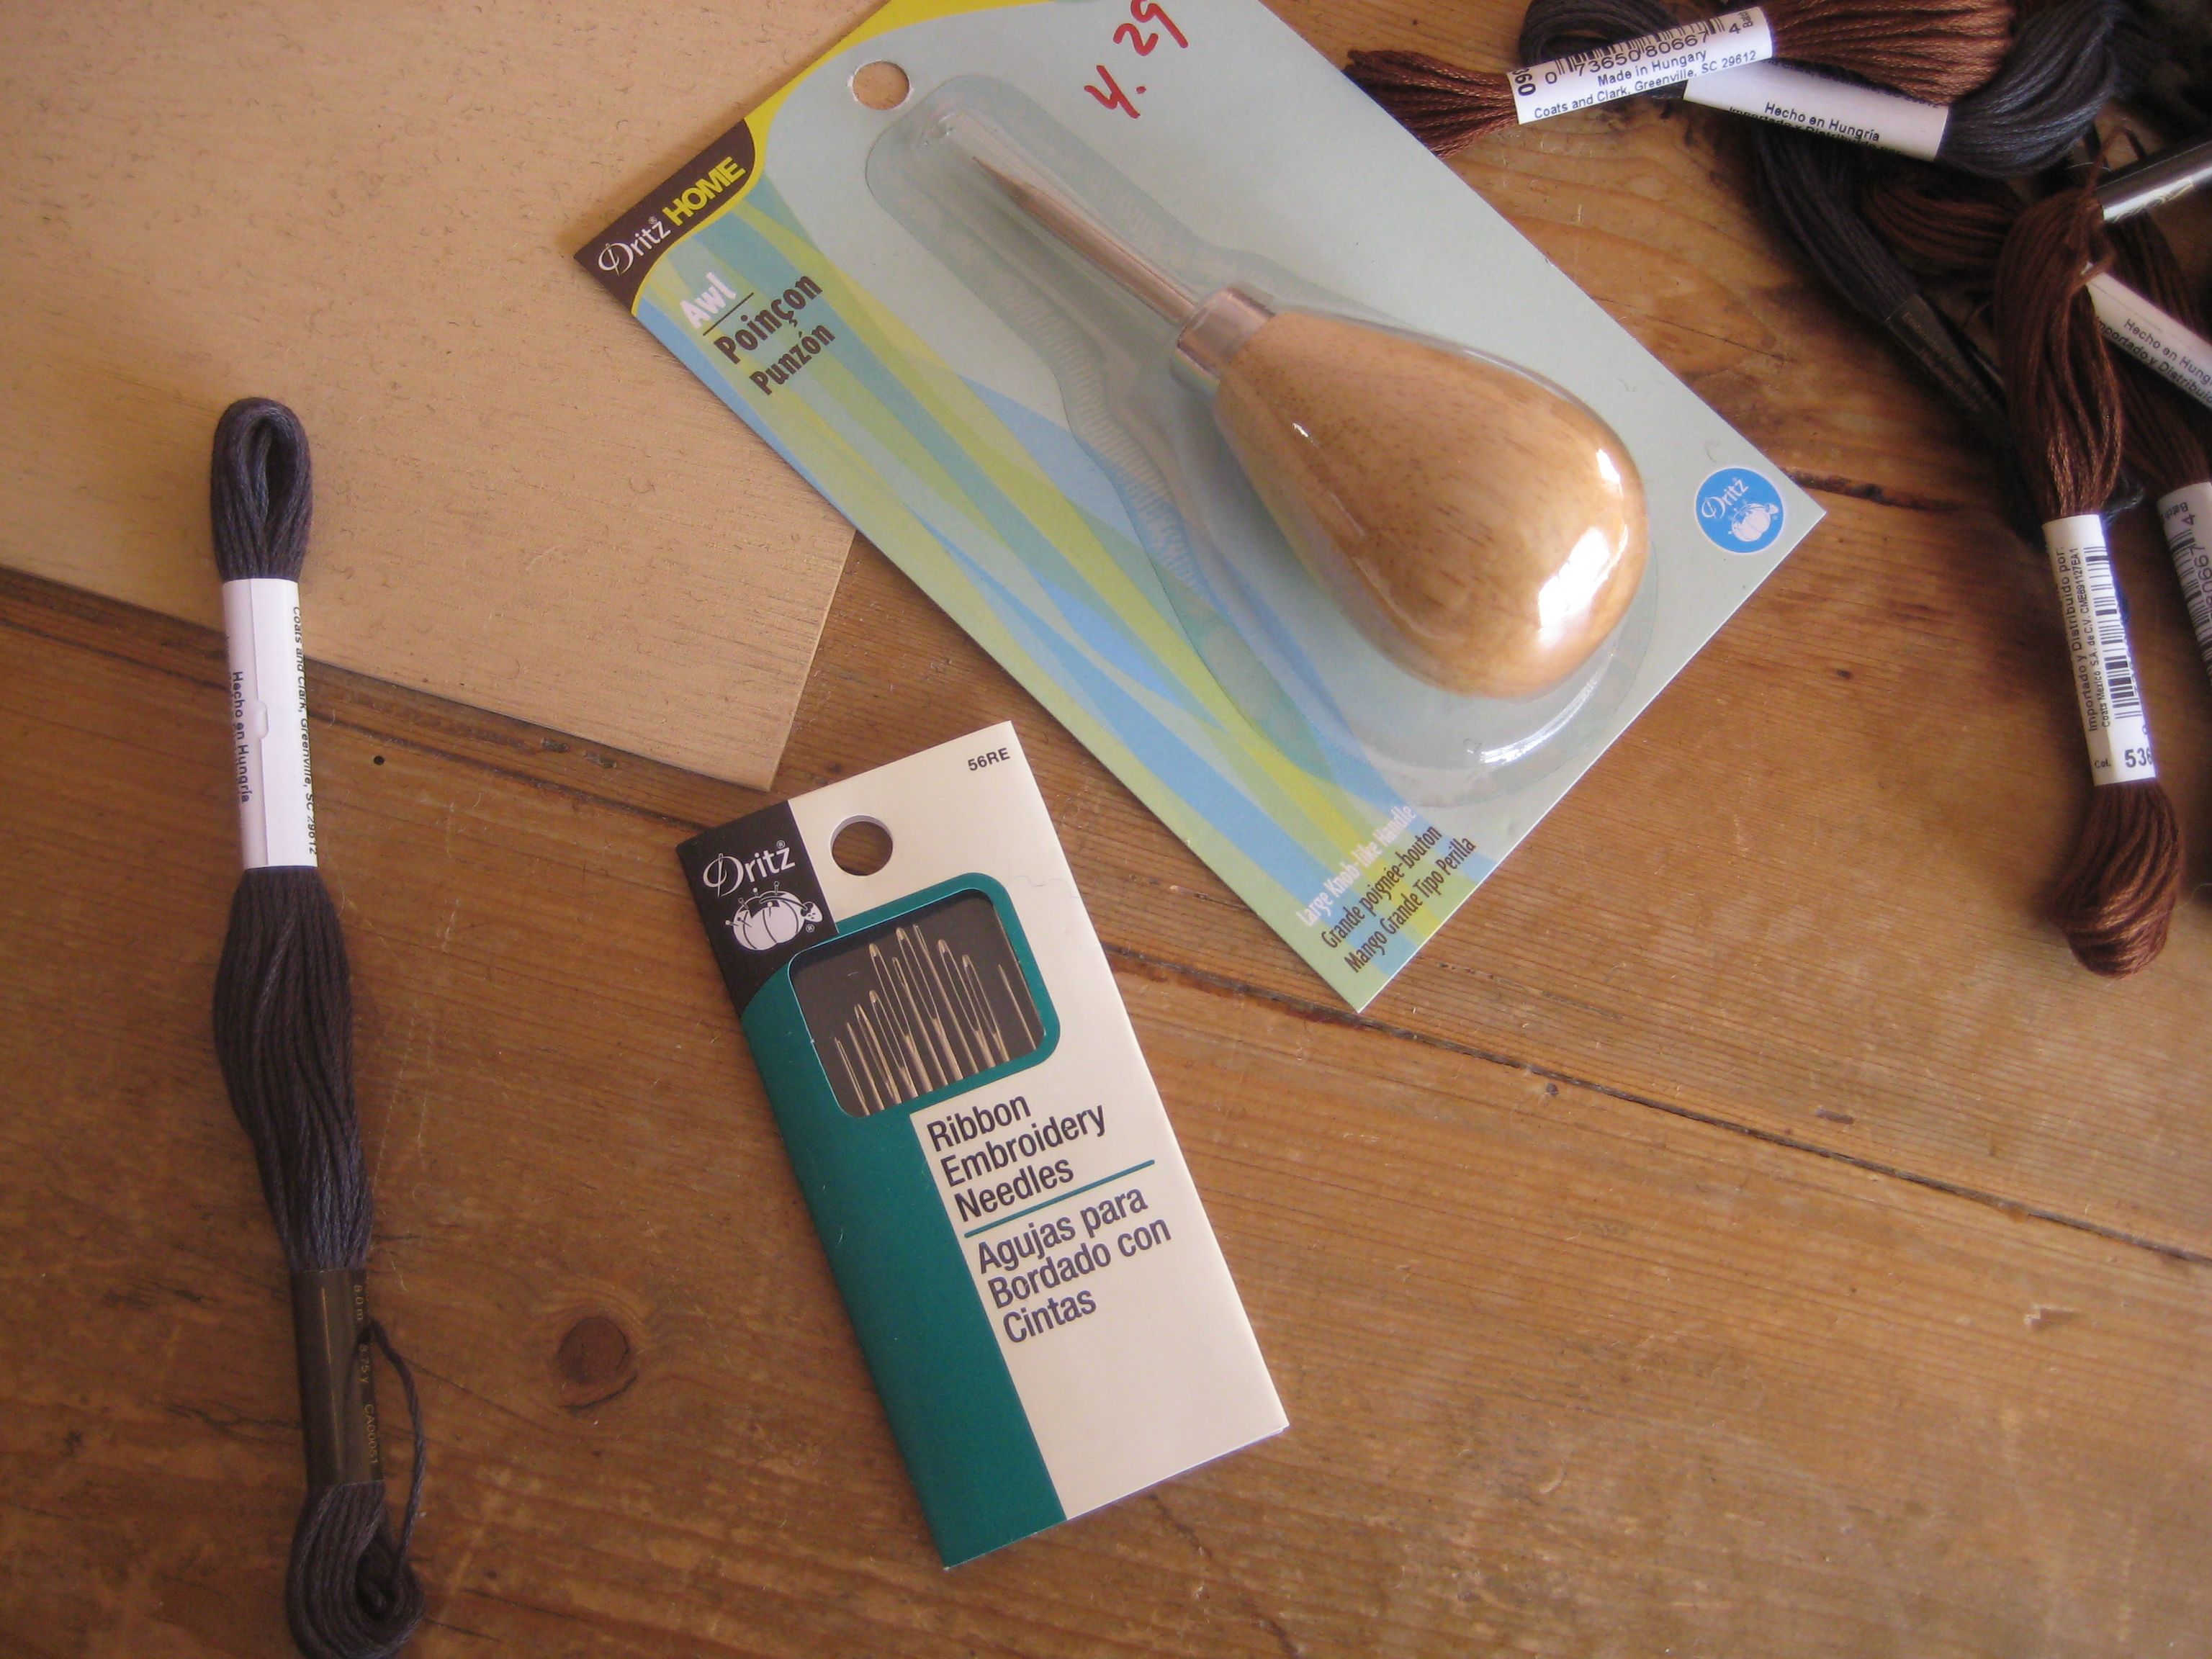
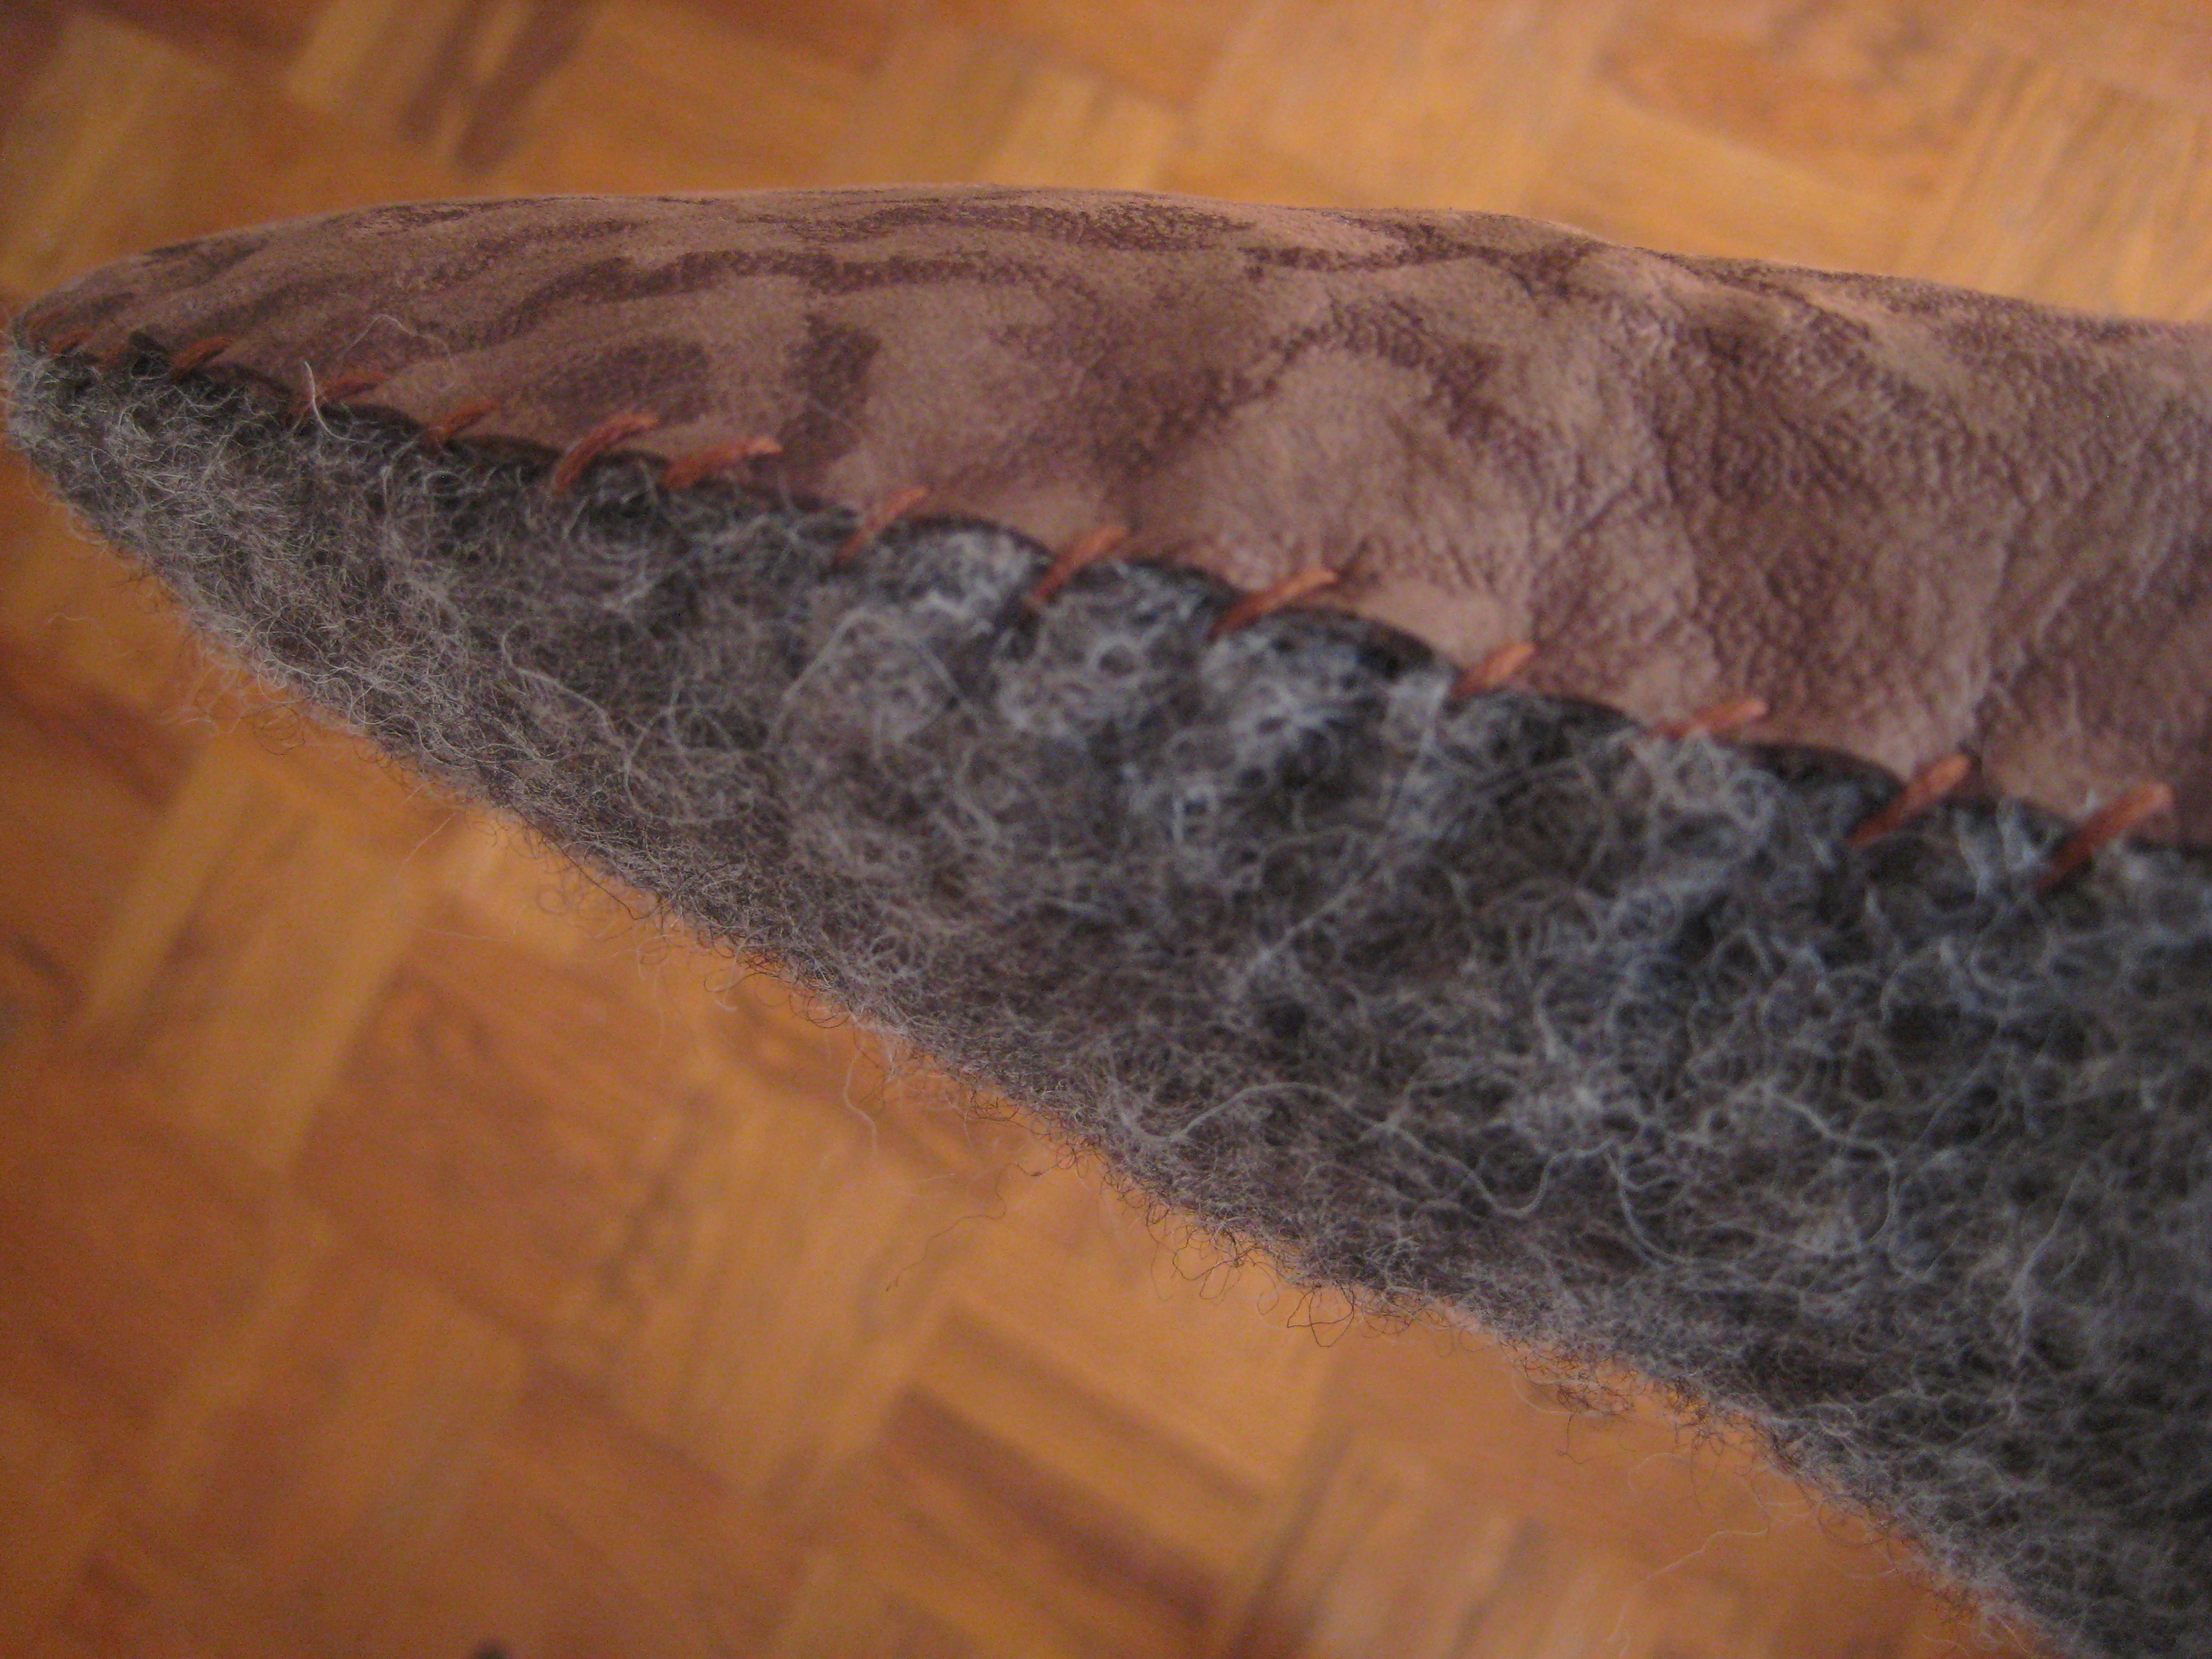
We used embroidery thread to sew around the edges.
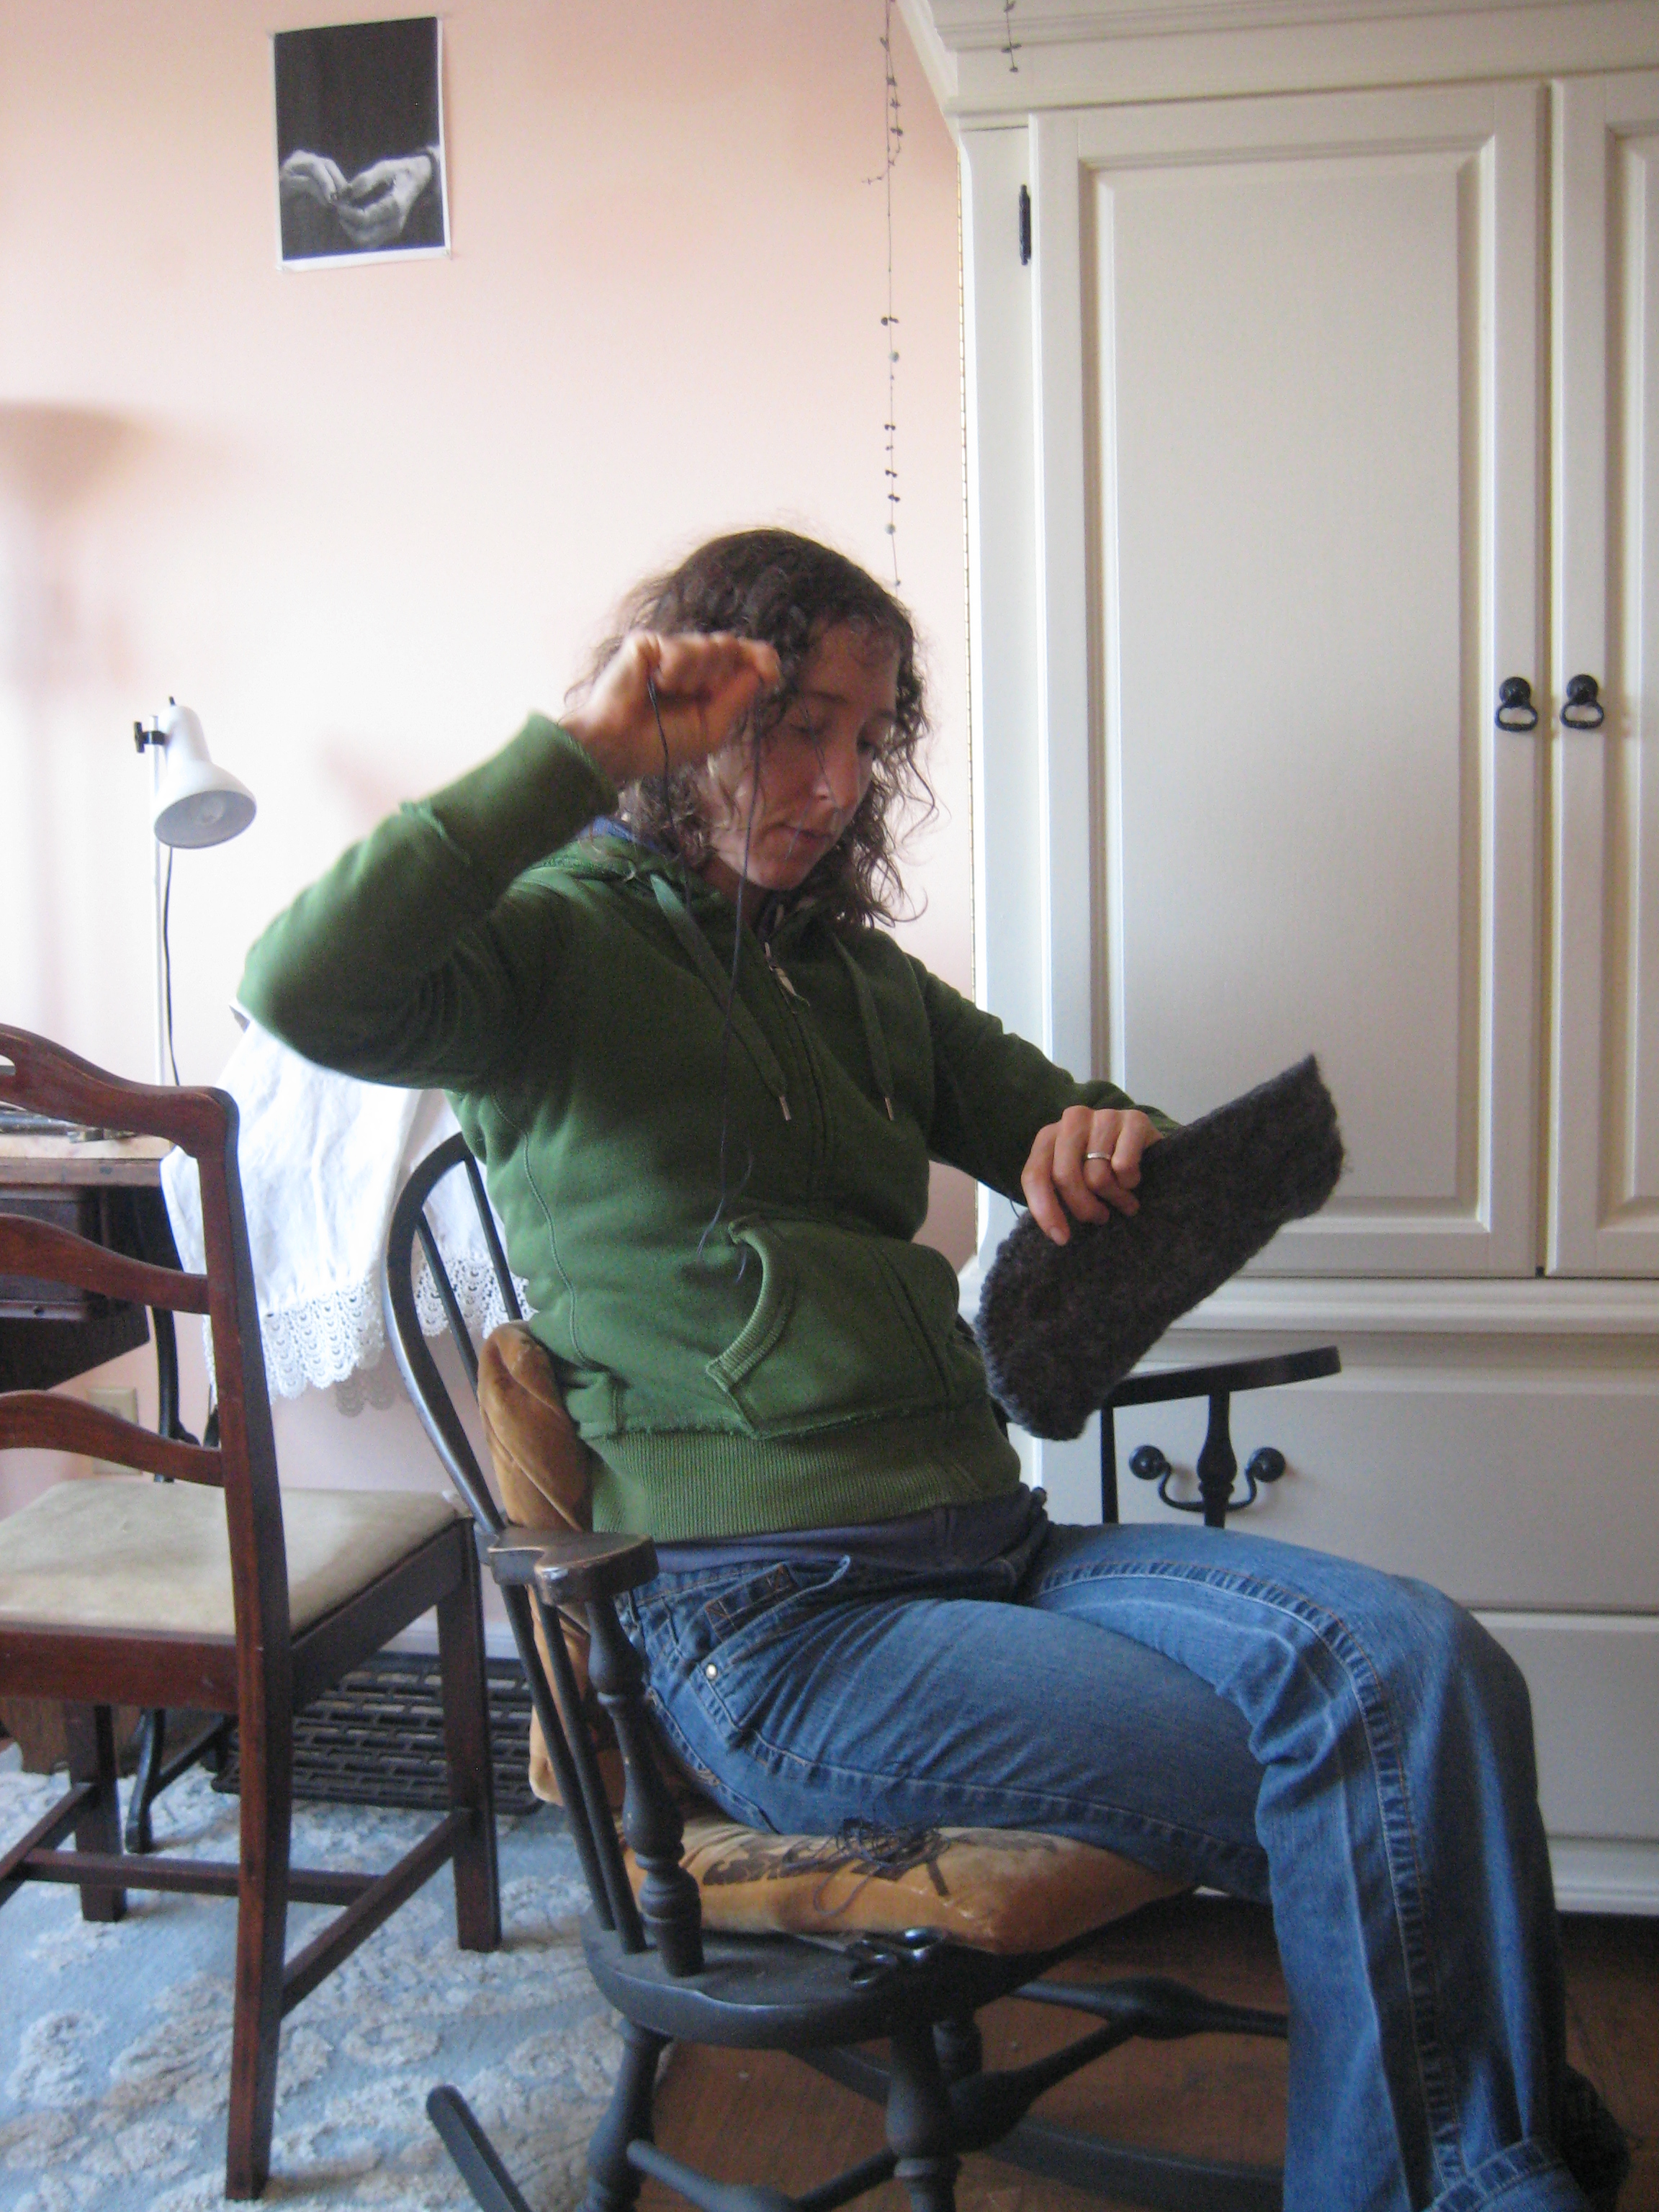
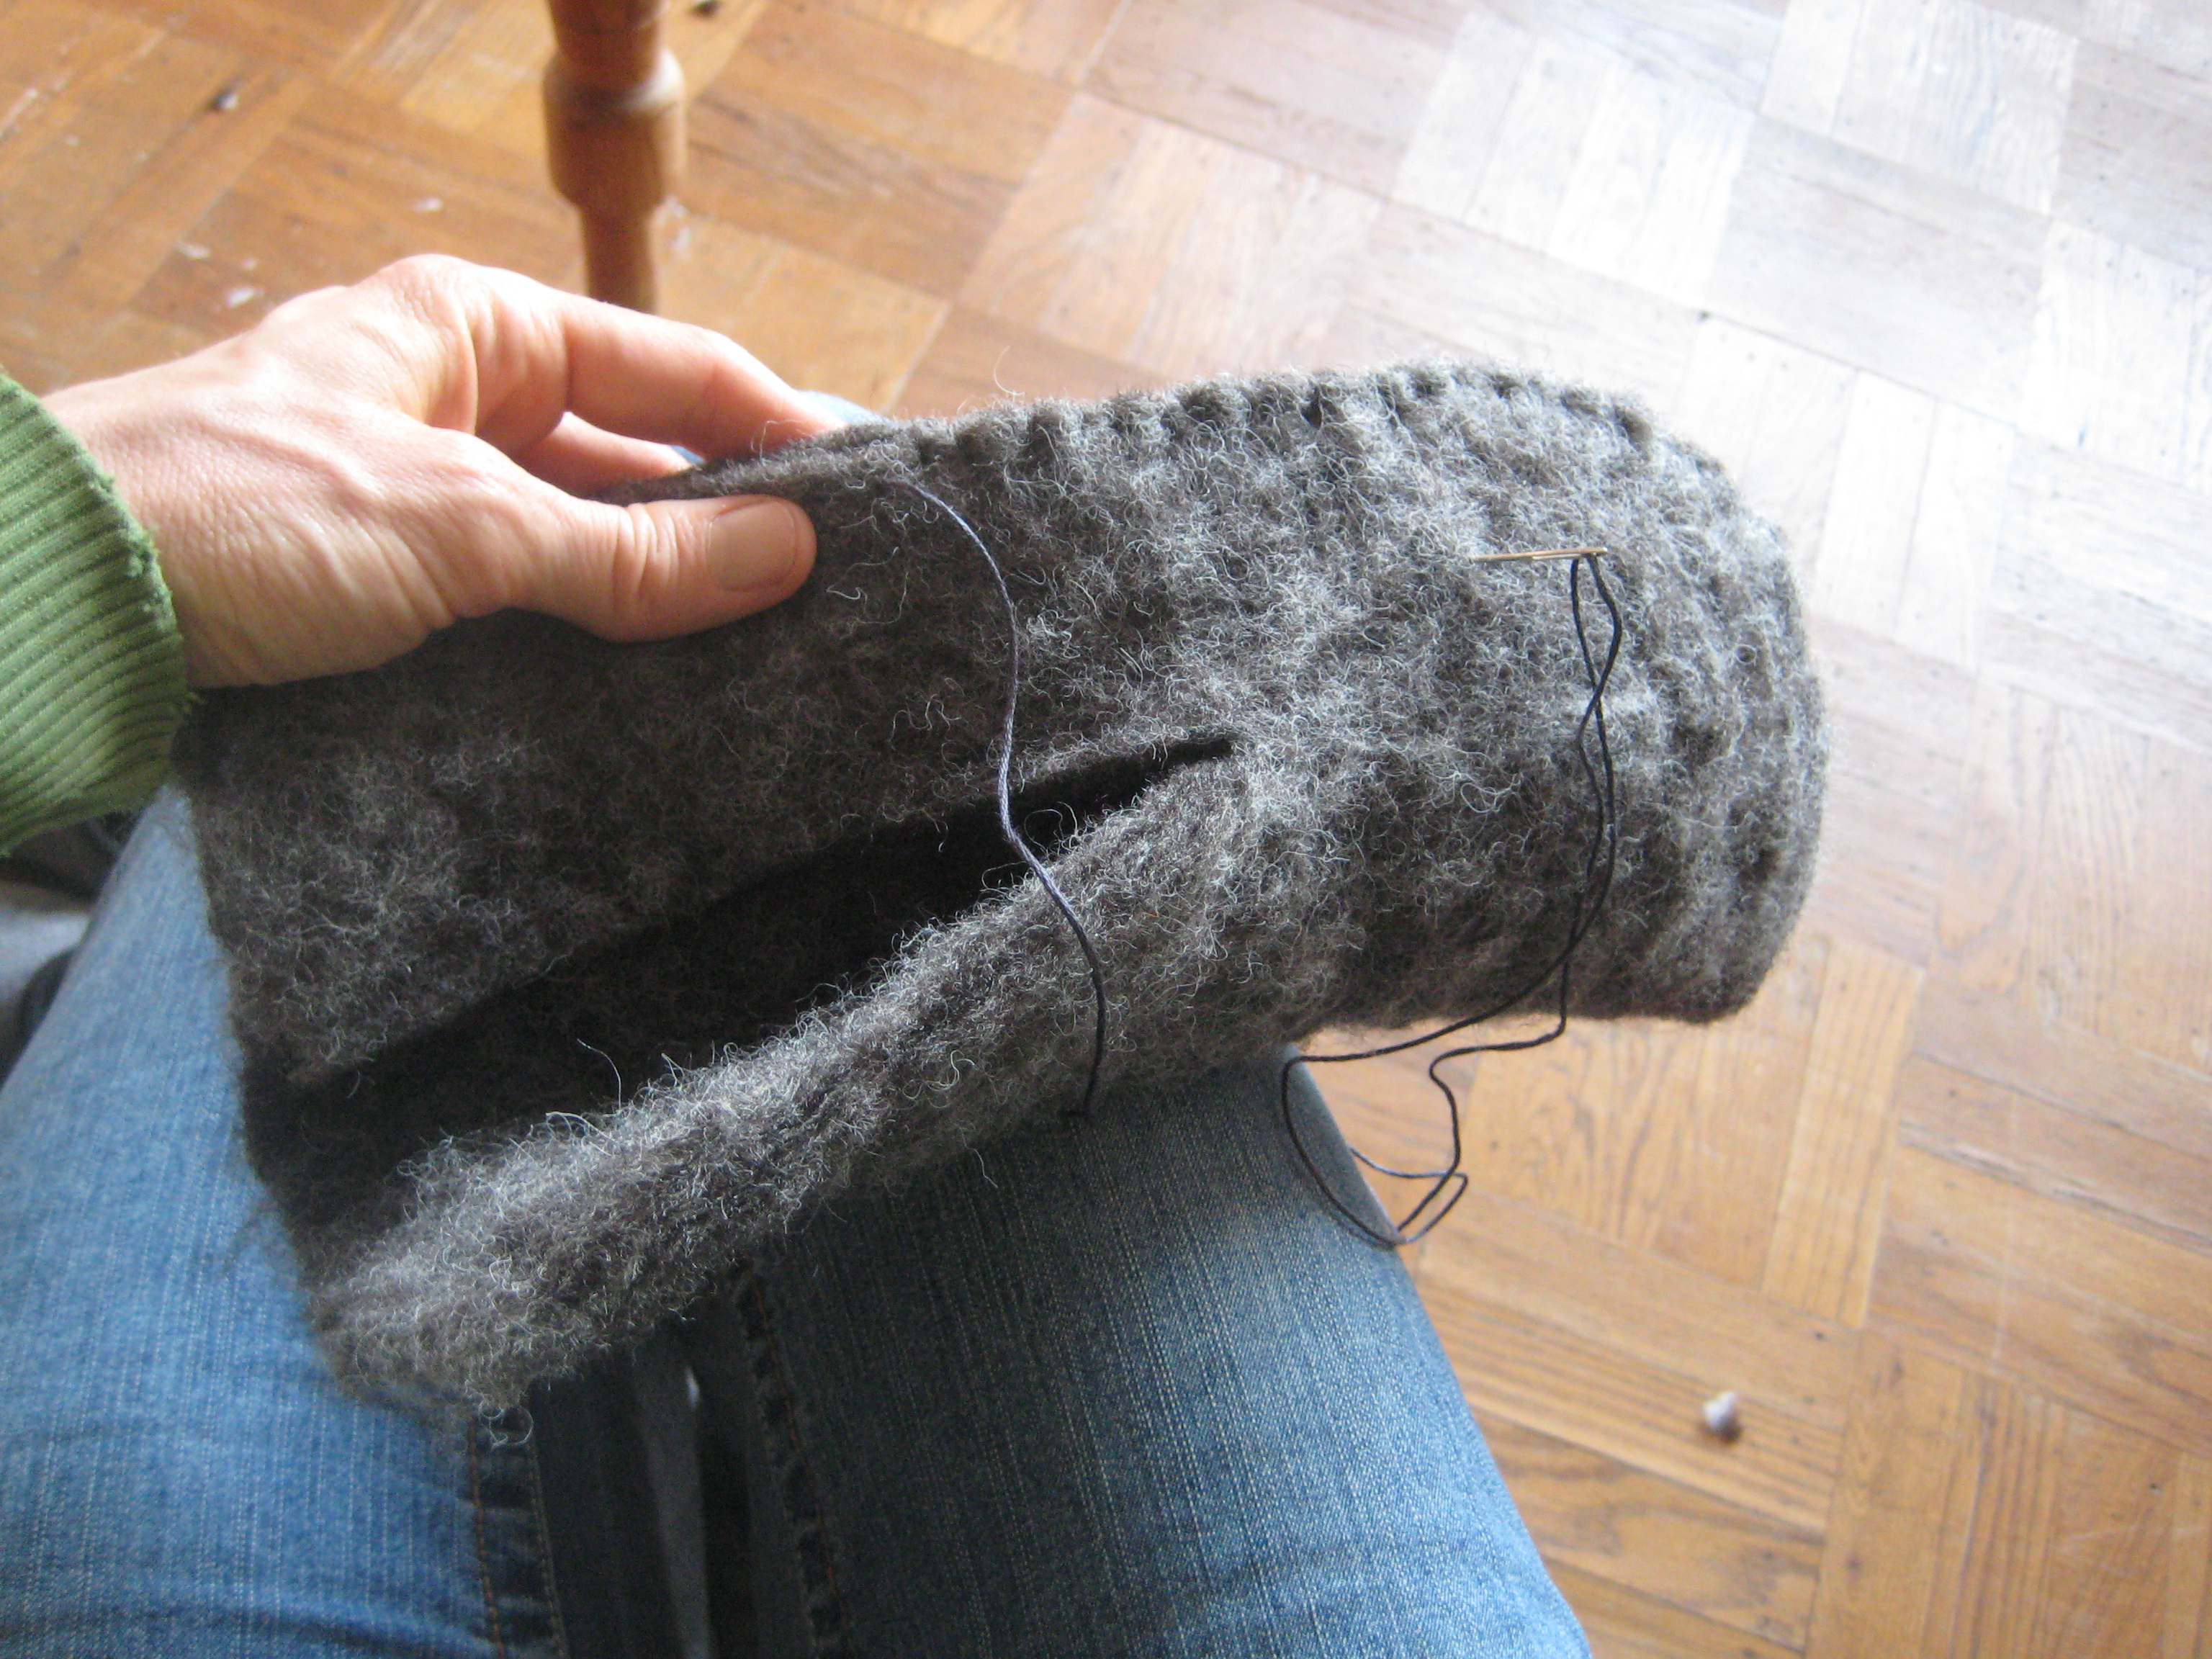

Rustic but functional. 🙂
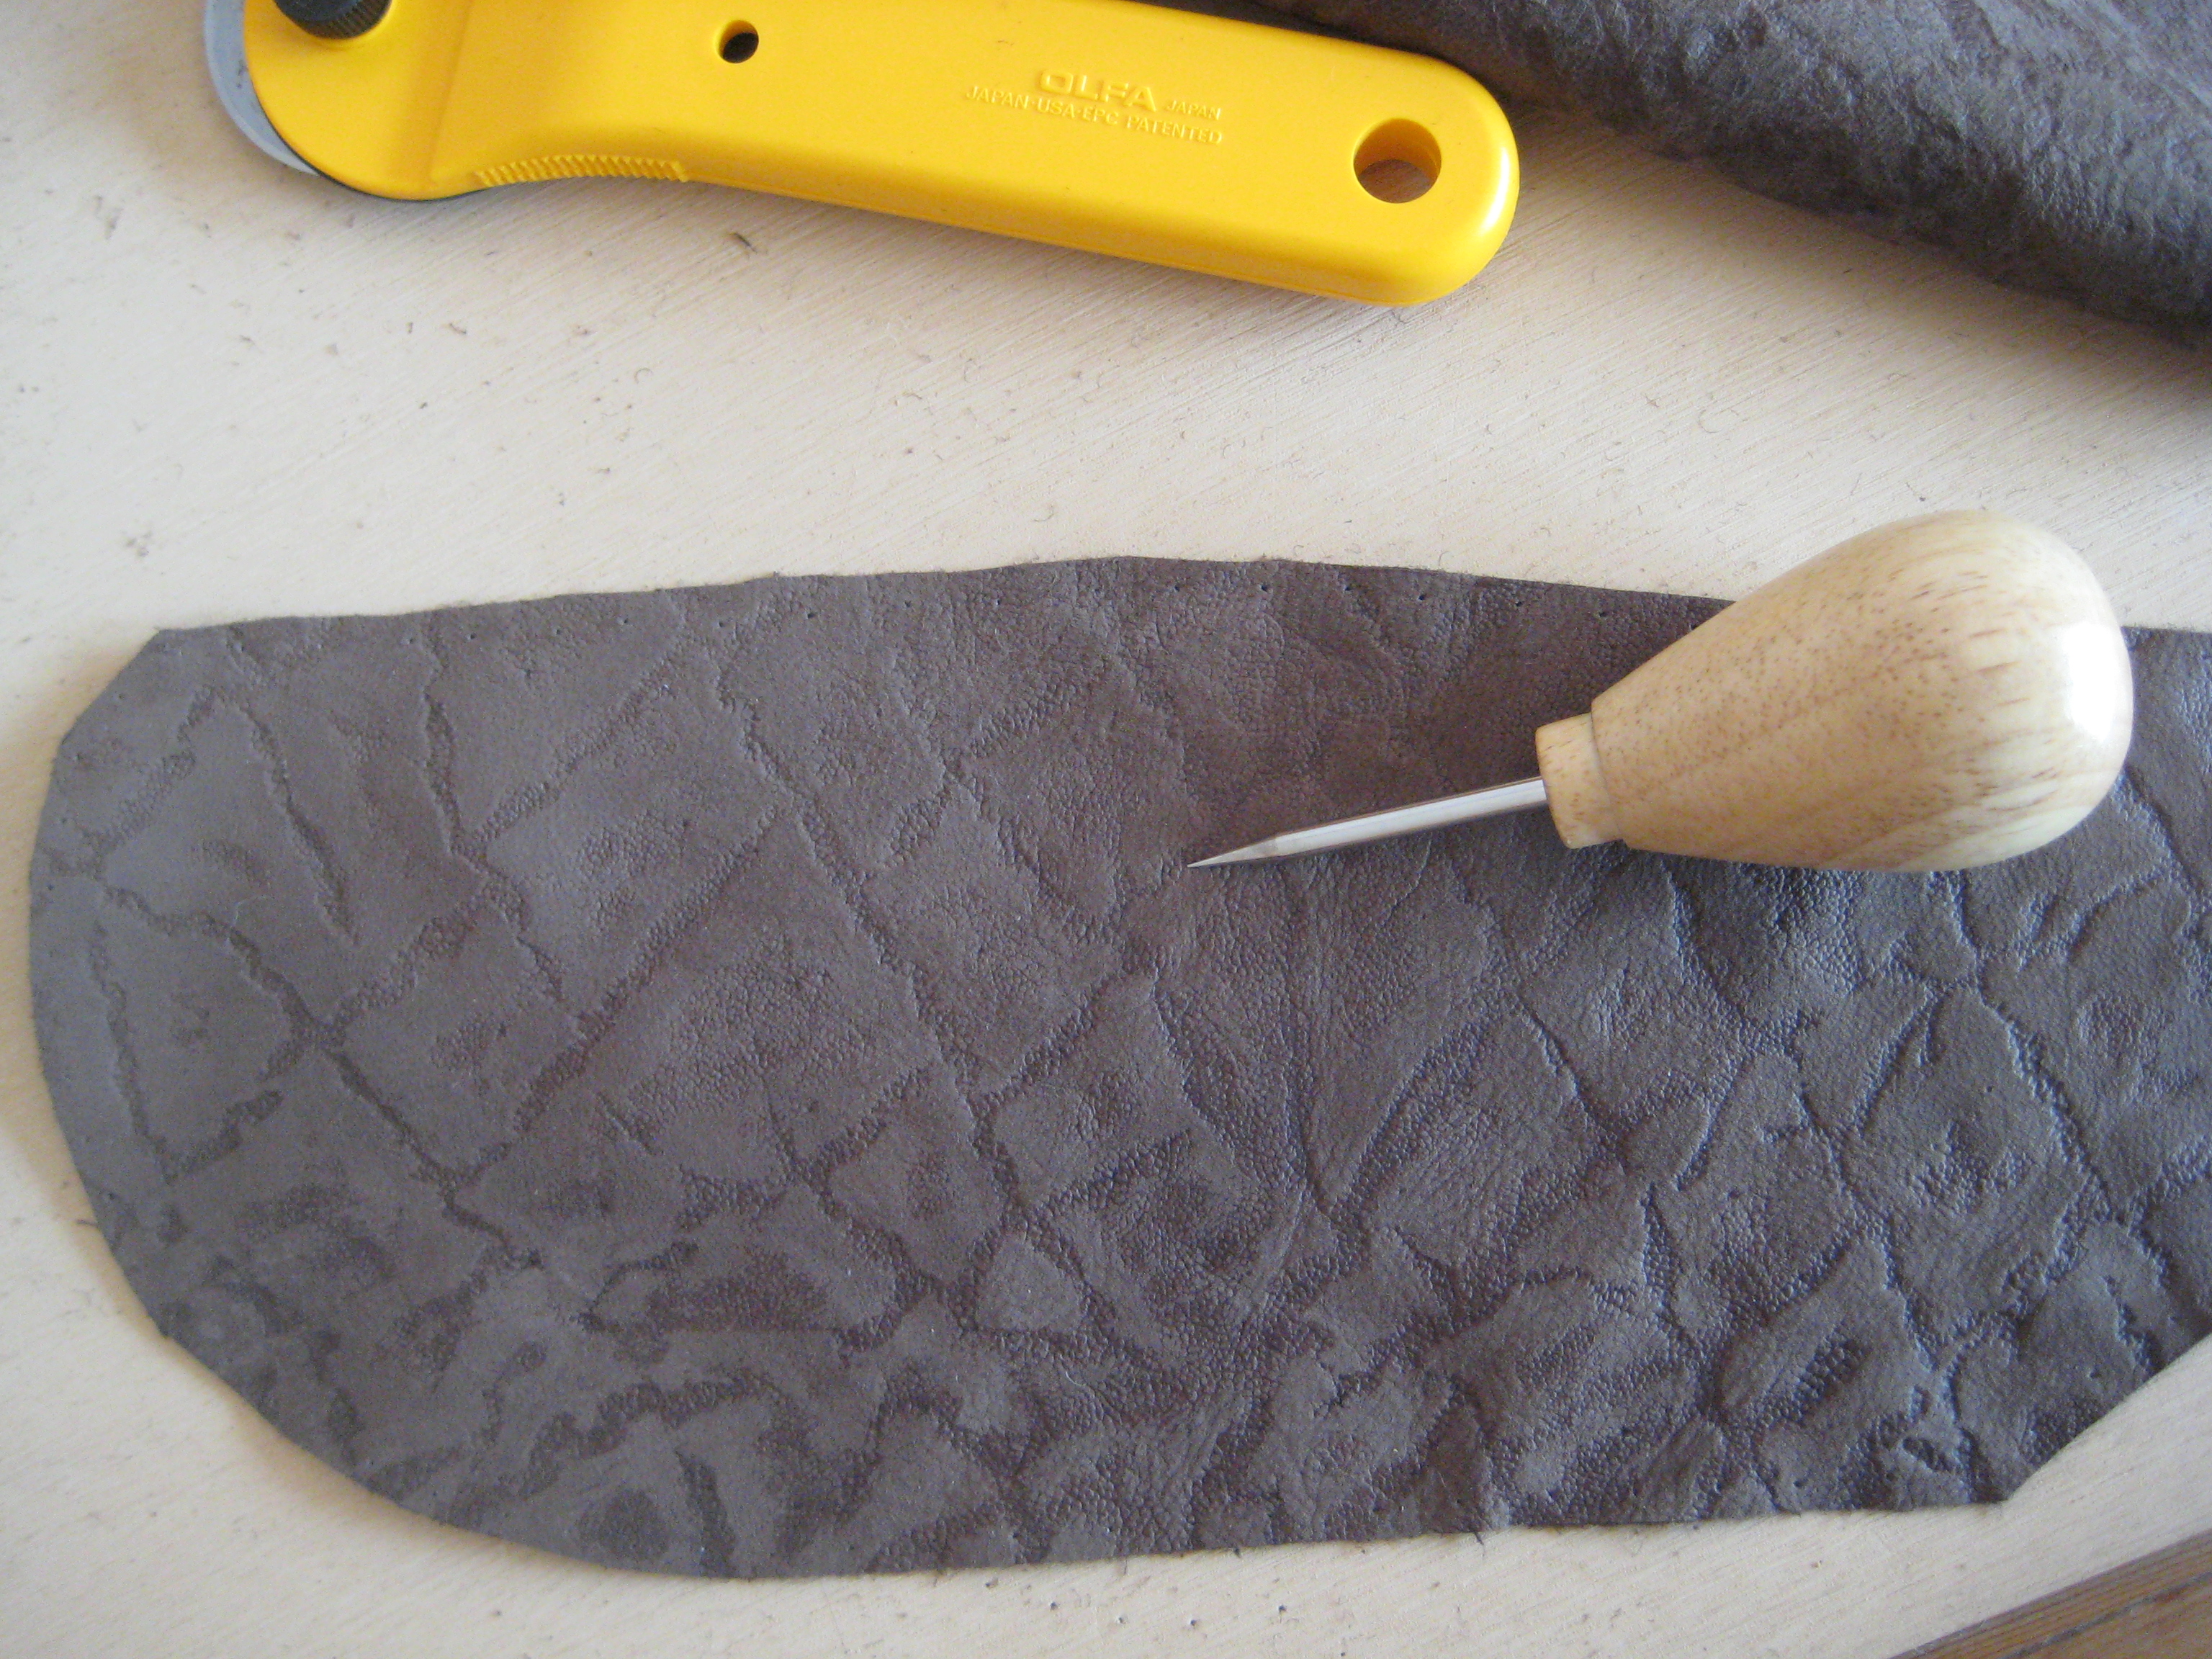
Then I added some leather soles.
First time I used an awl.
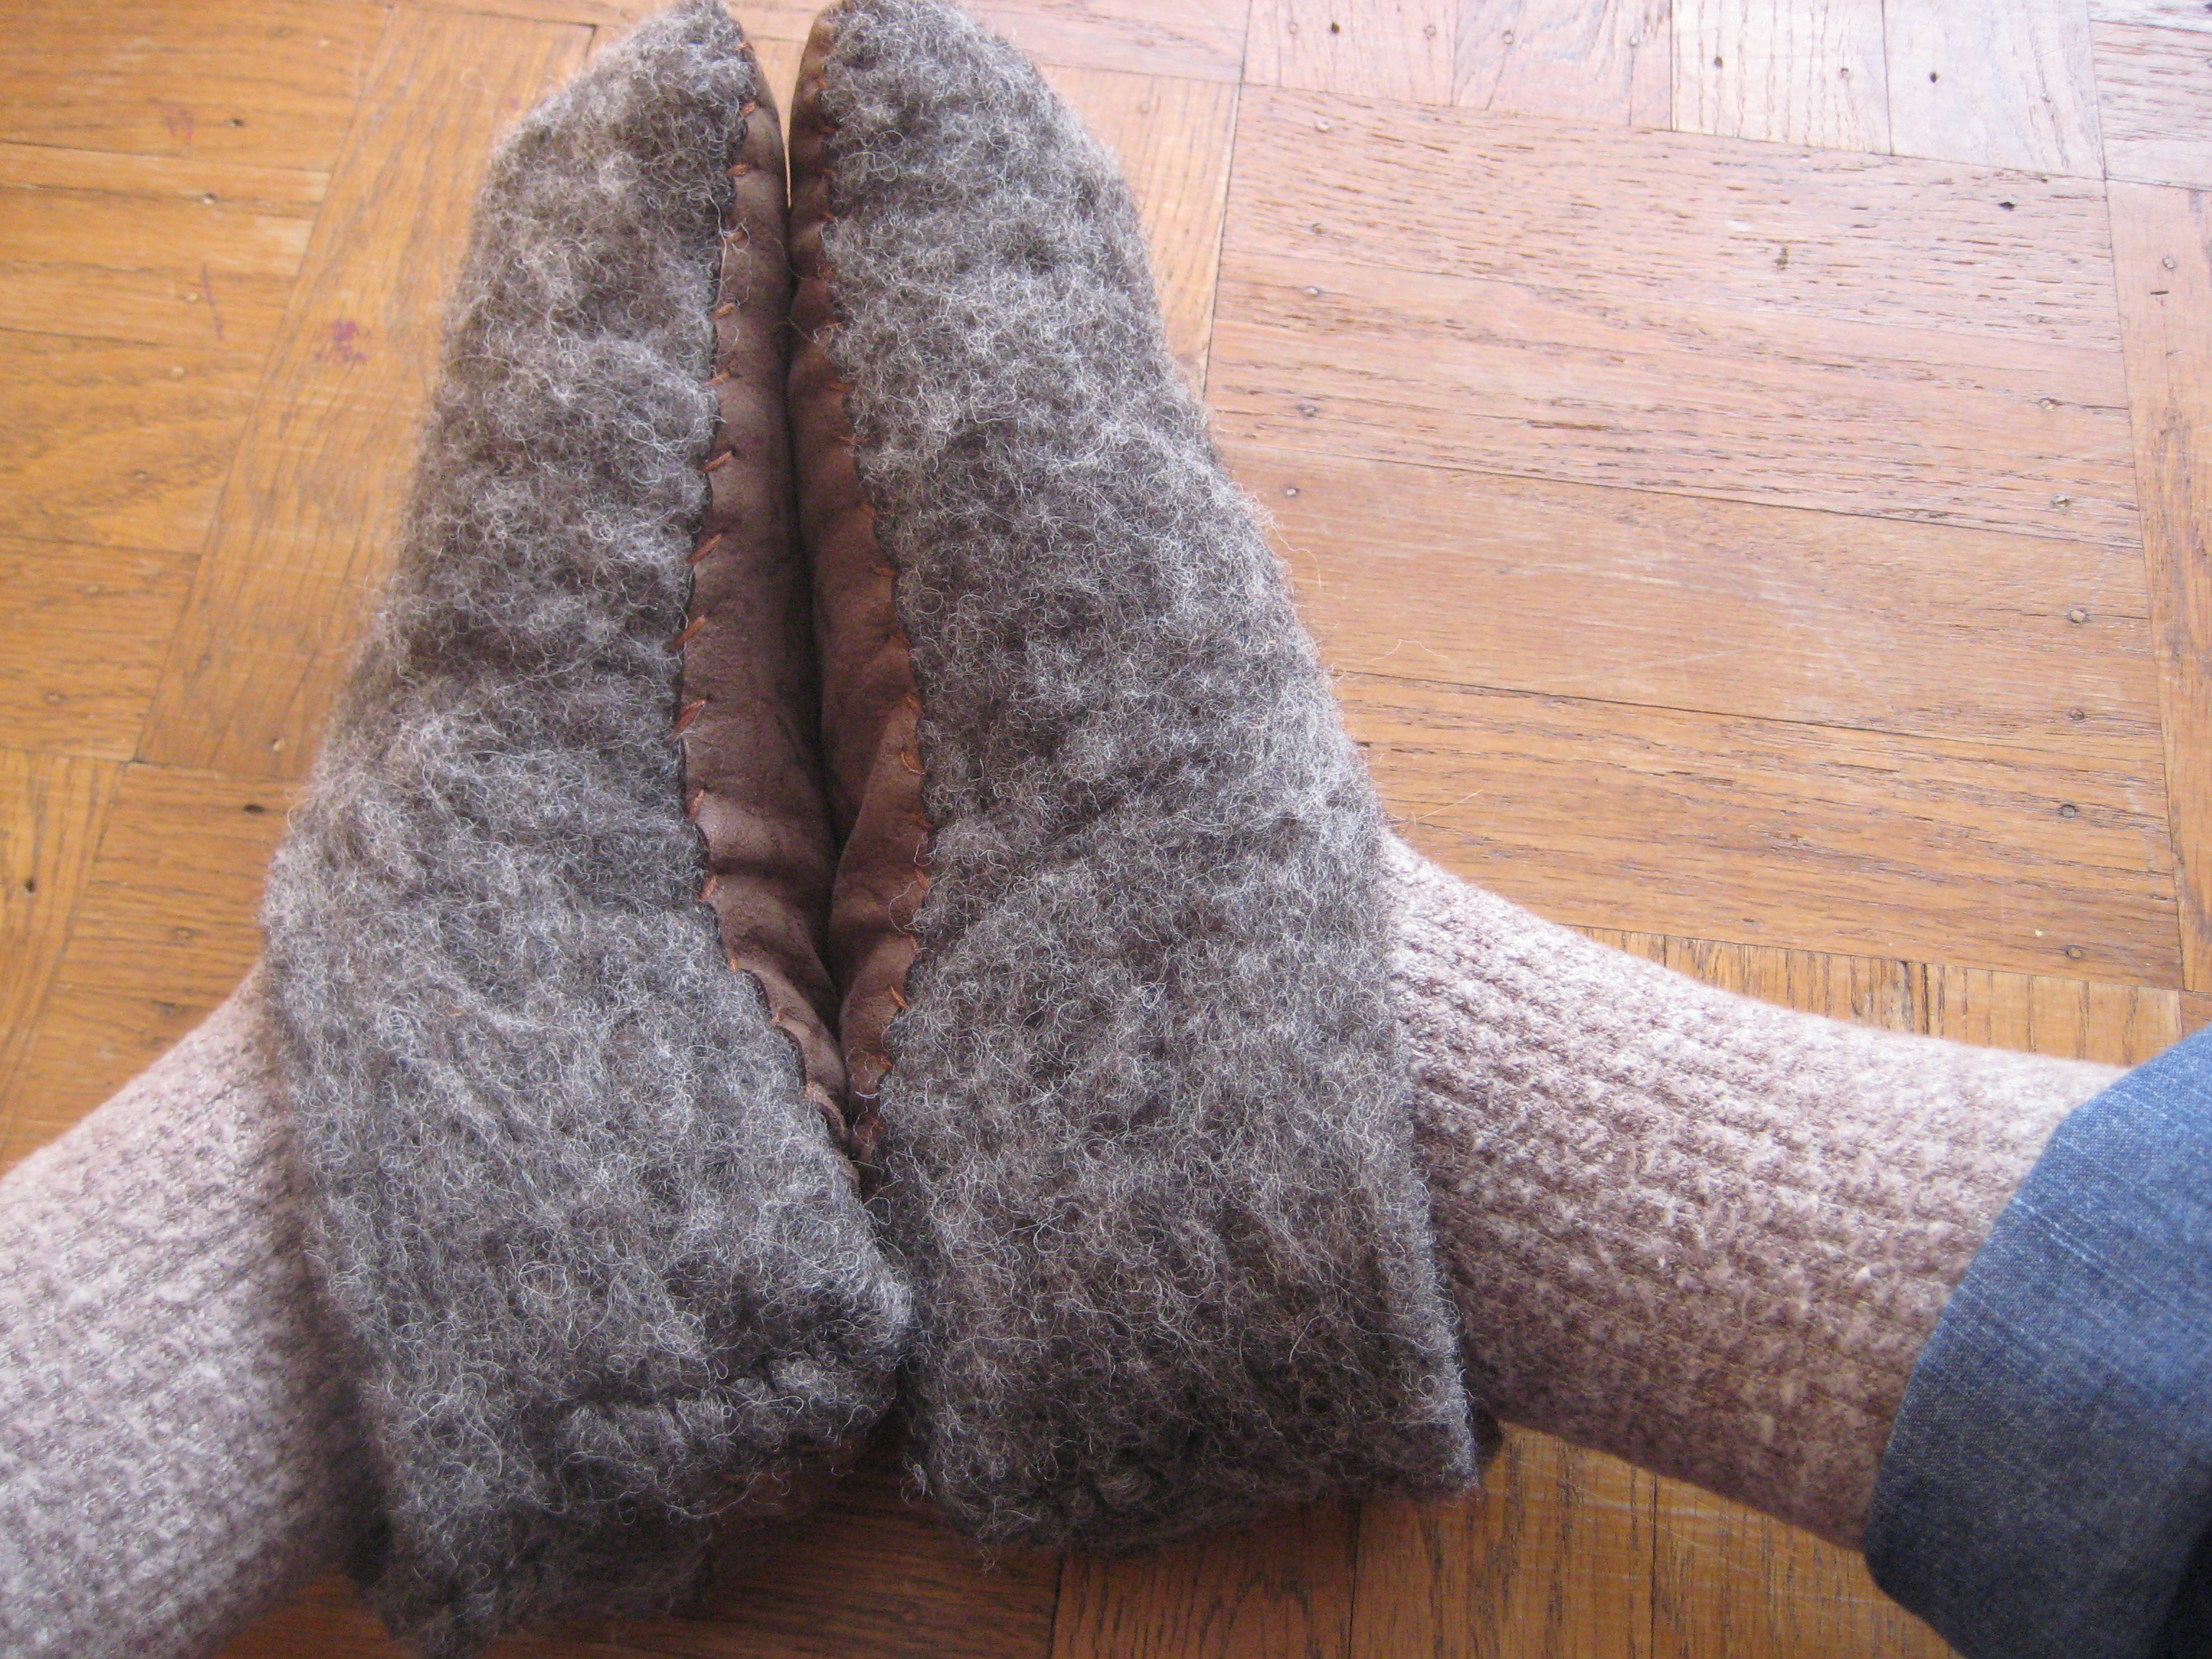
yay, slippers. I love them.
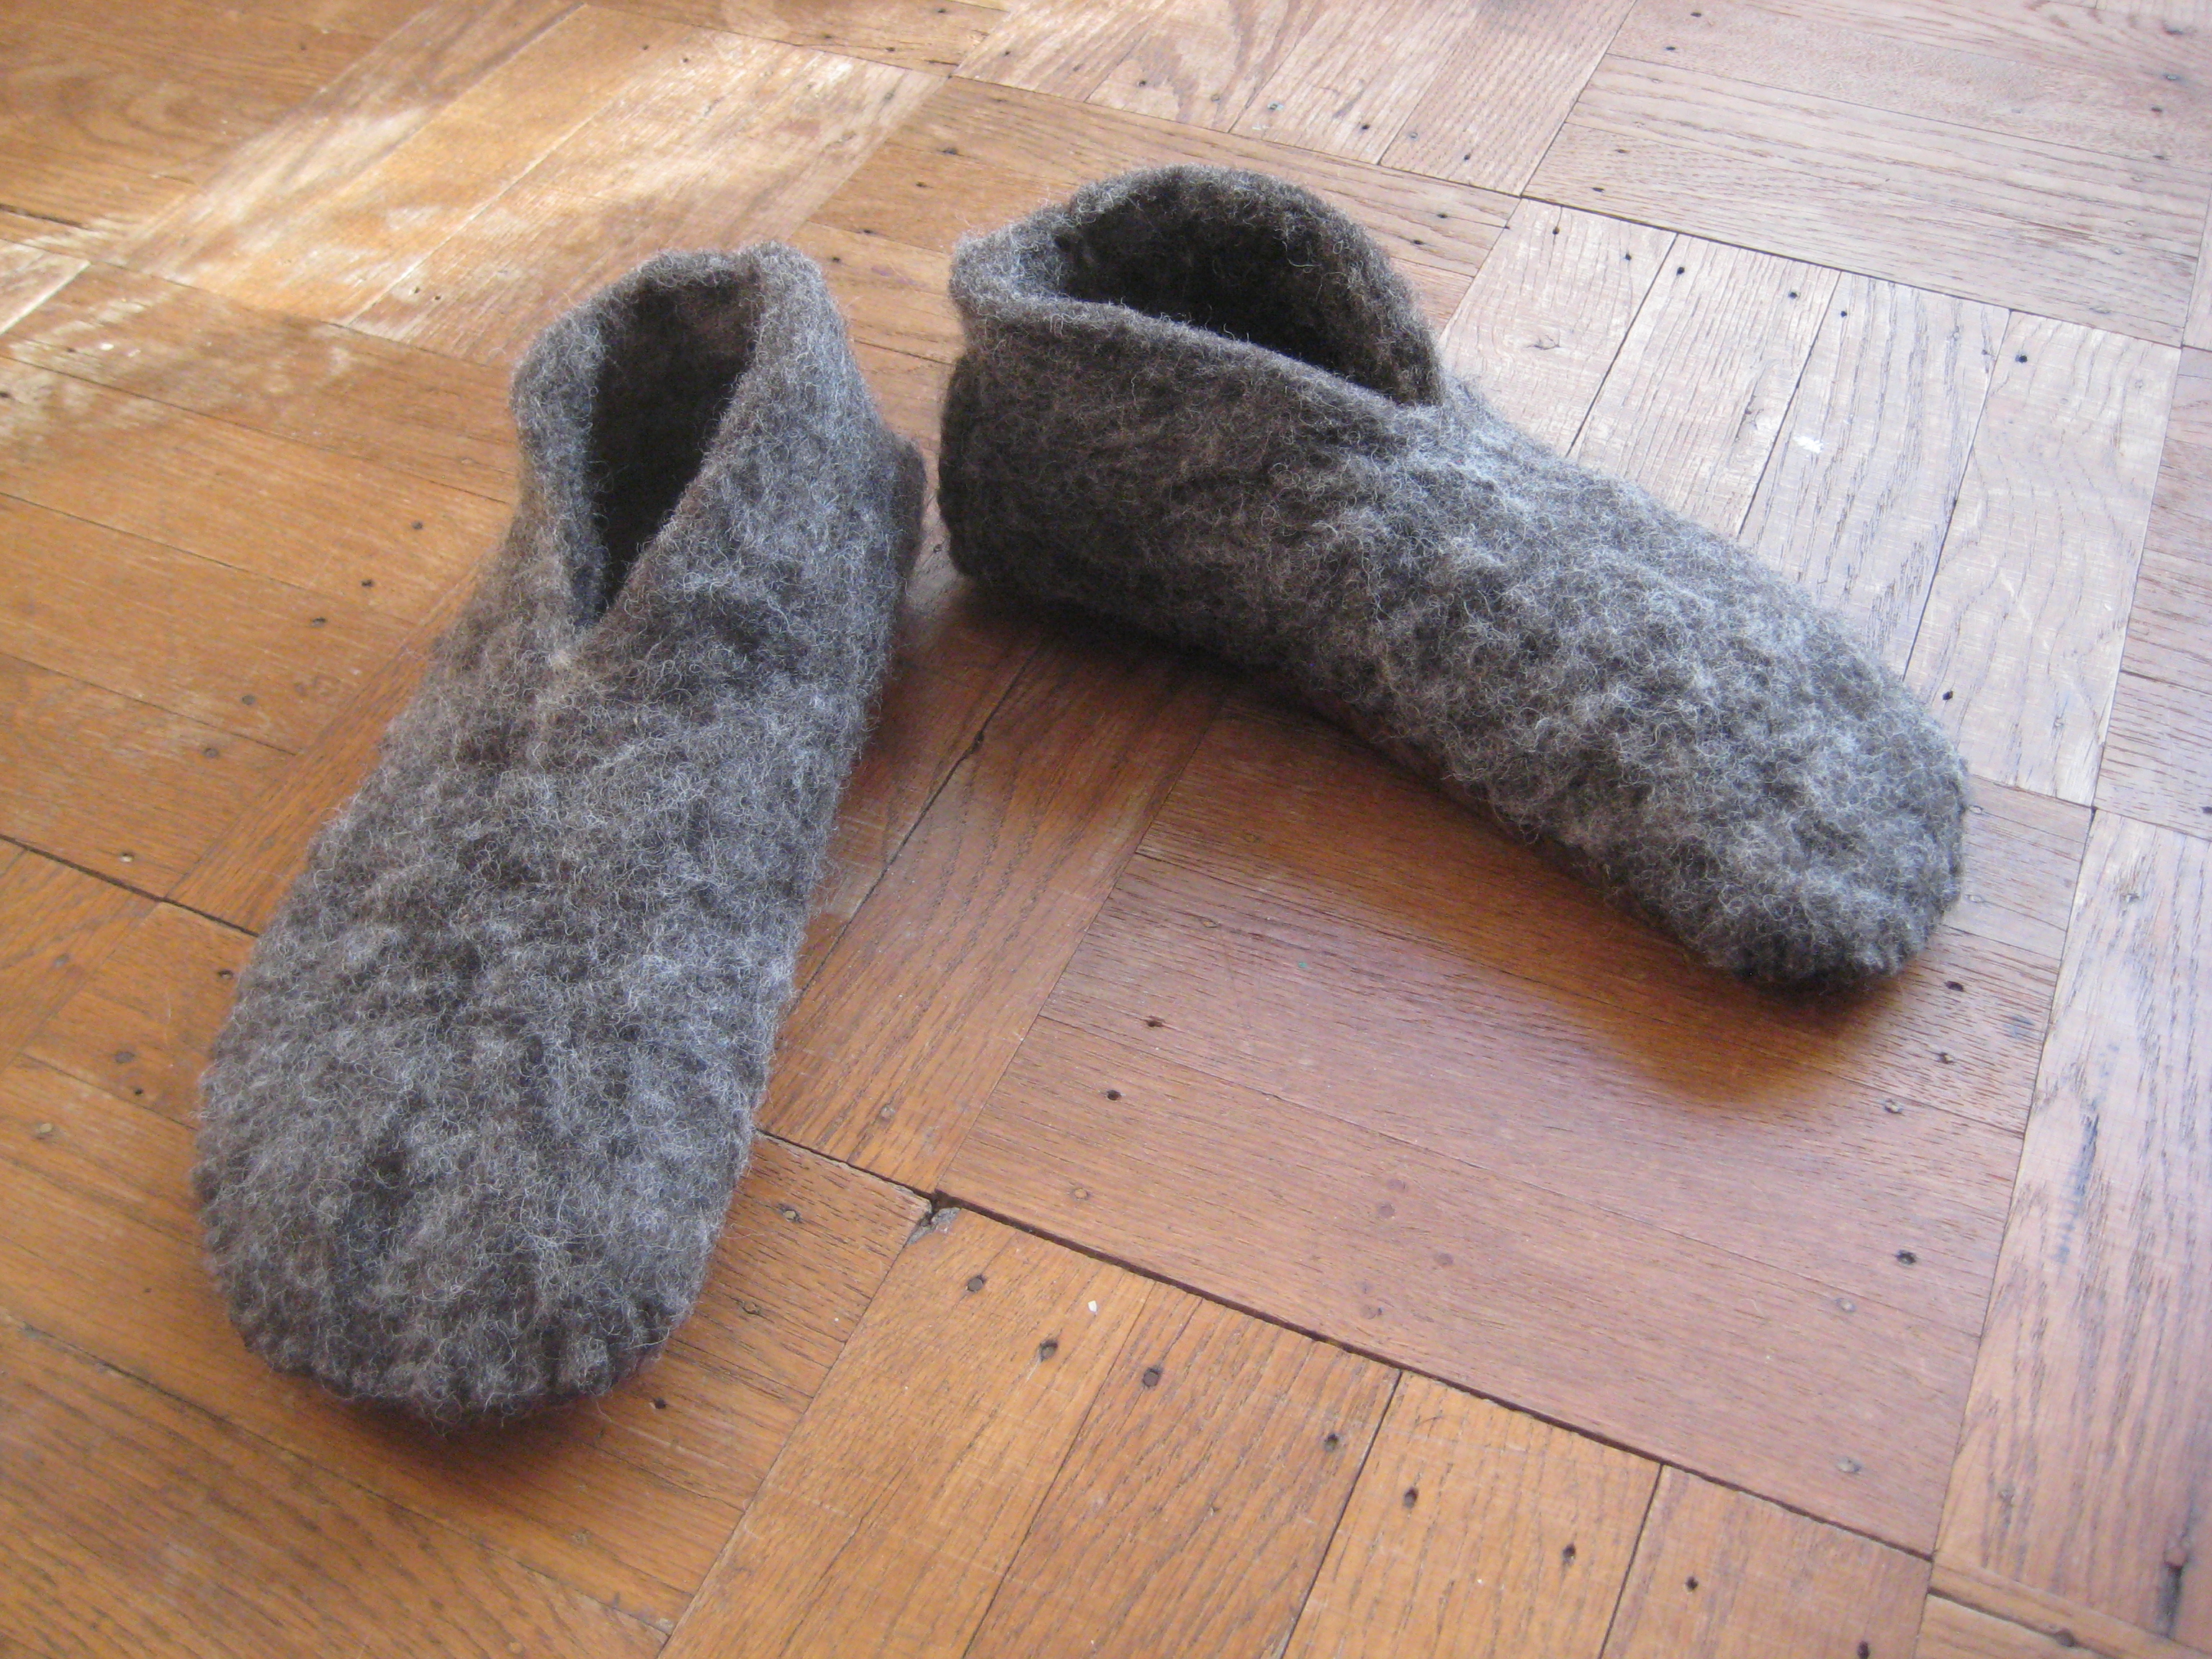
The whole process took about nine hours, spread out over three days.
I have leftover felt, so I’m sure I’ll be trying some other patterns.
Posted in Uncategorized | Leave a Comment »

The sunrise was exceptionally beautiful that morning of Dec. 21.
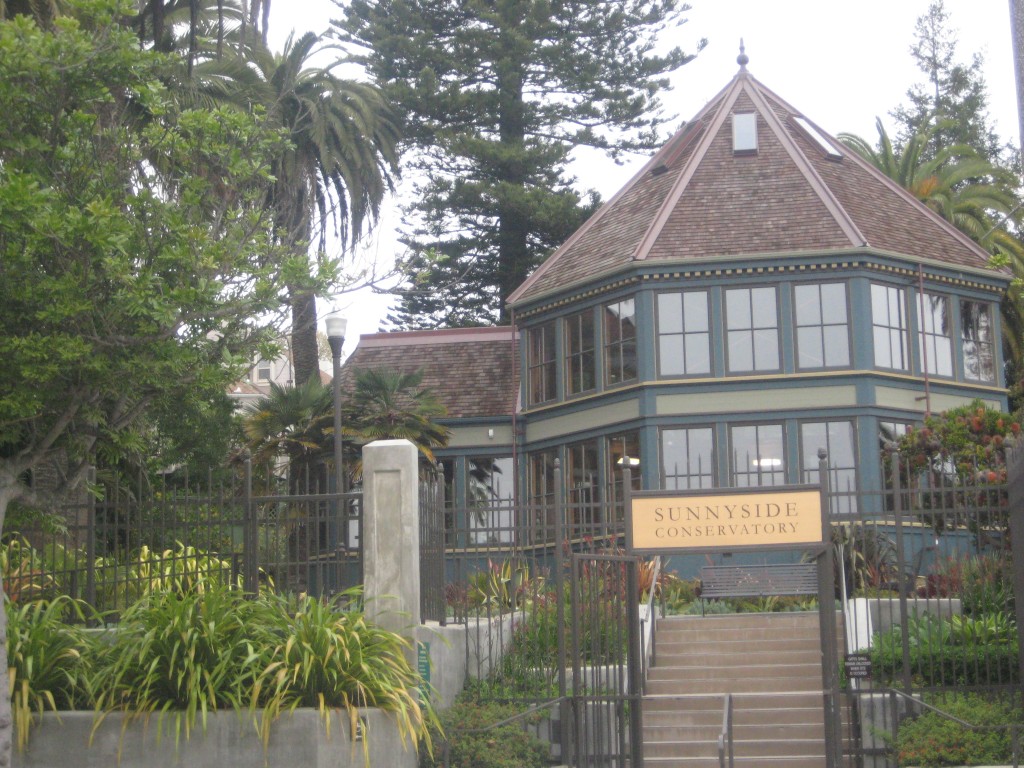
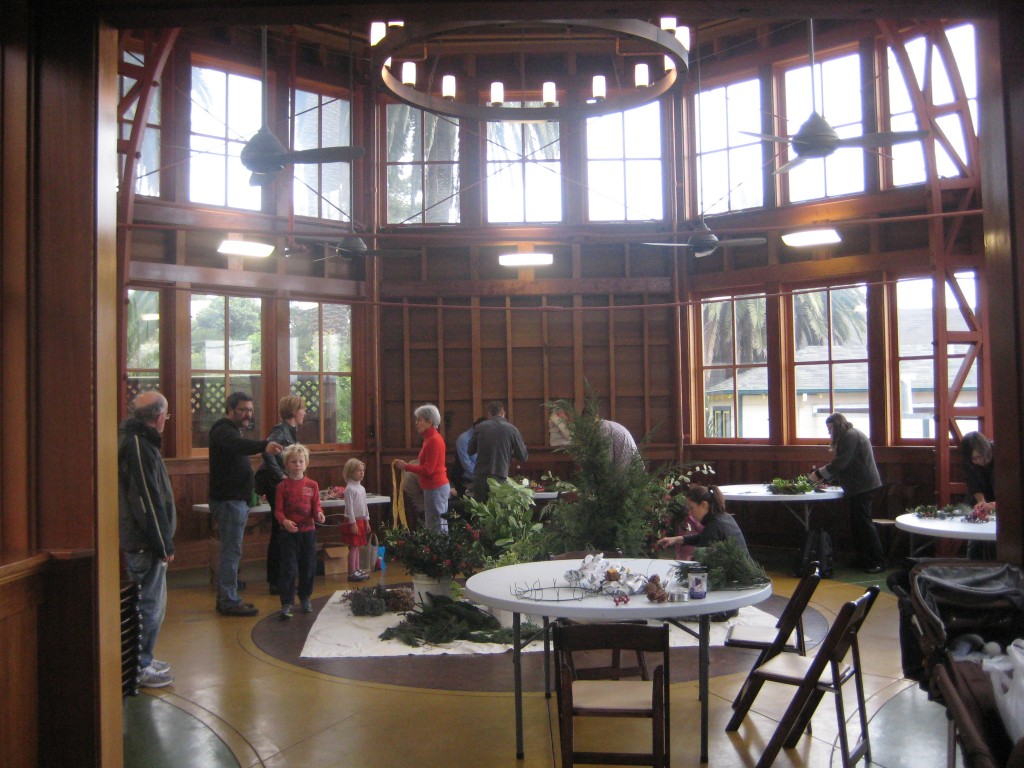
This year I had no tree or decorations other than a wreath and door swag that I made at a community wreath making workshop at the Sunnyside Conservatory in SF.
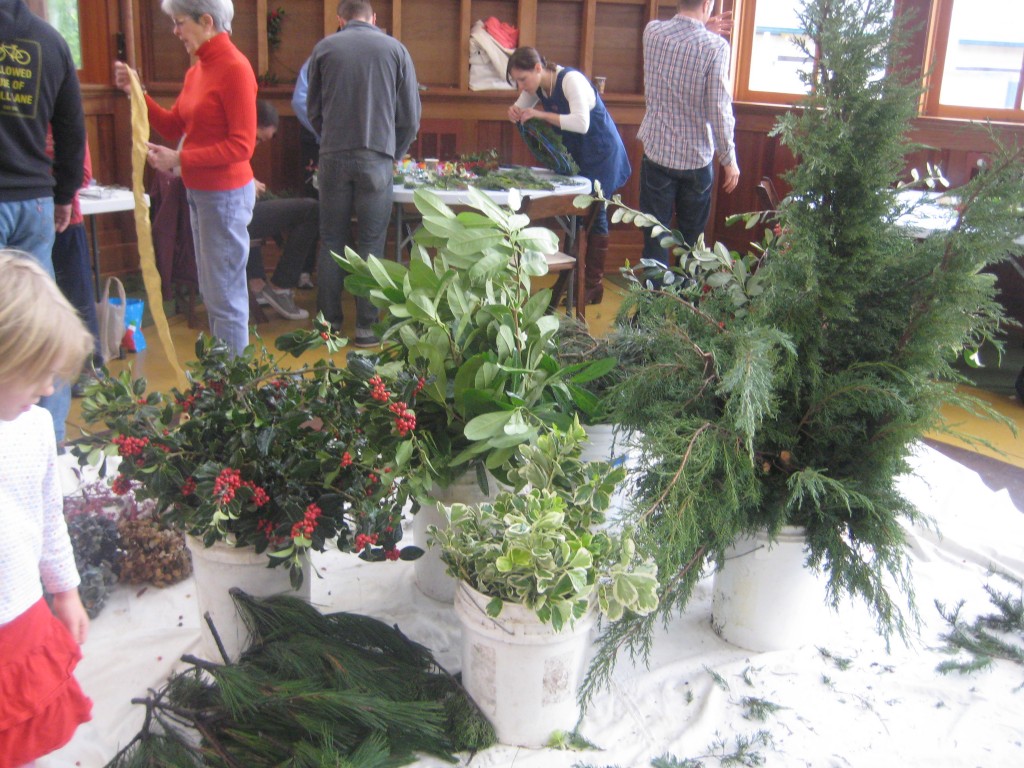
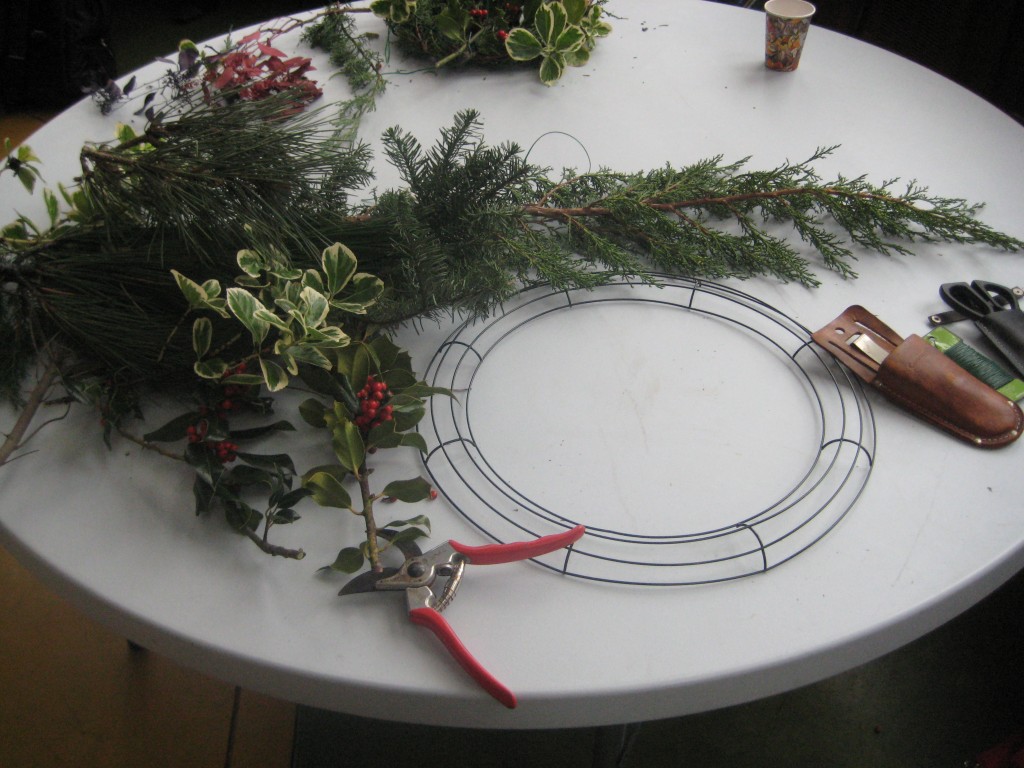
Working with these materials was aromatherapy.


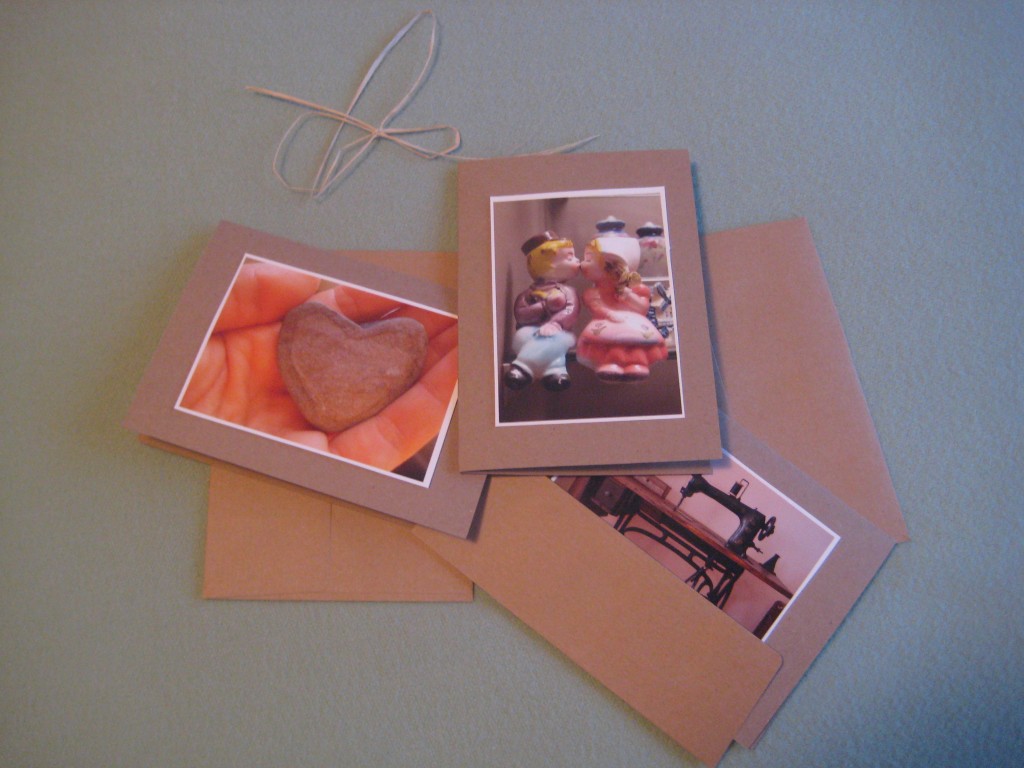
Also, as gifts this year I made little packages of blank photo cards w/envelopes.
A time of making and gifting.
A time of welcoming solar energy.
A time of endings and beginnings.
A time like and not like all other time.
Posted in Uncategorized | Leave a Comment »
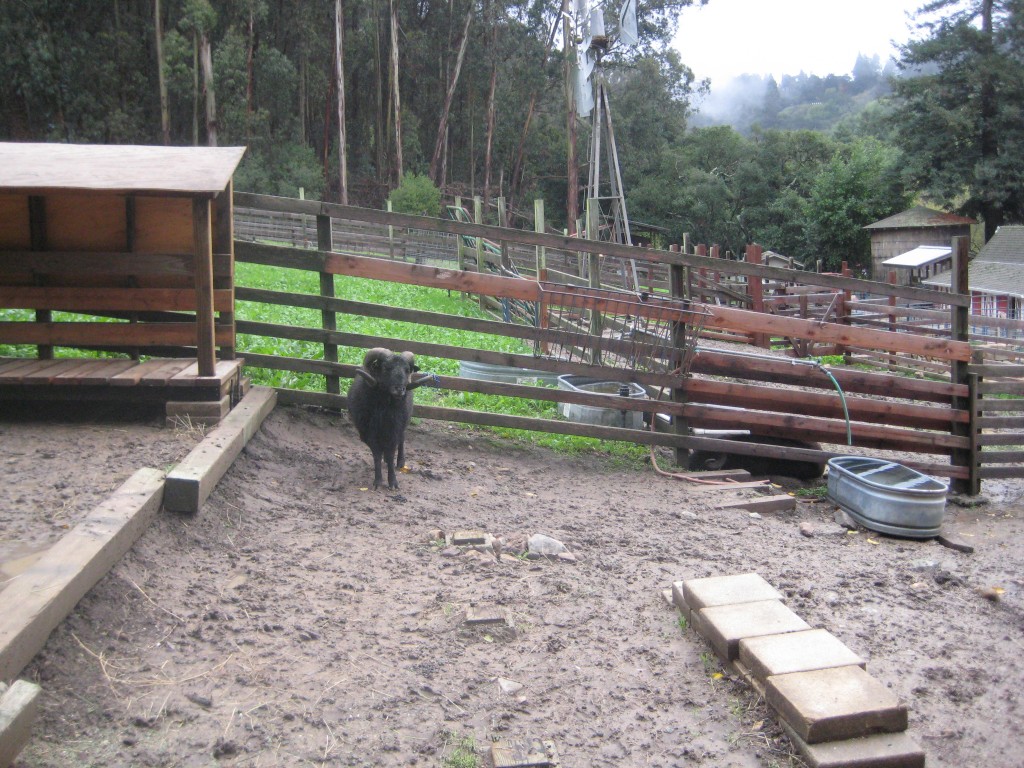
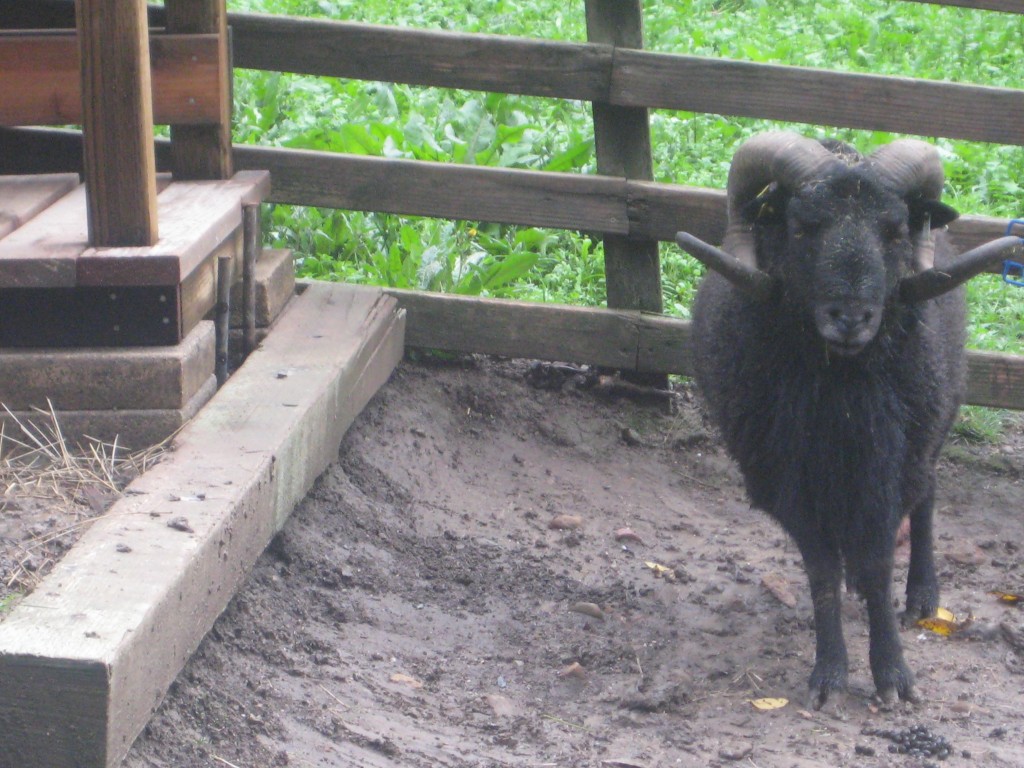
On a very rainy Saturday Sean and I took a felting workshop at Tilden Park in Berkeley. There were lots of options of what we could make.
The instructor gave us wool from the Little Farm’s black welsh mountain sheep to use. The wool was slightly brown because the wool gets “sunburned.”
Sean helped out with the carding – preparing the wool by pushing it through a series of combs.

Then came the gentle stage of softly pressing the wool for a while, with a little added warm water and soap.
And then much later the stage of pretty vigorously rubbing rubbing rubbing, and then rubbing some more.
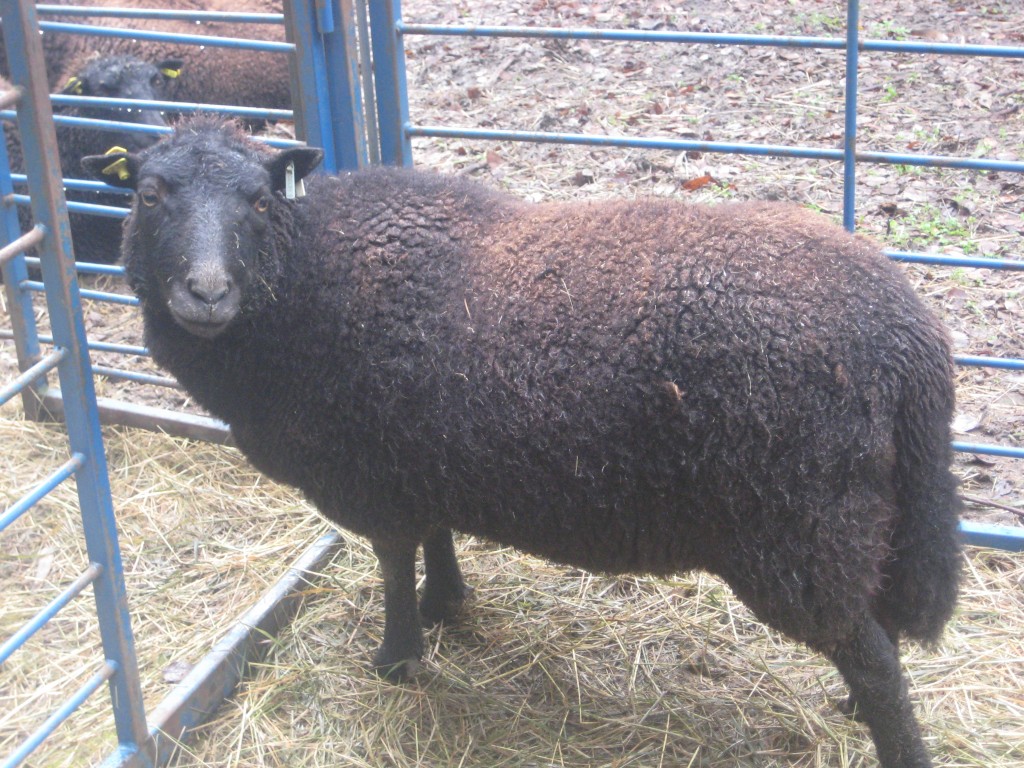
The rain cleared for a while and we got to walk around the farm. And we got to meet the rams our wool came from.
pretty impressive horns.
She was flirting with us.
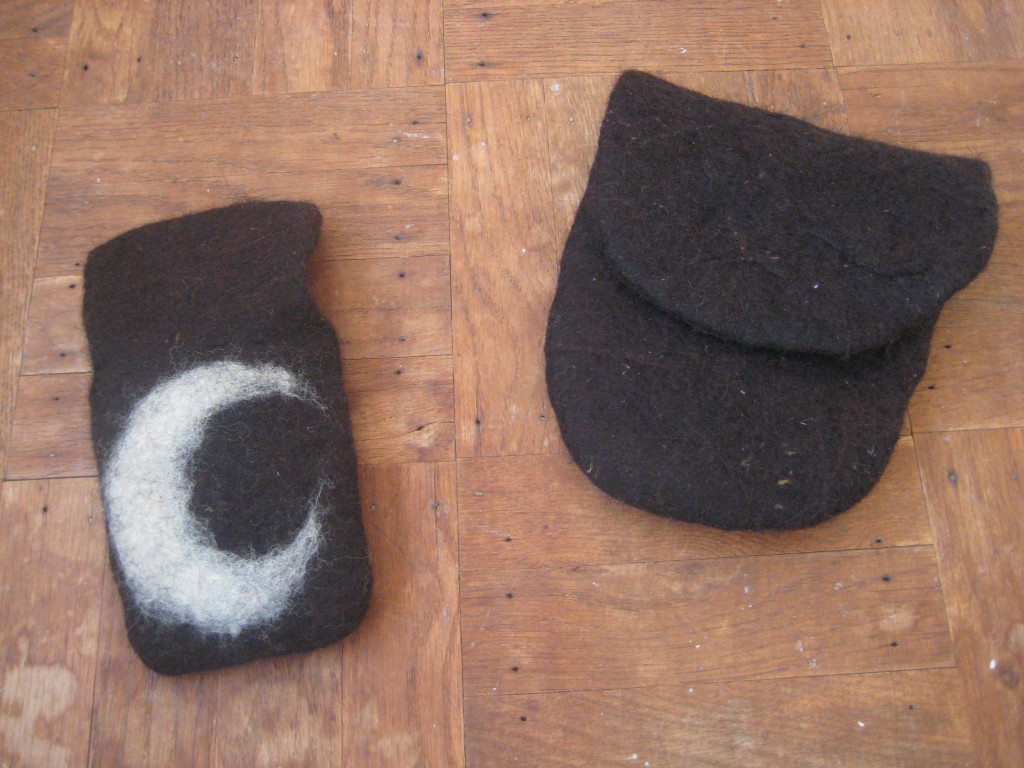
After bringing them home, rinsing well and letting dry, we have little pouches! Sean made a little wallet pouch with a cool decorative moon, and I made a slightly bigger purse that I will add straps to.
The East Bay Parks have an amazing Activities Calendar. They have such a variety of interesting classes, workshops and walks – and at a very reasonable cost. And it is a great way to start to explore some of our many regional open spaces. They are a valuable resource. Check them out if you can:
http://www.ebparks.org/activities
click on the Activity Guide PDF.
Posted in Uncategorized | Leave a Comment »
I am going through a mini-obsession with learning basic hunting and gathering skills.
I recently went fishing for the first time, and did some shooting practice with an old 22, on a visit to my grandparent’s house in Maine. I’ve always been curious about archery, and then I came across this workshop in the calendar of events in the East Bay Parks Guide. Atl Atl and Dart making at Tilden Park. This is a hunting tool used all around the world pre-bow and arrow. The atl atl is basically a stick with a hook on it that you use to throw a spear with greater strength and distance.

They are made in many different ways and out of many different materials. We were given some basic tools and basic instructions and then just started hacking away at some branches. Having the right tool to do the job is the key with wood working.

tools and such

instructions
Clamps are very handy.

So was this awesome axe.

I used a saw to make the lines.

A knife to hack out the wood bits.

I forget what this tool was called, but it was amazing for shaving the wood.

Then this file thing to smooth out the edges.

After attaching a handle it was done.
ta daa!

atl atl
The instructor demonstrated how to attach the feathers to the dart.

adding feathers to the dart
the finished duo.

atl atl and dart
Target practice:


Learning about this appealed to me for a few reasons:
Historical curiosity, connecting with natural elements, learning new skills, and having fun.
I doubt I would actually use this to hunt for food, but it is actually legal in some states to do just that. As with everything else, there are atl atl enthusiasts out there, with even a World Atl Atl Association (WAA).
Posted in Uncategorized | Leave a Comment »
I was going to skip doing a blog post this month but my mom really wanted me to show the extent of our preparedness for our two week cross-country road-trip coming up soon.
All of my other projects have been set aside this month for canning. LOTS of canning.

I am having food allergies and intolerances to a higher degree than normal right now, so my diet is very restricted. I decided in order to be the most comfortable and relaxed on our trip we would just have to bring all of our food. Thus the canning frenzy. I’ve pretty much got it down to a rhythmic flow by now though.
We also have invested in a travel water filter to insure we have access to clean water. The Berkey system is economical and sturdy.

We will have a bit of a heavy load, but we are so excited to see friends and family all along the way across the continent.
And to have our good home-cooked food with us.
Posted in Uncategorized | Leave a Comment »
Fermentation happens. It just does.
And you can make it happen. This is really fun. Sure, you can have mis-steps, and mess-ups, but once you get the hang of it, the magic starts to happen.
Everything, and I mean ev-er-y-thing, has some population of bacterial organisms on it. You, me, fruits and vegetables, the table, the air. They are everywhere. Think of it – food starts to spoil due to bacteria and this can make compost, leaves and twigs decompose into soil due to micro-organisms, and fungi, the major decomposers of the planet, interact with plant roots via bacteria to help feed them. Try to imagine life without these processes. They are absolutely necessary.
Lacto-fermentation is a process of encouraging a particular type of bacteria – lactic-acid producing bacteria – to thrive. The key to doing this is to create an anaerobic (without oxygen) environment under a liquid brine. Salt is used to inhibit bacteria that might cause putrefaction. Salt also helps pull the natural juices out of whatever you are fermenting to add to a nice brine. If not enough juice is expressed to completely cover your fruits or veggies, then simply add water.
Another ingredient you can add is whey, which is the liquid extraction from milk or yogurt. This simply acts as an innoculent to again encourage a beneficial bacterial population, but it is not really necessary. Fermentation can happen beautifully with simply a salty brine.
To make whey, as Sally Fallon recommends in Nourishing Traditions – the bible for making traditionally prepared whole foods, find some really good quality whole milk yogurt. You will also need some tools to strain it. I use a ceramic coffee filter with a cloth insert. You can also use a cloth napkin in a mesh strainer.

Pour the yogurt into your cloth, cover with another cloth and let sit over night.

In the morning you will have a cup of whey and a batch of yogurt cheese, which is just like cream cheese but a little yogurty.

The whey should last a few weeks in the fridge. The cheese a few days.

Lacto-fermented pickles are very different from the pickles you buy at the store, which are simply in a brine of vinegar and spices. You may like the taste of vinegar and it is perfectly fine to eat. However, you will be depriving yourself of a super healing food created by lacto-fermentation that vinegar can’t touch. The lacto-fermented pickle may not taste as strong as a vinegar pickle (or it may!) but it will be tart and tangy and full of lactic acid which is hugely beneficial for our digestion and our digestive tract. When we eat lacto-fermented vegetables we are populating our gut with beneficial bacteria, which helps create a healthy internal environment. Science is showing that most of our immune system and large numbers of neural cells (our brain) is in our gut, so really in order to be healthy we need a healthy gut. It is our first line of defense and affects everything else happening in our body. Pro-biotics are terrific and you can buy many different brands at the store, but I dont think any have the punch of homemade ferments.
So this is the magic of fermentation – this symbiotic relationship with the microbiota to create a truly healing vital food. Especially when combined with cooked foods in a meal, the enzymes in the ferment help to literally digest the foods that have had the enzymes cooked out of them. Fermentation is pre-digestion.
Fermentation goes way way way way back. It was one method of food preservation before refrigeration. Because as long as the veggies remain under the brine, they will stay good for a very long time. And you can eat it throughout the process. As Sandor Elix Katz suggests in his great book Wild Fermentation, you can taste your ferment after a few days and then keep taking from it and enjoying it as it changes over the weeks and/or months. He also just came out with a new book, The Art of Fermentation, which is on my “to get” list.
So you can leave it out, preferably in a cool place like a basement, or you can put it into the fridge after a few days at room temp to slow down the process of fermentation, adding salt water brine if need be to keep the veggies under liquid. An ingenious thing that Sandor suggests to keep the veggies covered is to fill a plastic baggie with salty brine and nest it in the top of the jar. Works beautifully.
So basic ingredients for home-made lacto-fermented pickles, following Sally’s recipe from Nourishing Traditions (except I doubled it):
-about a dozen pickling cucumbers
– 2 Tblspns sea salt
-8 Tblspns whey (optional)
4 Tblspns dill and/or other spices
-filtered water (if needed)
– a 2 quart jar

Slice up the pickles, place into a large bowl, sprinkle with the salt. Juices will start to expell after a few minutes.

Mix in the whey. Press firmly into your jar, adding in the dill throughout. Cover with water.

The next ingredient is time. Cover with the lid and leave on a shelf at room temperature for 3 days. You can then move it to the fridge to slow the process down. After a few weeks in the refrigerator, you should have some lovely pickles.
I recently realized that I was sensitive to many cruciferous vegetables – cabbage, broccoli, cauliflower, etc. So this meant that I could no longer go buy my favorite fermented vegetables at the store, like this and this, because they were all cabbage based. So this meant that if I wanted fermented veggies that I could tolerate I had to make them myself. This was a big motivator for me, as I am in the process of healing a damaged gut. I had not had much success in the past making ferments, but this time things seem to be working beautifully. So persistence is the key.
Some new ferments I am trying are dilly carrots, pickled summer squash, and Saur Ruben – fermented shredded turnips. The options are kind of endless. Fun!

One thing that I have made and will continue making forever is Beet Kvass. This has been my medicine for a long time. This is fermented beet water. 3 medium sized raw beets are peeled and coarsely chopped up. Put into a large jar with a tablespoon of sea salt and 1/4 cup of whey. Cover with water to fill the jar. Let this sit at room temp for a few days. A scum may form on the top. Simply remove this, stir, and strain out the beet pieces. Put in the fridge. It can be used right away. 1/4 cup before meals primes your body for digestion and helps the liver and bile do their jobs. It tastes salty and sour. Potent nourishment.

So here is to having some fun with fermentation.
Posted in Uncategorized | Leave a Comment »
So for the first step in creating and acquiring a mostly handmade wardrobe, I decided to start at the bottom, literally, with panties – made out of recycled knit fabrics from old turtle necks and t-shirts and stuff.

panties!
I found some great tutorials online with different ideas and techniques, like this and this and this, but I mostly just used an old pair of my own undies to use as a pattern. I went out and bought some stretchy elastic lace and some needles for sewing knit fabric.

in progress…


Using my electric Singer sewing machine I followed the instructions in the manual for sewing stretchy knit fabrics, but this was not an easy task. The only time I could make the zig-zag stitch come out the way it is supposed to was when I was sewing on the elastic lace, but just on the knit fabric was a mess. Lots of missed stitches and inconsistencies. I didn’t realize it would be so hard. I guess this is why people get sergers. So this has motivated me to get my serger up and running. I just need to find a treadle table.

zig zag stitch
Part of my motivation for wanting a handmade wardrobe is the desire to not give my support to the large corporate industrial paradigm. For many reasons going to Target to get some new underwear is an assumption I am beginning to question and want to find alternatives to. I have come to see that the corporate industrial model is destructive and that to move away from this model is to move toward health and wholeness and connection with what really matters. Another part of my motivation is wanting to reuse things as much as possible, and to avoid having disposable things as much as possible.
So I haven’t just stopped with panties, no, no.
I have also begun to make my own menstrual pads. This is not a new idea. There are actually a few companies out there already producing lovely cloth pads. Glad Rags, Luna Pads, Sckoon, New Moon pads, and Comfy Cloth pads. Etsy also has quite a bunch of lovely items.
This is a pic of my own personal collection of these pads I have bought.

menstrual pads
And this is my messy first attempt to make my own:

Again, using zig zag on the Singer vs. a serger for the edges was a mess. But these will be functional, if not lovely. Made out of one of Sean’s old flannels, a corduroy shirt and an old flannel sheet.
Why do this? Many good reasons: comfy, creative, washable (re-useable), personal, produces less waste, saves money.
“If you menstruate for 33 years (age 12-45) and you use about 20-25 pads per cycle, you will throw away 8,000-10,000 pads! That’s a lot of trash – and a lot of money and resources in the landfills. ” – Comfy Cloth pads website.
It comes down to recognizing that every decision we make, no matter how small, has ripple effects. I am learning how to become more and more aware of the ripples. I like this process.
Posted in Uncategorized | Leave a Comment »
“Good broth will resurrect the dead.” – a South American proverb.
Well made stock is a potent source of easily assimilable nutrients and minerals. Back when most animals were slaughtered locally and nothing went to waste – bones, hooves, knuckles, heads and tough meat – all went into the stock pot and cooked long and slow on the stove-top.
Gelatin is a major nutrient imparted to the broth that aids in digestion and gut healing. Though gelatin is not a complete protein in itself, it acts as a “protein sparer”, allowing the body to more fully utilize the complete proteins that are taken in.
for more detailed info, check out this post by Sally Fallon:
http://www.westonaprice.org/food-features/broth-is-beautiful
or this great blog post:
http://nourishedkitchen.com/bone-broths-adrenals-bones-teeth/
We pretty much always have a pot of stock cooking away to use for soups and stews, sauces and seasoning. It adds richness, nutrients and flavor to anything you add it to, and of course is nourishing as a simple warming beverage.

The first step in creating good quality broth is finding good quality meat. This can take some leg-work depending on where you are, but some good places to start are your local farmer’s market or on the web: eatwild.com & localharvest.org
Since toxins in the animal will be condensed in the stock just as the nutrients are you want to be sure to avoid factory farmed animals who have been fed unnatural diets, lived stressful torturous lives, and given drugs and anti-biotics to prevent them from getting too sick. Look for animals raised on pasture or grass-fed by small family farms. Hopefully this will become easier and cheaper as demand increases.
The second step for good broth is getting good quality water. Most places tap water is just as good or better than bottled water, but is really not adequate, so filtering is almost always necessary.
A good, reliable and affordable system is the Berkey gravity fed filter: http://www.berkeyfilters.com/
A more expensive and extensive purifier is the 14-stage radiant life system: http://www.radiantlifecatalog.com/product/474/water-filtration-systems
As you are filling your pot with animal parts and water, you will add a healthy amount of good quality salt (celtic sea salt, Redmond’s Real Salt) for more minerals and flavor. Also, apple cider vinegar (1/4 – 1/2 cup) will acidify the water helping to draw out certain minerals, particularly calcium, from the bones.
Most recipes call for browning the meats to bring out flavors and adding veggies for more minerals, but i don’t usually do either. I just make a rich meaty bone broth straight from the fridge or freezer (or occasionally from a cooked roast). Start with cold water (enough just to cover the contents) and bring to a boil. As the water heats it slowly extracts flavors.
A scum will rise to the surface right before boiling. This effluvium – impurities, alkaloids, lectins – should be skimmed off, with a mesh strainer or a spoon. Scim the scum.

Once it begins to boil, reduce heat to it’s lowest point so it barely simmers. Cover with a lid and leave for 24 – 72 hours or so. (fish may only need a few hours)

The broth should be strained. Sometimes there are meats that can be picked out and used as snacks or for salads, etc.
Then the broth should be chilled. A layer of fat will form on the top. Some fat is great, but most of what congeals should be removed. It can be saved and rendered and used as cooking fat, or even for making soap!

When the broth is cool it should firm up nicely because of the nutritious gelatin (like a meat jello). No worries if it doesn’t – maybe add a little less water next time. It seems to vary.


We have been putting our broth in bio-degradable corn “plastic” containers to put in the freezer, but we just got a pressure canner and have begun canning our broths and stews and many other things. This way we don’t need the refrigerator to preserve things. Very satisfying.

pressure canner

chicken soup
This is a necklace I made out of a perfectly cut (with bead-hole even) beef bone straight out of the stock pot (washed of course). Lovely shape and color.


Posted in Uncategorized | Leave a Comment »